One line at a time
Step by step drawing
What step by step means here: one or two new lines per picture, shown in red, so a child never has to guess what comes next.
A lot of “step by step” tutorials jump from an oval to a finished lion in four pictures. Ours do not. Each lesson is split into ten to thirteen small steps; every step picture shows everything drawn so far in black and just the new lines in red. The first steps are light guide shapes, the middle steps add the real outline, and the last steps are details, then you rub out the guides.
Pick a length below: short lessons for the youngest, medium for most kids, longer for the ones who want a project.
How to follow a step-by-step drawing
Look at the whole step first
Notice where the red lines sit compared to the black ones: touching the head, halfway down, under the chin. Position matters more than neatness.
Draw light
Guide shapes are dashed and light in the picture; draw them that way too, so they rub out later.
Tick the step
Each step card ticks as you scroll past it (or tap the number). It is a small thing, but it keeps a child moving.
Go bold at the end
When all the steps are done, go over the real lines with a marker, rub out the guides and colour it in.
Short: 10 steps or fewer
Easy drawings for kids
How to Draw a Fox Face
9 steps

How to Draw a Frog Face
7 steps

How to Draw an Apple
10 steps

How to Draw the Sun
10 steps

How to Draw a Snail
10 steps

How to Draw a Llama
9 steps

How to Draw a Trumpet
9 steps

How to Draw a Pinecone
9 steps

How to Draw a Soccer Ball
10 steps

How to Draw a Kite
10 steps
Medium: 11 to 12 steps

How to Draw a Cat
12 steps

How to Draw a Fox
12 steps

How to Draw a Penguin
12 steps

How to Draw an Owl
12 steps

How to Draw a Butterfly
12 steps
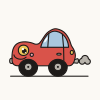
How to Draw a Car
11 steps

How to Draw a Rocket Launch
13 steps

How to Draw a Cupcake
12 steps

How to Draw Ice Cream
12 steps

How to Draw a Castle
13 steps

How to Draw a Rainbow Unicorn
13 steps

How to Draw a Robot
11 steps
Longer: 13 steps and up

How to Draw a Dog
13 steps

How to Draw a Kitten
13 steps

How to Draw a Puppy
13 steps

How to Draw a Dragon
15 steps

How to Draw a T-Rex
11 steps

How to Draw a Horse
12 steps

How to Draw an Airplane
13 steps

How to Draw a Fire Truck
13 steps

How to Draw an Astronaut
13 steps

How to Draw a Tiger
15 steps
Questions parents and teachers ask
How many steps should a kids’ drawing have?
Enough that each step is one clear move. Eight to ten for little ones, ten to thirteen for most children, up to sixteen for older kids who want detail.
Why are the first steps dashed?
They are guide shapes, the egg for a head, a line for the spine, that set the proportions. They get rubbed out at the end, which is why you draw them lightly.