Watch it draw itself · tap to replay
How to Draw a Zombie Face
Draw a zombie face in 13 easy steps, about 10 minutes. Free, with a printable worksheet.
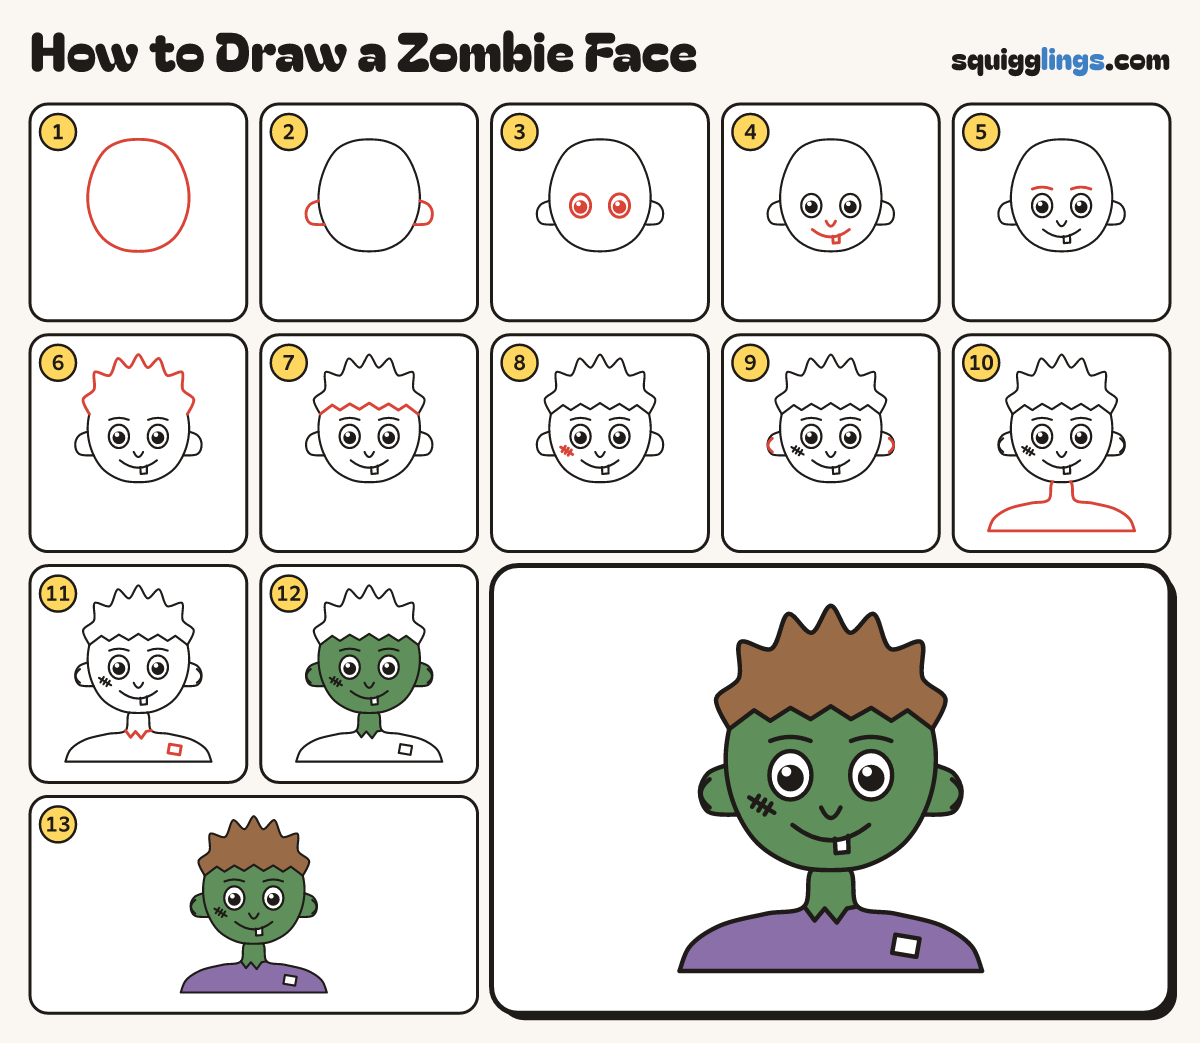
Each picture adds one red line. Draw that line, then scroll to the next picture. Rub out any dashed helper lines at the end. First up: big egg head.
Step 1: Big egg head
Near the top, draw a big egg head, round at the chin.
Tip Nearly two thirds of the page tall.
Step 2: Two ears
On each side of the head, draw a C ear. Start on the head line and stop back on it.
Step 3: Two big eyes
Below the middle of the head, draw 2 big oval eyes, one eye apart. Add black dots with shines.
Step 4: Smile and tooth
Draw a tiny U nose. Under it, draw a wide U smile. Hang one square tooth from the smile.
Step 5: Eyebrows
Above each eye, draw a short eyebrow like a little rainbow.
Step 6: Messy hair
Start by the left ear. Draw big messy tufts and points over the head, stopping by the right ear.
Step 7: Jagged fringe
Start where the hair meets the left side of the head. Zigzag across above the eyebrows to the right side.
Step 8: Stitches
On the left cheek, draw a short slanted line with 3 tiny lines crossing it.
Step 9: Inside the ears
Inside each ear, draw a smaller C that follows the outside curve.
Step 10: Neck and shirt
Under the chin, draw 2 short neck lines. From each one, draw a shoulder sloping out to the edge.
Step 11: Torn collar and patch
Between the neck lines, draw a zigzag collar of 3 points. Add a small square patch on the right.
Step 12: Green skin
Colour the face, ears and neck green, leaving the eyes and tooth white.
Step 13: Brown hair, purple shirt
Colour the hair brown and the shirt purple, leaving the patch white. Go over your lines.
Your finished drawing
Follow the steps above and this is where you end up: a zombie face, drawn by you.
Every step in one picture