Watch it draw itself · tap to replay
How to Draw a Yuzu
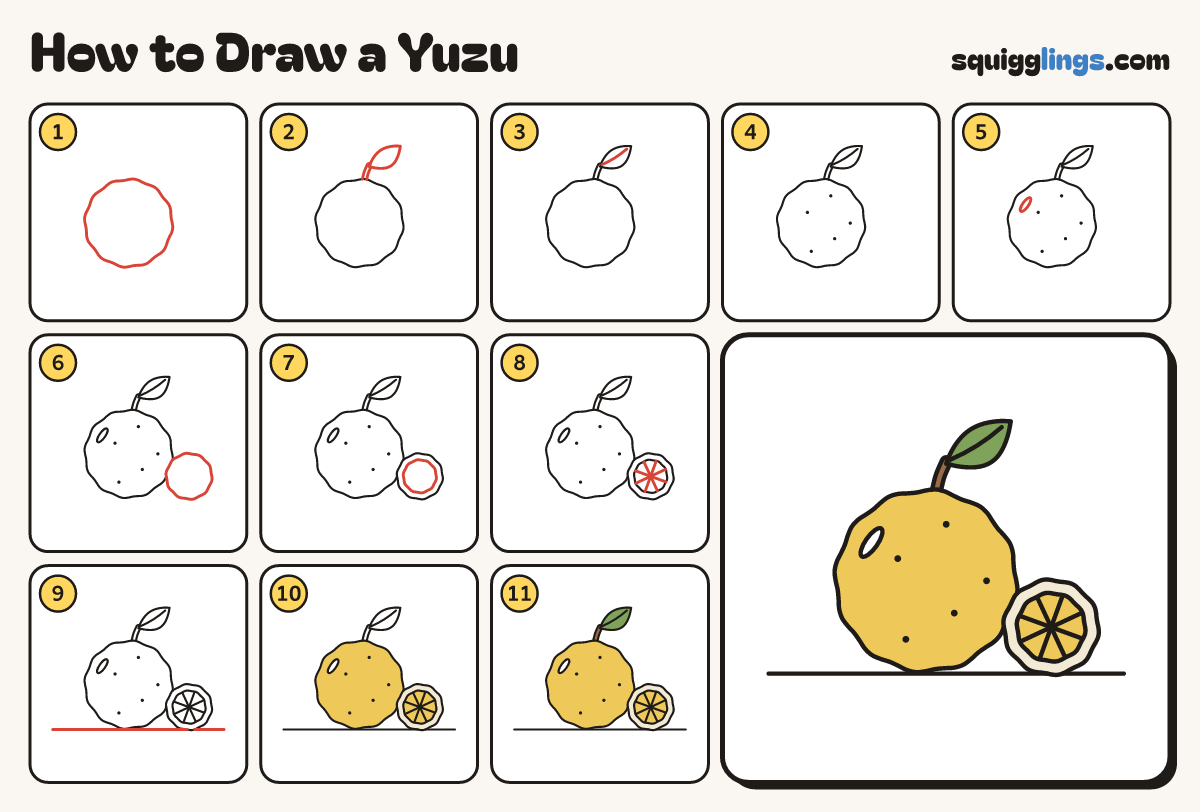
Draw a yuzu in 11 easy steps, about 8 minutes. Free, with a printable worksheet.
Each picture adds one red line. Draw that line, then scroll to the next picture. Rub out any dashed helper lines at the end. First up: the yuzu.
Step 1: The yuzu
In the middle draw a big round as big as your fist, with a small bumpy knobbly edge all round.
Tip The knobbly edge is what makes it a yuzu: no smooth circle here.
Step 2: Stem and leaf
From the top of the yuzu draw a short stem leaning right, with a fat pointed leaf on its tip.
Step 3: Leaf vein
Start on the stem end of the leaf. Draw one bowed line up the middle, stopping short of its tip.
Step 4: Dimples
Dot 5 tiny dots on the yuzu for its bumpy skin, spread out, none touching the edge.
Step 5: A shine
Inside the upper left of the yuzu draw a thin oval sliver for a shine, following the edge's curve.
Step 6: A half yuzu
Low on the right, in front of the yuzu, draw a smaller bumpy round: a half, cut side facing you.
Tip Rub out the bit of the yuzu's edge that is inside the half.
Step 7: Thick rind
Inside the half draw a second bumpy round about a finger inside the first, for the thick rind.
Step 8: Segments
From the middle of the half draw 8 short lines out to the inner round, like wheel spokes.
Step 9: The ground
Draw a long ground line from side to side under the yuzu and the half, just touching their bottoms.
Step 10: Yellow yuzu
Go over your lines. Colour the yuzu and the half's middle yellow, the rind cream, leaving the shine white.
Step 11: Green leaf, brown stem
Colour the leaf green and the stem brown.
Your finished drawing
Follow the steps above and this is where you end up: a yuzu, drawn by you.
Every step in one picture