Watch it draw itself · tap to replay
How to Draw a Wizard
Draw a wizard in 13 easy steps, about 10 minutes. Free, with a printable worksheet.
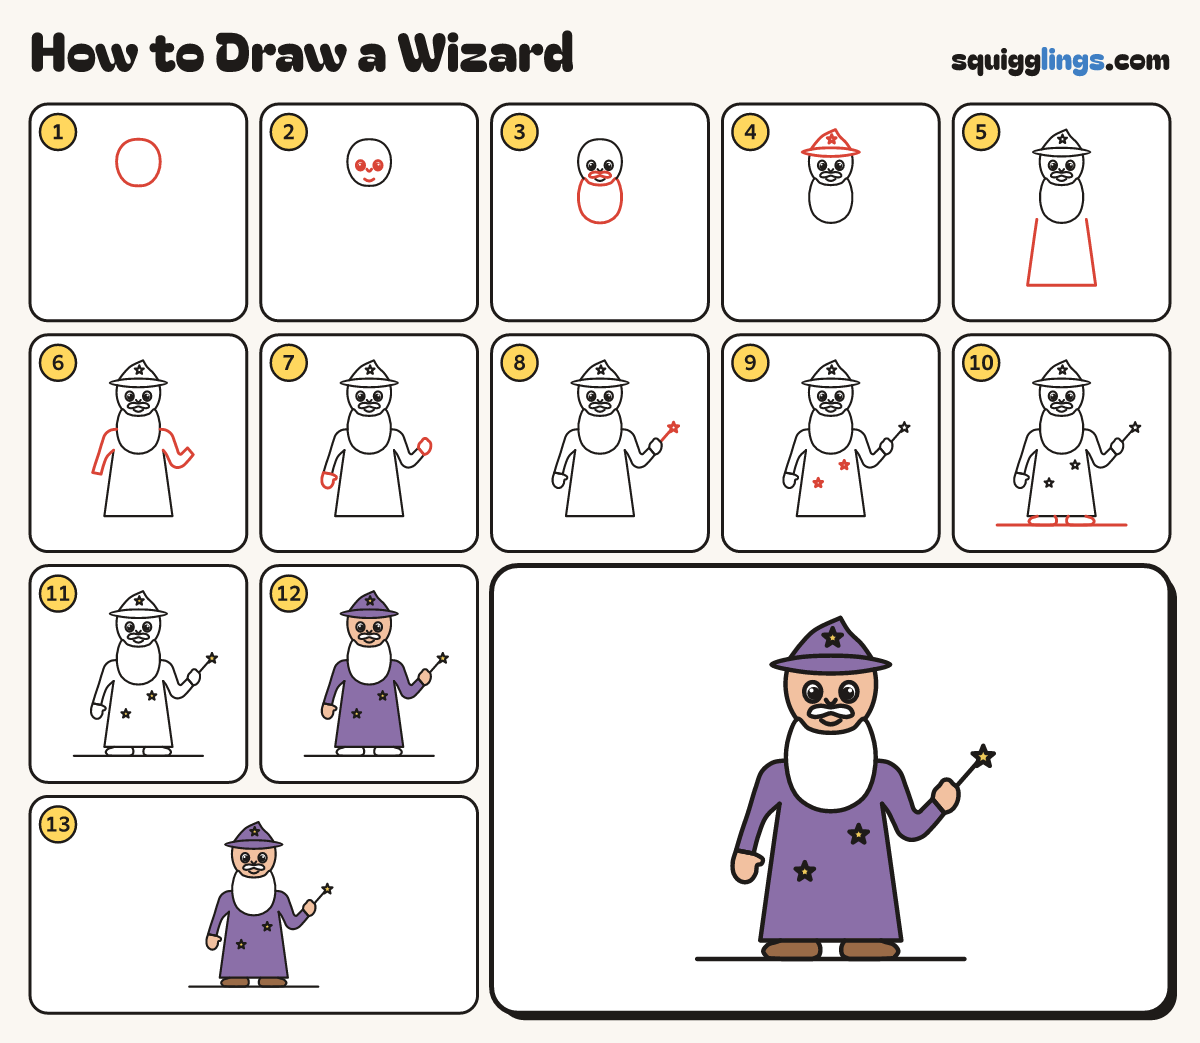
Each picture adds one red line. Draw that line, then scroll to the next picture. Rub out any dashed helper lines at the end. First up: egg head.
Step 1: Egg head
Near the top, in the middle, draw an egg for the head, narrower at the chin.
Tip Leave room above for a tall hat and lots below for the robe.
Step 2: The face
Below the middle, draw 2 oval eyes with dots. Add a tiny U nose and a smile.
Step 3: Long beard
Under the nose, draw a curly moustache. Add a big U beard, cheek to cheek, down to the chest.
Step 4: Pointed hat
Draw a brim across the head, then a tall cone from one end, stopping at the other. Add a star.
Step 5: Long robe
Start beside the bottom of the beard. Draw a long robe to a flat hem, stopping on the other side.
Step 6: Long sleeves
From the beard, draw sleeves over the shoulders to the wrists and back to the robe. Bend the right elbow.
Step 7: Mitten hands
On the left sleeve, draw a mitten with a thumb. On the right, draw a round fist.
Step 8: Magic wand
From the right fist, draw a straight stick up and out. Stop at a little star on the tip.
Step 9: Stars on the robe
Draw 2 little stars on the robe, one low on the left and one high on the right.
Step 10: Shoes and ground
Under the hem, draw 2 shoes peeking out, toes pointing out. Draw a long ground line under the shoes.
Step 11: Yellow stars
Colour the stars yellow. Leave the eyes, beard and moustache white.
Step 12: Peach skin, purple robe
Colour the face and hands peach. Colour the hat and robe purple around the stars.
Step 13: Brown shoes
Colour the shoes brown. Your wizard is done!
Your finished drawing
Follow the steps above and this is where you end up: a wizard, drawn by you.
Every step in one picture