Watch it draw itself · tap to replay
How to Draw an Ear
Draw an ear in 9 easy steps, about 7 minutes. Free, with a printable worksheet.
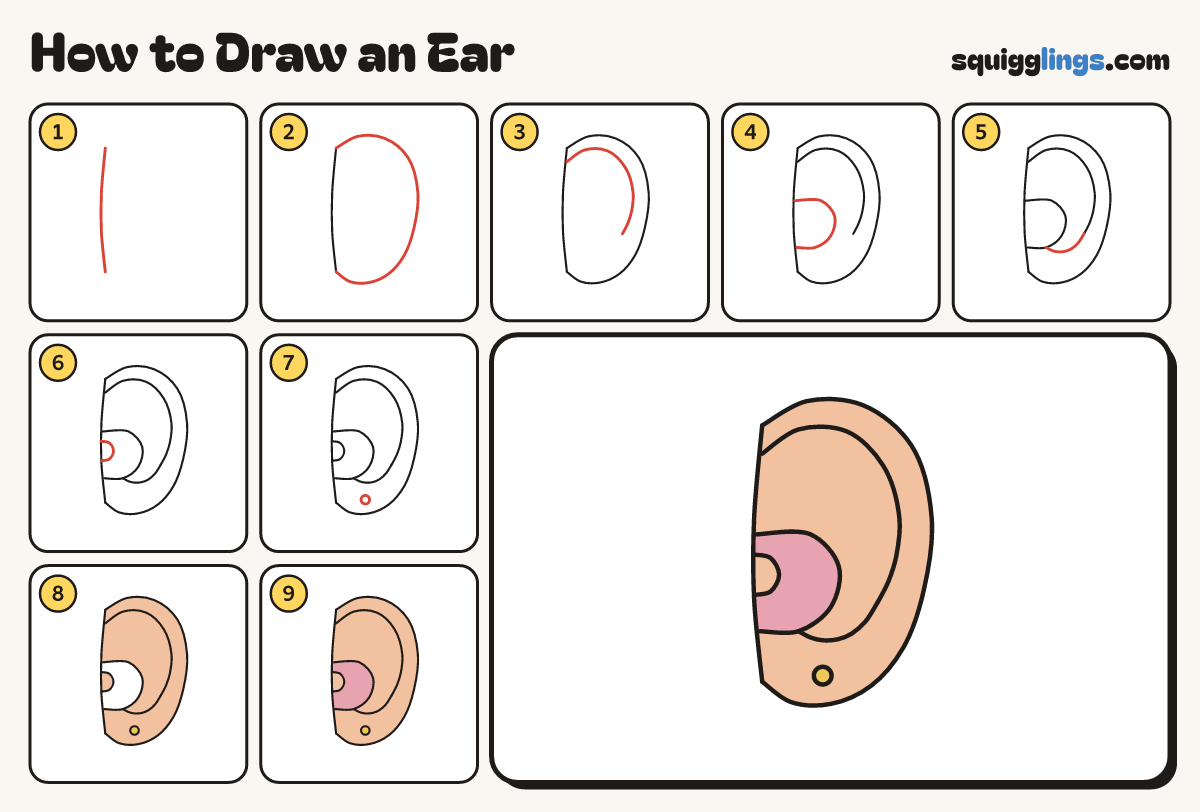
Each picture adds one red line. Draw that line, then scroll to the next picture. Rub out any dashed helper lines at the end. First up: side of the head.
Step 1: Side of the head
Left of the middle, start near the top and draw a long head line down, stopping near the bottom.
Tip The ear sticks out to the right of this line.
Step 2: The big C
Start high on the head line. Draw a huge backwards C out right, back to the head line low down.
Step 3: The rim
Start on the head line a little lower. Draw a smaller C inside the big one, stopping two thirds down.
Step 4: The bowl
Start on the head line halfway down. Draw a D bulging out right, back to the head line lower down.
Step 5: The lobe
Start where the rim stops. Curve down and in, and join the bottom of the bowl for the lobe.
Step 6: The little flap
Start on the head line inside the bowl. Draw a small round bump and come back to the head line.
Step 7: An earring
In the middle of the earlobe, draw a tiny circle for an earring.
Step 8: Peach ear
Colour the earring yellow. Colour the ear and the little flap peach, but not the bowl.
Step 9: Pink bowl
Colour the bowl pink around the little flap. Done!
Your finished drawing
Follow the steps above and this is where you end up: an ear, drawn by you.
Every step in one picture