Watch it draw itself · tap to replay
How to Draw Wind Chimes
Draw wind chimes in 12 easy steps, about 9 minutes. Free, with a printable worksheet.
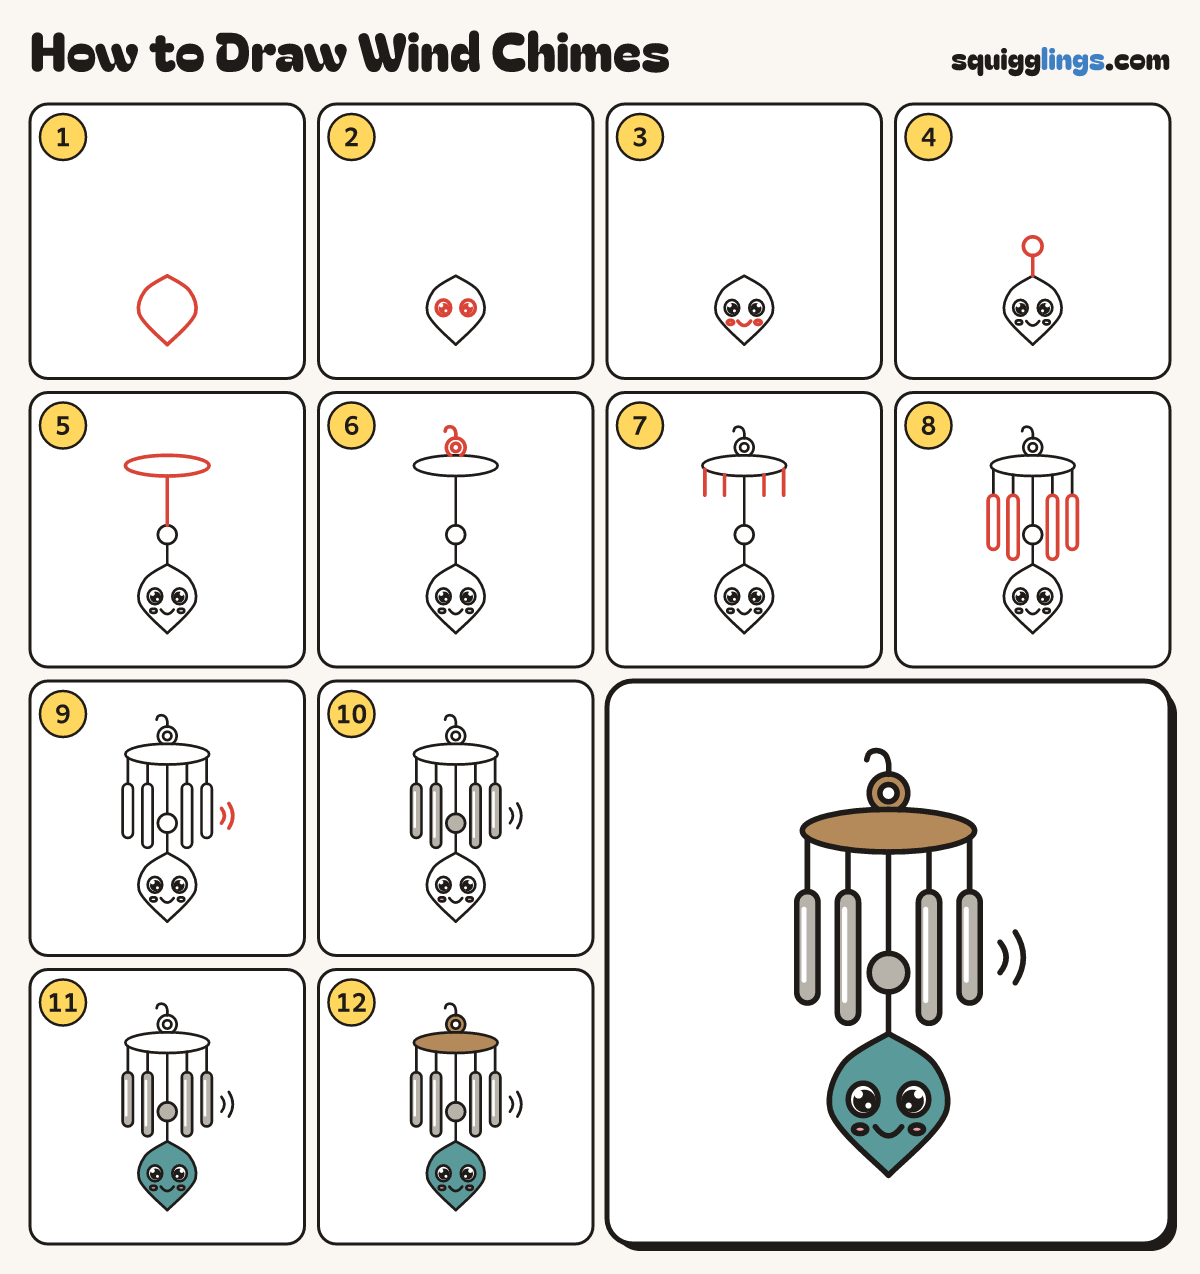
Each picture adds one red line. Draw that line, then scroll to the next picture. Rub out any dashed helper lines at the end. First up: the wind catcher.
Step 1: The wind catcher
Low on your paper draw a big leaf shape pointing down, about as big as your palm.
Tip The wind catcher is the biggest piece of the chimes.
Step 2: A happy face
On the wind catcher draw 2 big round eyes, with a black dot and a shine in each.
Step 3: Smile and cheeks
Under the eyes draw a small U smile, and a tiny oval cheek beside each end.
Step 4: The clapper
From the top of the wind catcher draw a short string straight up, with a round coin on the end.
Step 5: The top disc
From the coin draw a longer string straight up. At its top draw a wide flat oval, a hand wide.
Step 6: Ring and hook
On top of the disc draw a small ring with a hole, and a little hook curling over its top.
Step 7: 4 strings
Start under the disc and draw 4 short strings down, 2 each side of the middle, stopping in the air.
Step 8: 4 tubes
On each string's end draw a tall thin tube with round ends, like a straw. The inner 2 are longer.
Tip The tubes must not touch the clapper.
Step 9: Sound lines
Beside the right tube draw 2 little curved sound lines, the outer one taller.
Step 10: Pink cheeks, grey tubes
Colour the cheeks pink, and the tubes and clapper grey, leaving a thin white shine down each tube.
Step 11: Teal catcher
Colour the wind catcher teal, around the pink cheeks, leaving the eyes white.
Step 12: Wooden disc and ring
Colour the disc and the ring wood brown. Go over your lines, and your wind chimes are ready to ring!
Your finished drawing
Follow the steps above and this is where you end up: wind chimes, drawn by you.
Every step in one picture