Watch it draw itself · tap to replay
How to Draw a Wilted Plant
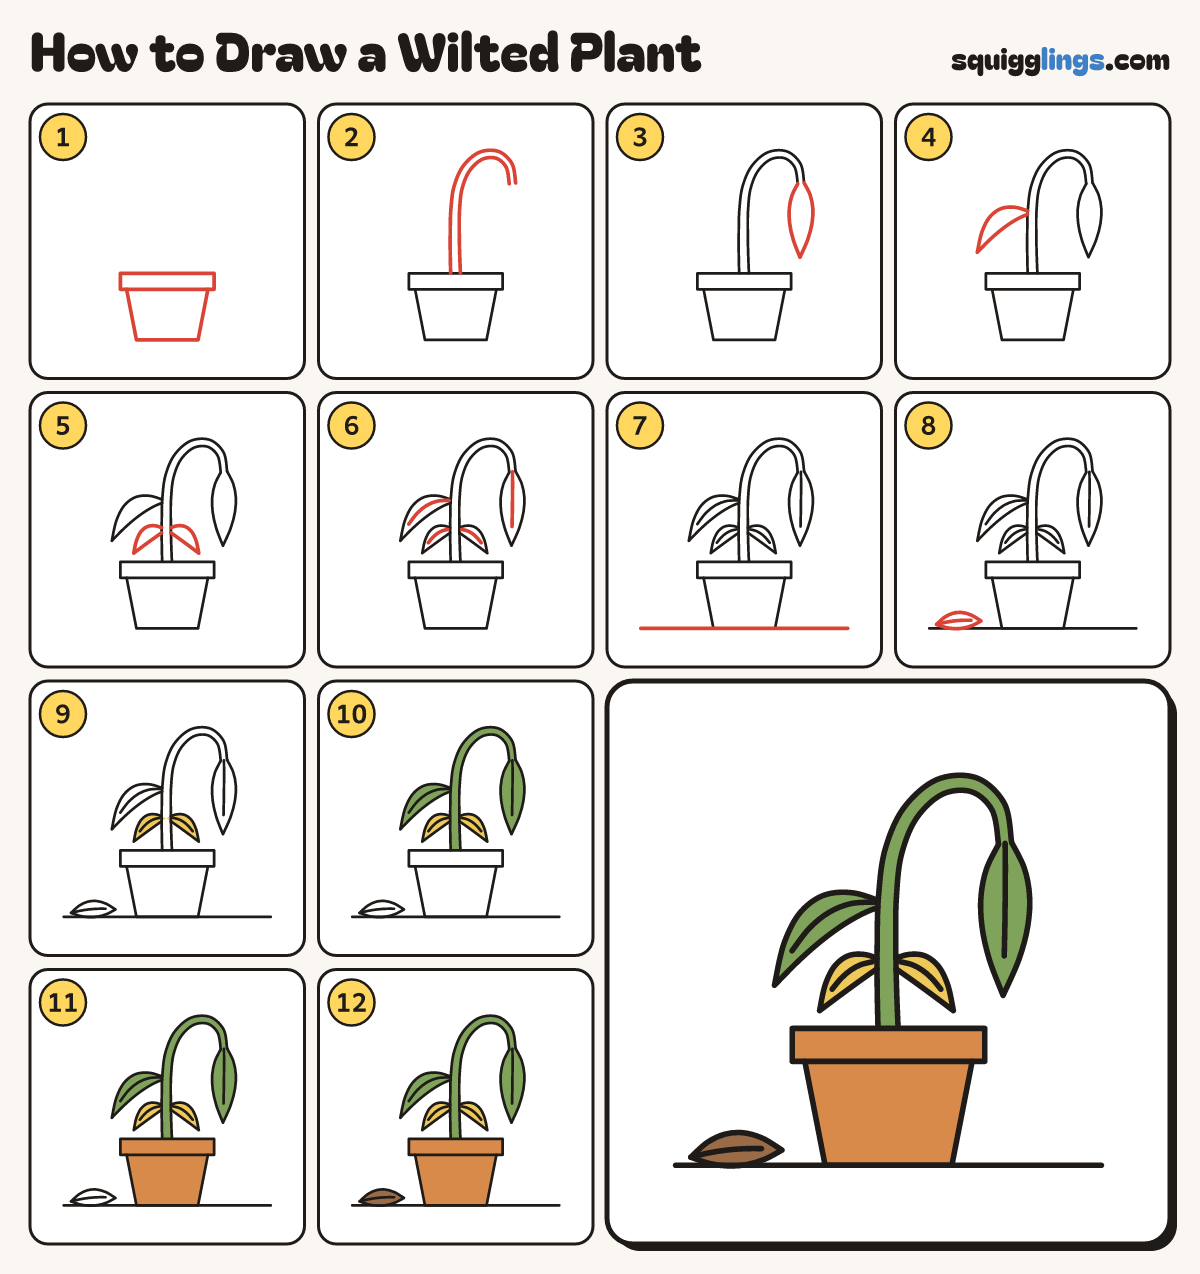
Draw a wilted plant in 12 easy steps, about 9 minutes. Free, with a printable worksheet.
Each picture adds one red line. Draw that line, then scroll to the next picture. Rub out any dashed helper lines at the end. First up: the pot.
Step 1: The pot
Draw a flat box rim. Start under it on the left, draw the pot down, and stop under the right.
Tip Draw the pot low down. The plant needs lots of room above it.
Step 2: Bent stem
Start on the rim. Draw a stem up, 2 lines wide, bend it over right and stop pointing down.
Tip A thirsty plant cannot hold itself up, so the stem bends over like a walking stick.
Step 3: Hanging leaf
Start at the end of the stem. Draw a long pointed leaf hanging down, and stop back on the stem.
Step 4: Droopy leaf
Halfway up the stem draw a long leaf out to the left that curls down at the tip.
Tip Every tip points down. That is what makes the plant look wilted.
Step 5: Two low leaves
Lower down the stem draw a small leaf drooping out on each side.
Tip Make these 2 leaves match, like a sad moustache.
Step 6: Leaf veins
Start at the stem. Draw a line along the middle of each leaf, and stop before the tip.
Step 7: The table
Draw a long straight line along the bottom of the pot, from far left to far right.
Step 8: Fallen leaf
On the table, left of the pot, draw one leaf that has dropped off. Add its middle line.
Step 9: Yellow leaves
Go over your lines. Colour the 2 low leaves yellow.
Tip The lowest leaves on a thirsty plant turn yellow first.
Step 10: Green stem and leaves
Colour the stem, the hanging leaf and the long droopy leaf green.
Step 11: Ginger pot
Colour the rim and the pot ginger brown.
Step 12: Brown leaf
Colour the fallen leaf brown. Your wilted plant is done. It needs a drink!
Your finished drawing
Follow the steps above and this is where you end up: a wilted plant, drawn by you.
Every step in one picture