Watch it draw itself · tap to replay
How to Draw Jungle Vines
Draw jungle vines in 13 easy steps, about 10 minutes. Free, with a printable worksheet.
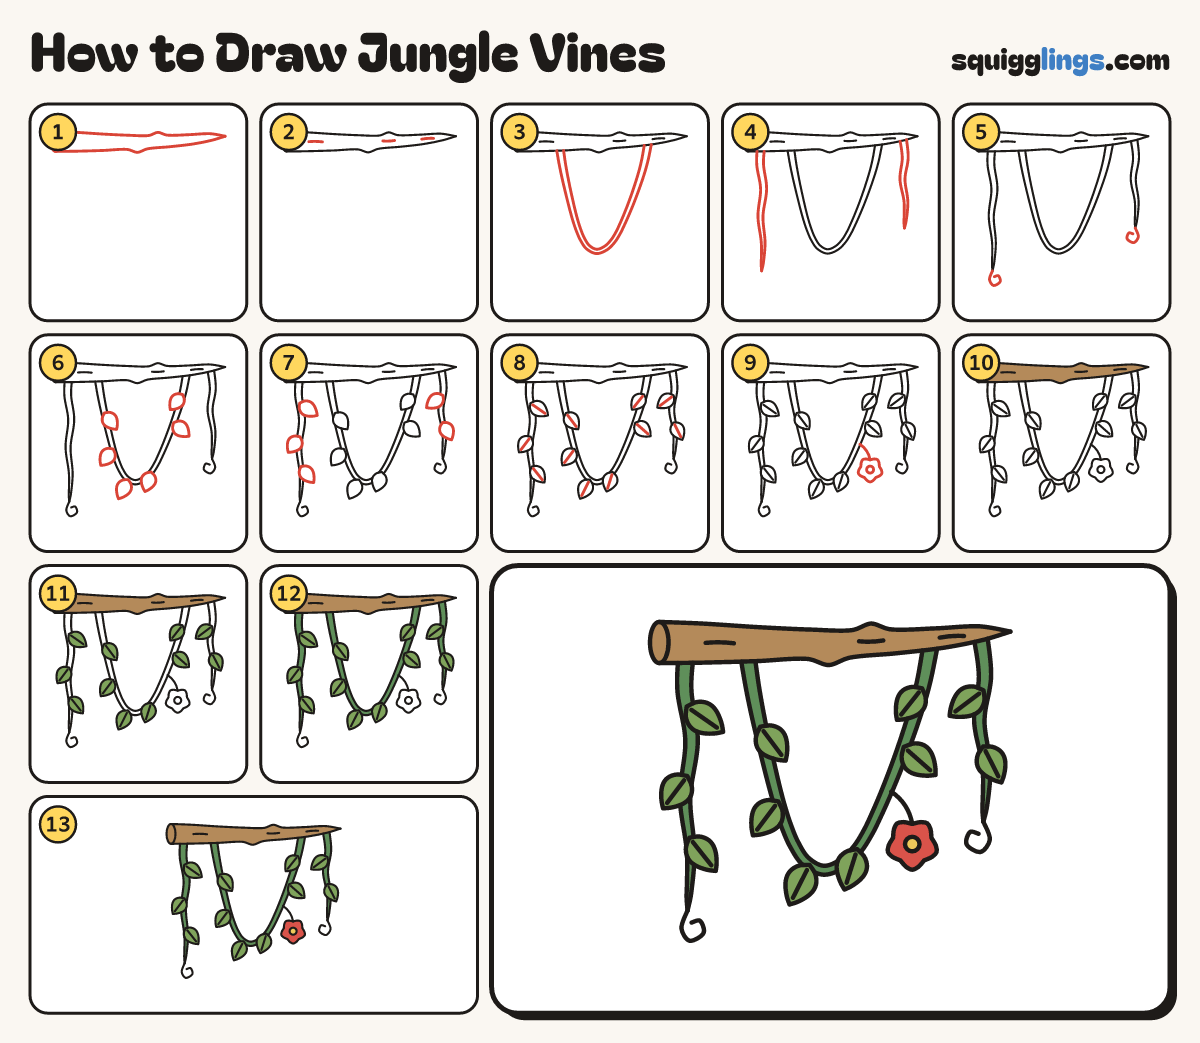
Each picture adds one red line. Draw that line, then scroll to the next picture. Rub out any dashed helper lines at the end. First up: the branch.
Step 1: The branch
Draw an oval on the left. From it draw a bumpy branch, ending in a thin point on the right.
Step 2: Bark lines
Draw 3 short dashes along the branch for bark.
Step 3: The U vine
Start under the branch on the left. Draw a droopy U, back up to the branch on the right.
Step 4: 2 hanging vines
Start under each end of the branch. Draw a vine thinning down to a point, long left, short right.
Step 5: Curly ends
At the point of each hanging vine draw a little curl, like a snail shell.
Step 6: Leaves on the U
Along the U vine draw 6 big leaves hanging down, wide in the middle and pointy at the end.
Step 7: More leaves
Draw 3 big leaves on the long vine and 2 on the short one, above the curls.
Step 8: Leaf veins
Draw one straight vein line down the middle of every leaf.
Step 9: A dangling flower
Start on the right side of the U. Draw a short stem down to a flower with 5 round petals.
Step 10: Wood branch
Go over your lines, then colour the branch wood brown.
Step 11: Light green leaves
Colour every leaf light green.
Step 12: Dark green vines
Colour the 3 vines dark green, around the leaves.
Step 13: Red flower
Colour the middle of the flower yellow, then the petals red, and your jungle vines are done!
Your finished drawing
Follow the steps above and this is where you end up: jungle vines, drawn by you.
Every step in one picture