Watch it draw itself · tap to replay
How to Draw a Hazelnut
Draw a hazelnut in 10 easy steps, about 8 minutes. Free, with a printable worksheet.
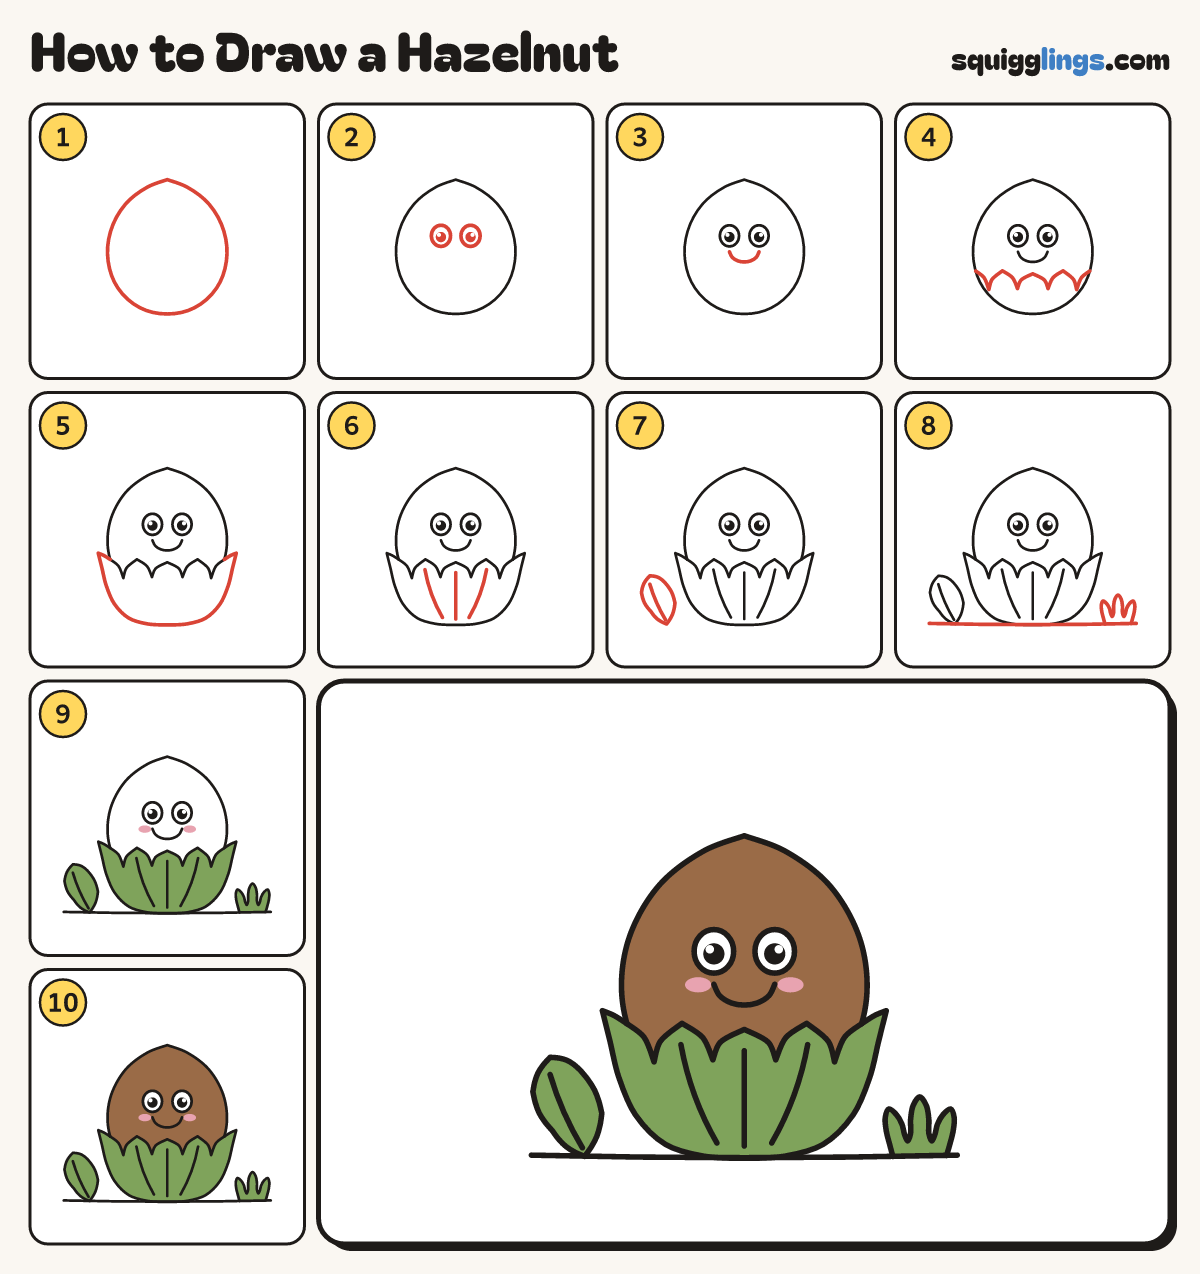
Each picture adds one red line. Draw that line, then scroll to the next picture. Rub out any dashed helper lines at the end. First up: the nut.
Step 1: The nut
Draw a big round nut in the middle, as big as your fist, with a tiny point on top.
Step 2: 2 big eyes
Above the middle draw 2 big eggy eyes, one eye apart. Colour a black dot in each, leaving a shine.
Step 3: Big smile
Leave a gap under the eyes, then draw a wide U smile from under one eye across to the other.
Step 4: Leafy frill
Start on the nut's left side, below the smile. Draw 3 pointy leaf tips across, stopping on its right side.
Step 5: Husk cup
From the frill's left end, draw a leaf point out, a bowl under the nut, a point, then back in.
Step 6: Husk veins
From low in the cup, draw 3 veins up towards the 3 middle leaf tips, stopping just below each tip.
Step 7: Hazel leaf
On the left draw a round leaf with a bumpy edge, on the ground. Add a vein up the middle.
Step 8: Ground and grass
Draw a ground line nearly edge to edge. Right of the husk, add a 3-blade grass tuft on the line.
Step 9: Green husk, pink cheeks
Colour the husk, the leaf and the grass tuft green. Give the nut 2 rosy pink cheeks.
Step 10: Brown nut
Colour the nut brown above the husk, around the eyes and cheeks. Leave the eyes white. Your hazelnut is done!
Your finished drawing
Follow the steps above and this is where you end up: a hazelnut, drawn by you.
Every step in one picture