Watch it draw itself · tap to replay
How to Draw a Wheat Field
Draw a wheat field in 12 easy steps, about 9 minutes. Free, with a printable worksheet.
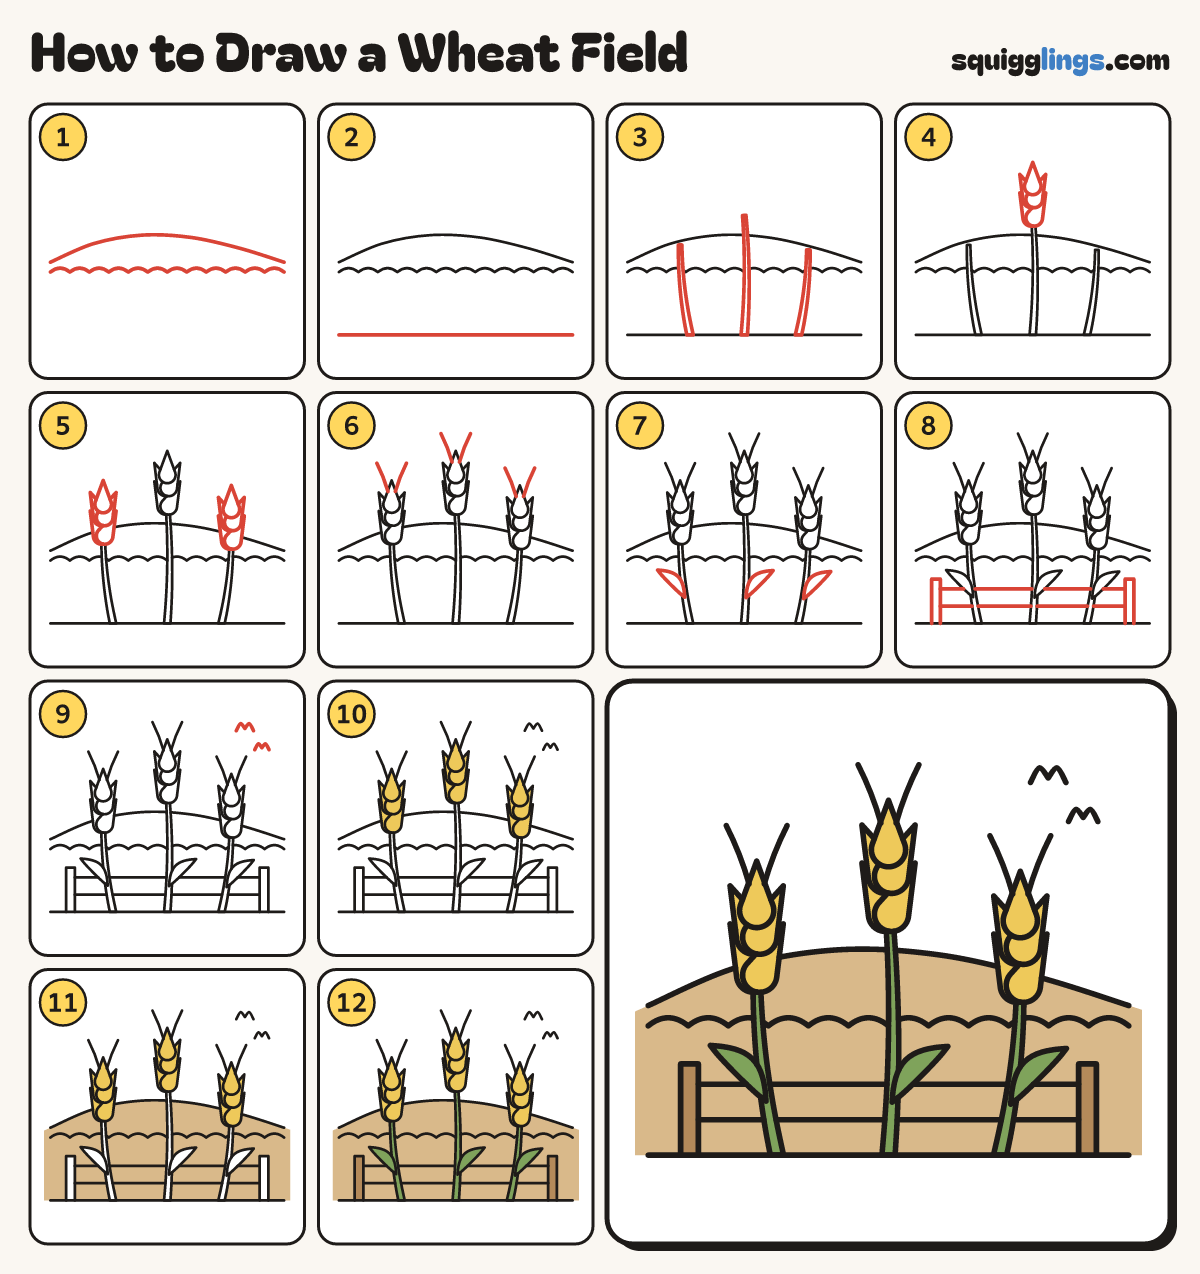
Each picture adds one red line. Draw that line, then scroll to the next picture. Rub out any dashed helper lines at the end. First up: the far hill.
Step 1: The far hill
Start at the left edge. Draw a long low hill across to the right edge. Add bumps under it.
Tip The little bumps are the far-away wheat.
Step 2: The ground
Start at the left edge and draw a straight ground line across to the right edge, near the bottom.
Step 3: Three stalks
From the ground draw 3 tall stems that bend a little and get thinner at the top, the middle tallest.
Step 4: The middle head
On the middle stem draw a head of grain: a teardrop on the tip, 2 pairs of teardrop kernels below.
Step 5: Two more heads
Do the same on the left and right stems: a teardrop on top and 2 pairs of kernels under it.
Step 6: Whiskers
From the top of each head draw 2 long whiskers fanning up and out.
Step 7: Blade leaves
On each stem draw one long thin blade leaf sweeping out and up to a point.
Step 8: The fence
Draw a post each side. From the left post draw 2 rails across to the right post.
Step 9: Birds
High in the sky on the right draw two little flying birds, each a soft letter M.
Step 10: Golden heads
Colour all 3 heads yellow, every kernel.
Step 11: Tan field
Colour the field between the hill line and the ground tan, going around the heads, stalks, leaves and posts.
Step 12: Green stalks, brown posts
Colour the stems and leaves green and the 2 fence posts wood brown, then go over your lines.
Your finished drawing
Follow the steps above and this is where you end up: a wheat field, drawn by you.
Every step in one picture