Watch it draw itself · tap to replay
How to Draw a Weevil
Draw a weevil in 12 easy steps, about 9 minutes. Free, with a printable worksheet.
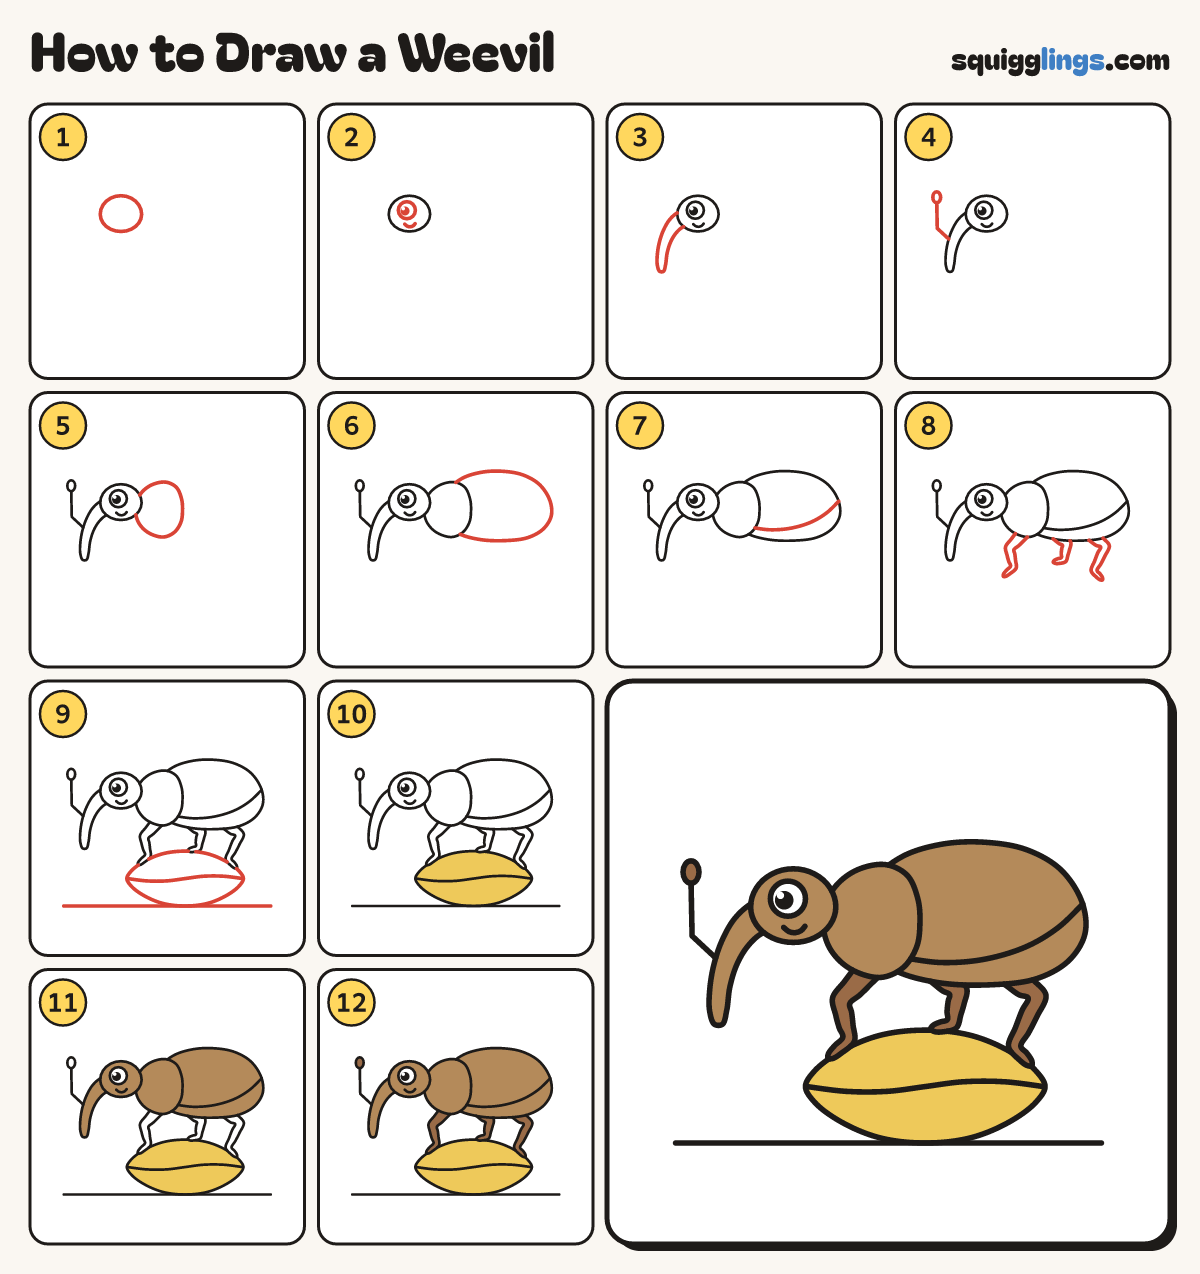
Each picture adds one red line. Draw that line, then scroll to the next picture. Rub out any dashed helper lines at the end. First up: small head.
Step 1: Small head
Left of the middle, draw a small round head.
Tip A weevil is a beetle with a very long nose.
Step 2: Big eye and smile
Draw a big dotted eye high on the head. Start a smile under its middle, stop under its right edge.
Step 3: Long curvy nose
From the front of the head, draw a long nose curving down like a trunk, thin at the tip.
Step 4: Bent feeler
Start halfway along the nose. Draw a line up to a sharp bend, then up to a little oval.
Tip The feeler grows out of the nose, not the head.
Step 5: Round chest
Behind the head, draw a round bump for the chest, bigger than the head.
Step 6: Long oval body
Behind the chest, draw a big long oval body, like an egg lying on its side.
Step 7: Wing case line
Start at the chest, low down, and draw one curved line back to the tail end.
Step 8: 3 bent legs
Under the chest and body, draw 3 bent legs, fat at the top and thin at the little hooked feet.
Tip Every leg has a knee that pokes out, like a real bug.
Step 9: The grain
Under the feet, draw a fat grain, pointy at both ends, with a wavy crease. Add a ground line.
Tip A weevil is so tiny it can stand on one grain of wheat!
Step 10: Golden grain
Colour the grain golden yellow first.
Step 11: Brown weevil
Colour the head, nose, chest and body light brown. Leave the eye white.
Step 12: Dark brown legs
Colour the 3 legs and the feeler tip dark brown. Go over your lines and your weevil is done!
Your finished drawing
Follow the steps above and this is where you end up: a weevil, drawn by you.
Every step in one picture