Watch it draw itself · tap to replay
How to Draw a Waterfall
Draw a waterfall in 12 easy steps, about 9 minutes. Free, with a printable worksheet.
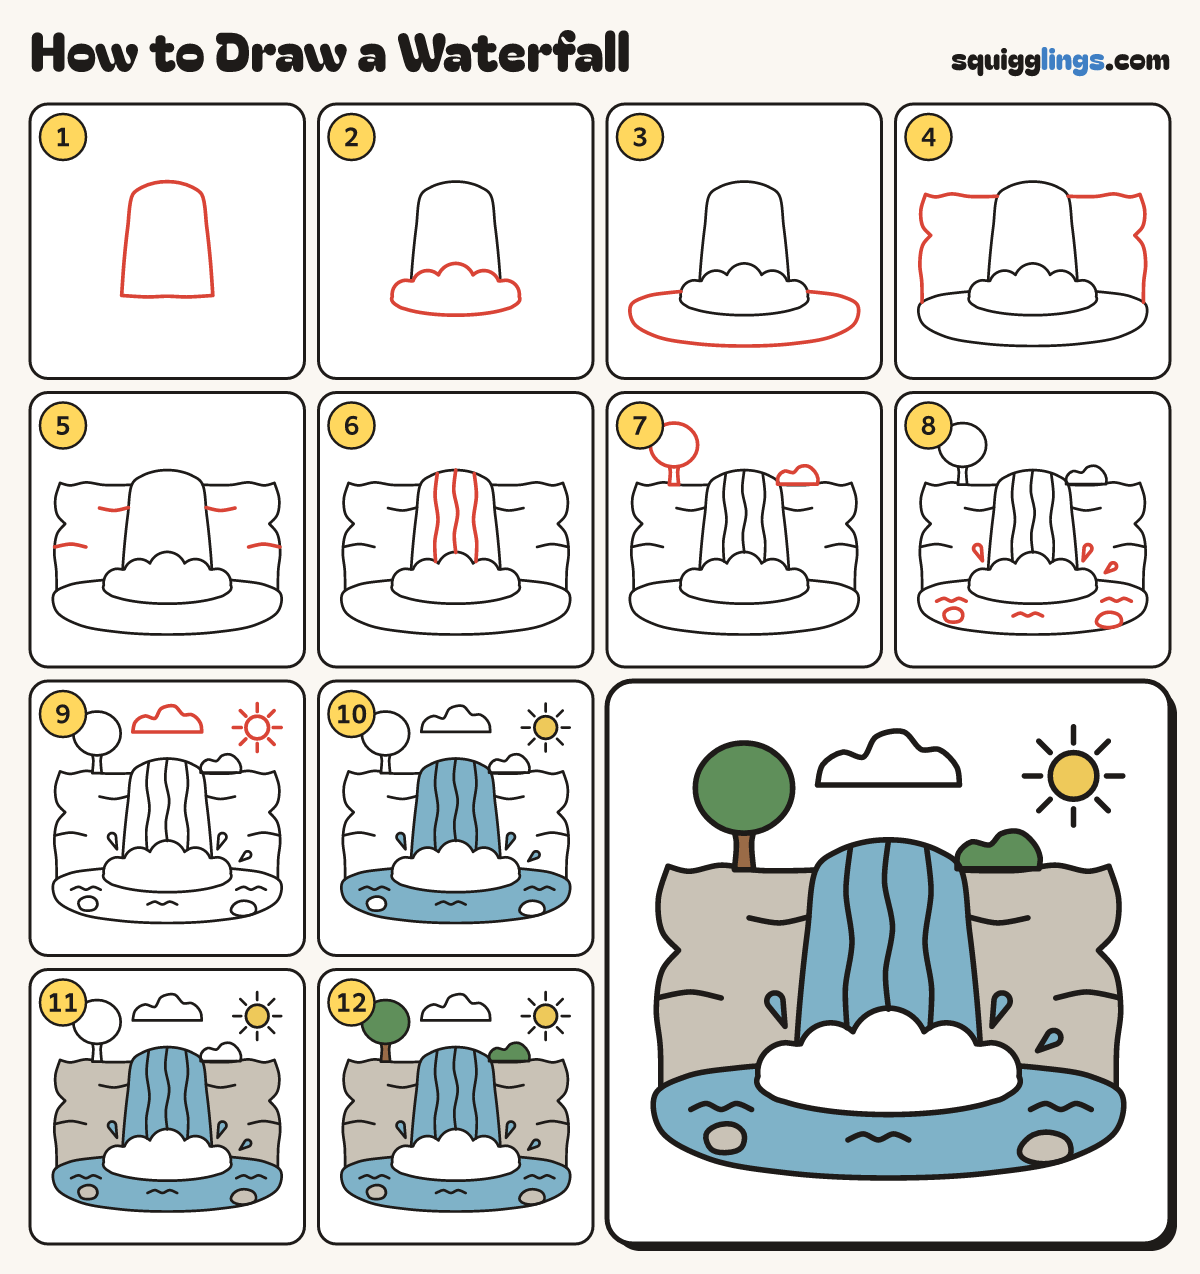
Each picture adds one red line. Draw that line, then scroll to the next picture. Rub out any dashed helper lines at the end. First up: falling water.
Step 1: Falling water
A third of the way down, draw a low rainbow a hand wide. Draw long lines down from both ends.
Tip The rainbow is where the water curls over the cliff.
Step 2: Foam splash
At the bottom of the water, draw a puffy cloud with 5 bumps. Make the middle bump tallest.
Step 3: The pool
Start at the left edge under the foam. Draw a wobbly shore across to the right edge, skipping the foam.
Step 4: Rock cliffs
Start at the top of the water. Draw a bumpy line out, then wobble down to the pool. Both sides.
Tip Bumpy lines look like rock. Ruler lines look like a box.
Step 5: Rock cracks
On each cliff, draw 2 short wavy cracks. Start at an edge and stop part way across.
Step 6: Water streaks
Inside the falling water, draw 3 long wavy lines. Start on the rainbow and stop at the foam.
Step 7: Tree and bush
On the left cliff, draw a tree with a round leafy top. On the right, draw a 2-hump bush.
Step 8: Drops and ripples
Draw 3 drops flying up from the foam. In the pool, draw 3 wavy ripples and 2 small rocks.
Step 9: Sun and cloud
In the top right corner, draw a sun with 8 short rays. Beside the tree top, draw a 3-bump cloud.
Step 10: Yellow sun, blue water
Colour the sun yellow. Colour the falling water, pool and 3 drops blue. Leave the foam and cloud white.
Step 11: Grey rocks
Colour both cliffs and the 2 pool rocks grey, going around the drops.
Step 12: Green leaves, brown trunk
Colour the tree top and the bush green. Colour the trunk brown. Go over your lines.
Your finished drawing
Follow the steps above and this is where you end up: a waterfall, drawn by you.
Every step in one picture