Watch it draw itself · tap to replay
How to Draw a Wagon
Draw a wagon in 11 easy steps, about 8 minutes. Free, with a printable worksheet.
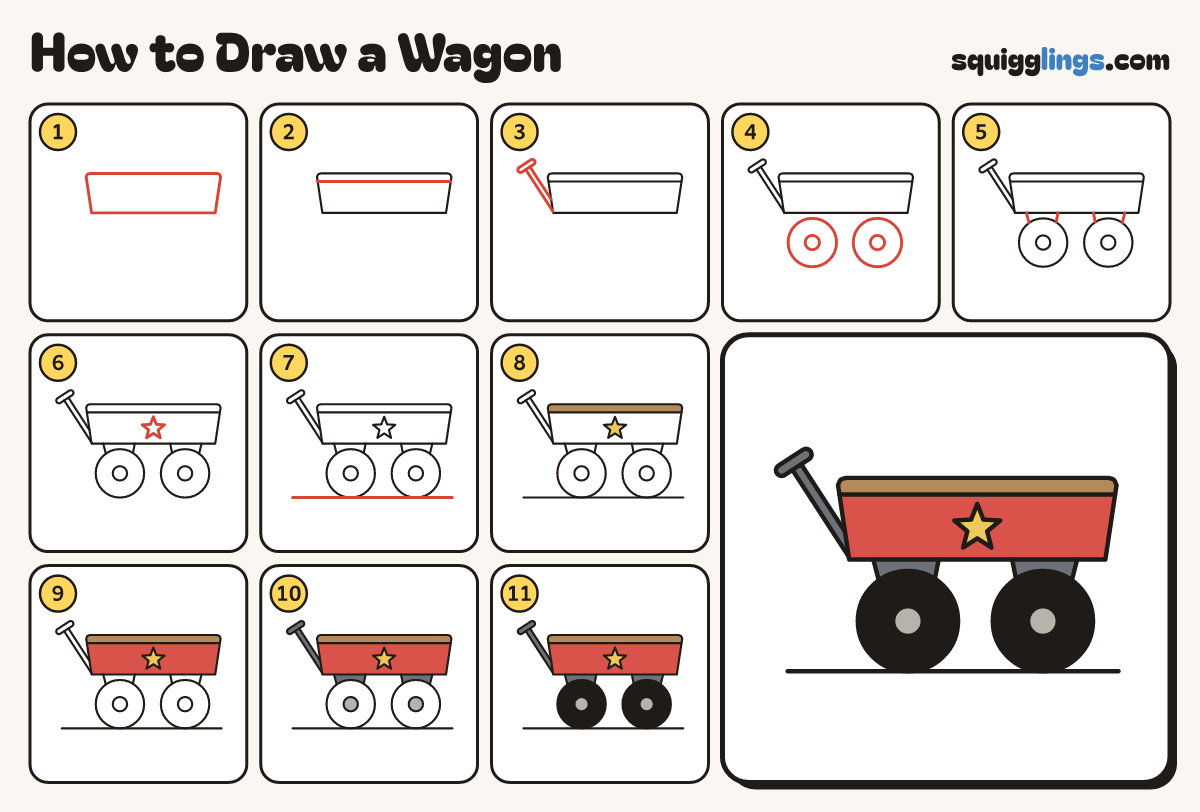
Each picture adds one red line. Draw that line, then scroll to the next picture. Rub out any dashed helper lines at the end. First up: the box.
Step 1: The box
Above the middle, leaving room on the left, draw a long deep box, wider at the top, with soft corners.
Tip Nearly 3 times as wide as it is tall, like a tray.
Step 2: The rim
Start on the left side, a finger under the top. Draw one line across and stop on the right side.
Step 3: The handle
From the bottom-left corner draw a long pole slanting up, away from the box. Cap it with a short bar.
Tip Leave a wide gap between the pole and the box, so it pulls like a handle.
Step 4: Two fat wheels
Under the box draw 2 big wheels, one near each end. Add a small hub in the middle of each.
Tip Both wheels hang the same distance below the box, really fat.
Step 5: Wheel holders
Above each wheel draw 2 short lines from the box bottom slanting down and in, ending behind the wheel.
Tip Each holder is a chunky upside-down flowerpot tucked behind the wheel.
Step 6: A big star
In the middle of the box side draw one big star with 5 points.
Step 7: The ground
Start under the handle. Draw one straight line touching the bottom of both wheels, stopping past the back.
Step 8: Yellow star, wood rim
Colour the star yellow and the rim band along the top wood brown.
Step 9: Red box
Colour the box under the rim red, going around the star.
Step 10: Grey hubs, dark handle
Colour the hubs grey. Colour the handle, its bar and the wheel holders dark grey.
Step 11: Black wheels
Colour both wheels black, going around the grey hubs.
Your finished drawing
Follow the steps above and this is where you end up: a wagon, drawn by you.
Every step in one picture