Watch it draw itself · tap to replay
How to Draw a Volcano
Draw a volcano in 10 easy steps, about 8 minutes. Free, with a printable worksheet.
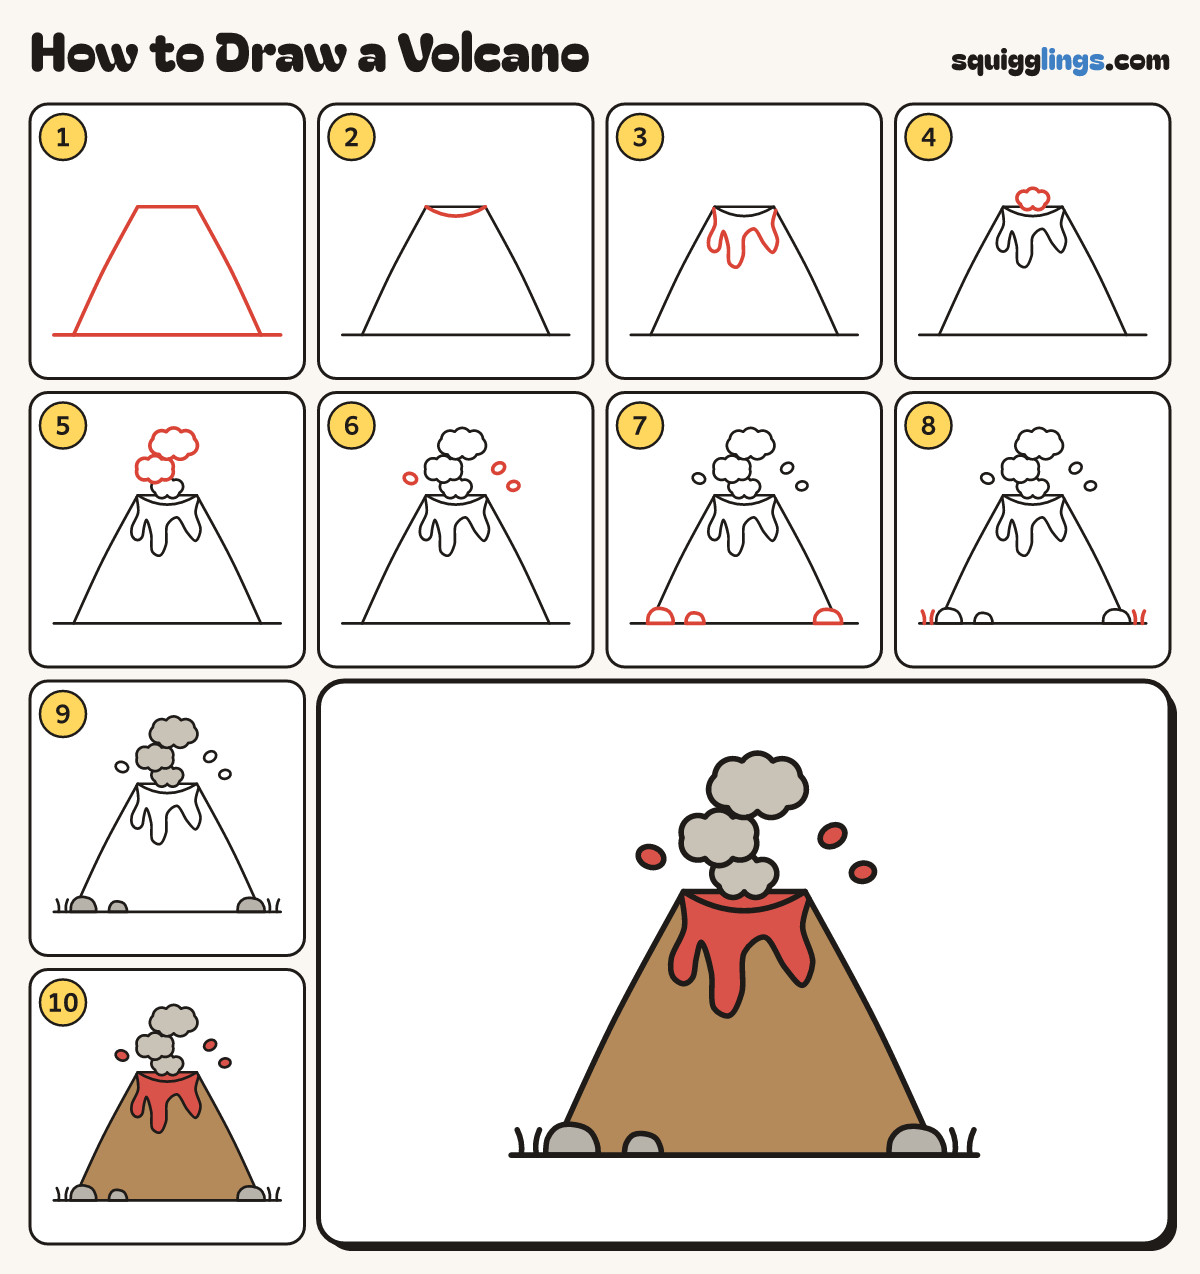
Each picture adds one red line. Draw that line, then scroll to the next picture. Rub out any dashed helper lines at the end. First up: ground and cone.
Step 1: Ground and cone
Draw a low ground line across your paper. From the left draw a wide flat-topped mountain, back down to it.
Step 2: The crater
Start at the top left corner of the cone. Draw a sagging U across to the top right corner.
Step 3: Dripping lava
Start on the crater's left rim. Draw a wobbly line of 3 drips down the cone, up to the right.
Tip The middle drip is the longest.
Step 4: Puff of smoke
Sitting on the crater, draw a small bumpy puff of smoke, like a little cloud with 5 bumps.
Tip Rub out the rim line inside the puff.
Step 5: More smoke
Draw a bigger bumpy puff up left of the first, overlapping it. Then a bigger one up right.
Tip The puffs get bigger as they rise, like a chain of clouds.
Step 6: Flying lava
Just above the crater draw 3 little oval lava blobs flying out: one left and 2 right.
Step 7: Rocks
At the foot draw 3 flat-bottomed rocks on the ground: a big one each side, a small one left.
Tip Rub out the cone lines inside the big rocks.
Step 8: Grass
Near each end of the ground line, start on the ground and flick 2 short grass blades up.
Step 9: Smoke and rocks
Go over your lines. Colour the smoke puffs light grey and the rocks grey.
Step 10: Red lava, brown cone
Colour the crater, drips and blobs red. Colour the cone brown around the lava and rocks. Your volcano is done!
Your finished drawing
Follow the steps above and this is where you end up: a volcano, drawn by you.
Every step in one picture