Watch it draw itself · tap to replay
How to Draw a Fairy Ring
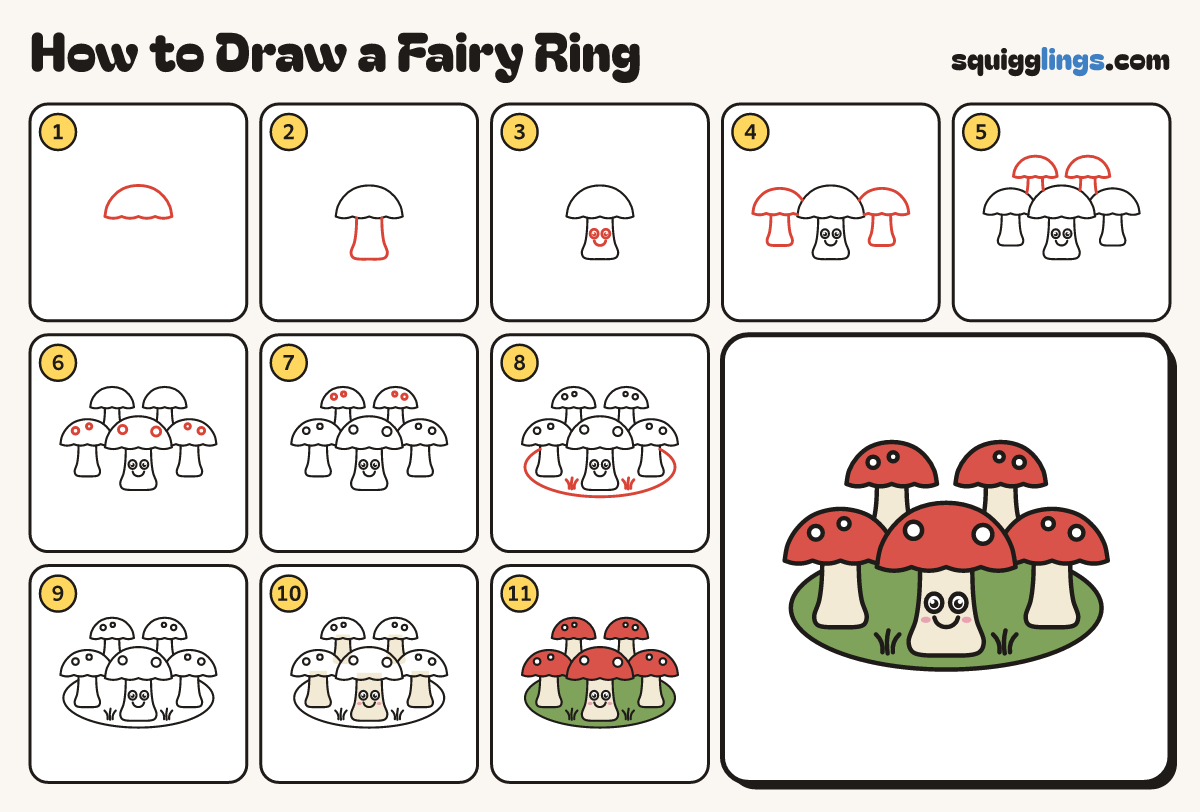
Draw a fairy ring in 11 easy steps, about 8 minutes. Free, with a printable worksheet.
Each picture adds one red line. Draw that line, then scroll to the next picture. Rub out any dashed helper lines at the end. First up: the front cap.
Step 1: The front cap
Start a third of the way in, at the middle. Draw a big dome over, then back with wavy bumps.
Step 2: The front stem
Start under the cap, left of the middle. Draw a chunky stem down, round the foot, up to the cap.
Step 3: A happy face
On the stem draw 2 big eggy eyes with black dots, and a U smile under them.
Step 4: Two at the sides
On each side draw a smaller mushroom, its foot a little higher: a wavy dome and a chunky stem.
Step 5: Two at the back
At the back draw the 2 smallest mushrooms, stopping their lines where they go behind the front caps.
Step 6: Front cap spots
Draw 2 round spots on each of the 3 front caps, clear of the edges.
Step 7: Back cap spots
Draw 2 round spots on each of the 2 back caps.
Step 8: Ground and grass
Draw a flat oval of grass under the feet, going behind the stems. Add 2 little grass tufts in front.
Step 9: White spots
Colour all the spots white.
Step 10: Cream stems, pink cheeks
Colour all the stems cream. Keep the eyes white. Give the front mushroom 2 pink cheeks.
Step 11: Green grass, red caps
Colour the grass green around the stems. Colour all 5 caps red, going round the spots. You're done!
Your finished drawing
Follow the steps above and this is where you end up: a fairy ring, drawn by you.
Every step in one picture