Watch it draw itself · tap to replay
How to Draw a Viper
Draw a viper in 12 easy steps, about 9 minutes. Free, with a printable worksheet.
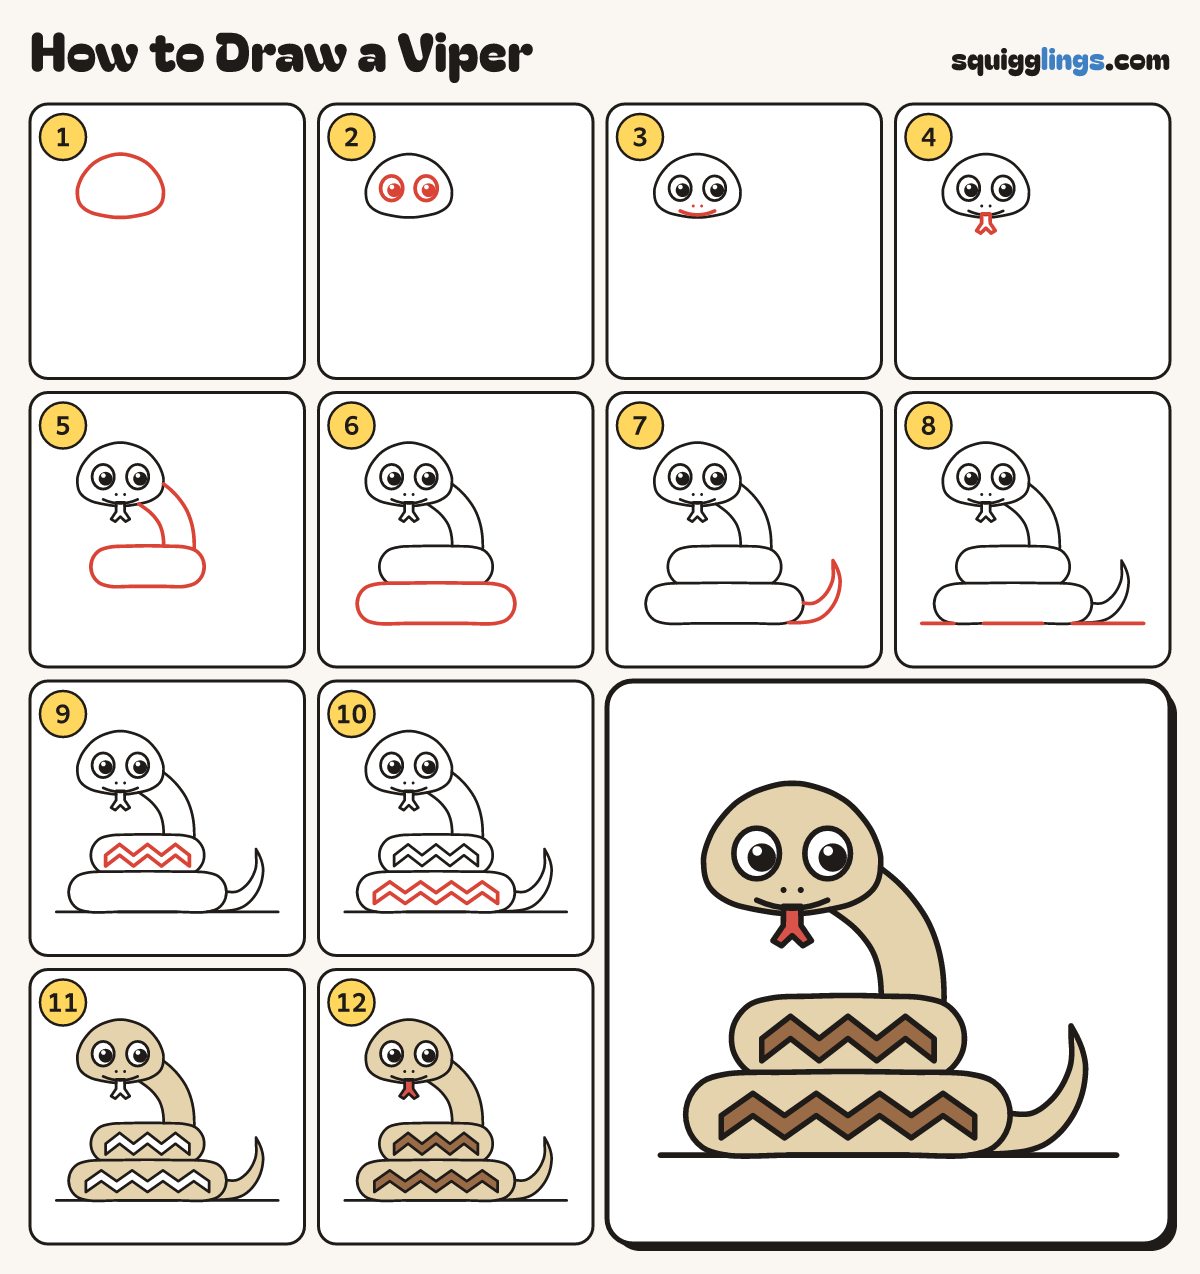
Each picture adds one red line. Draw that line, then scroll to the next picture. Rub out any dashed helper lines at the end. First up: big round head.
Step 1: Big round head
In the top left, draw a big round head like an egg lying down. Leave room below for the coils.
Step 2: Two big eyes
In the middle of the head, draw 2 big egg eyes. Colour big black dots, leaving white shines.
Step 3: Nostrils and smile
Dot 2 nostrils under the eyes. Start under the left eye and draw a wide smile to the right eye.
Step 4: Forked tongue
From the middle of the smile, draw a short tongue just past the chin. Split the end into 2 points.
Step 5: Neck and top coil
From the right cheek, draw a thick neck curving down. Under it, draw a long sausage coil lying flat.
Step 6: Bottom coil
Under the top coil, draw a longer, wider sausage coil, tucked just over its bottom edge.
Step 7: Pointed tail
From the right end of the bottom coil, draw a tail curling up, getting thinner to a point.
Step 8: The ground
Draw a straight ground line under the snake, from the left edge to the right edge.
Step 9: Top zigzag
Along the middle of the top coil, draw a zigzag band with 3 points up.
Tip The zigzag band is what makes it a viper.
Step 10: Bottom zigzag
Along the middle of the bottom coil, draw a longer zigzag band with 4 points up.
Step 11: Sand viper
Colour the head, neck, coils and tail sand, around the zigzags. Leave the eyes and tongue white.
Step 12: Brown zigzags
Go over your lines. Colour the 2 zigzag bands brown and the tongue red.
Your finished drawing
Follow the steps above and this is where you end up: a viper, drawn by you.
Every step in one picture