Watch it draw itself · tap to replay
How to Draw a Village
Draw a village in 12 easy steps, about 9 minutes. Free, with a printable worksheet.
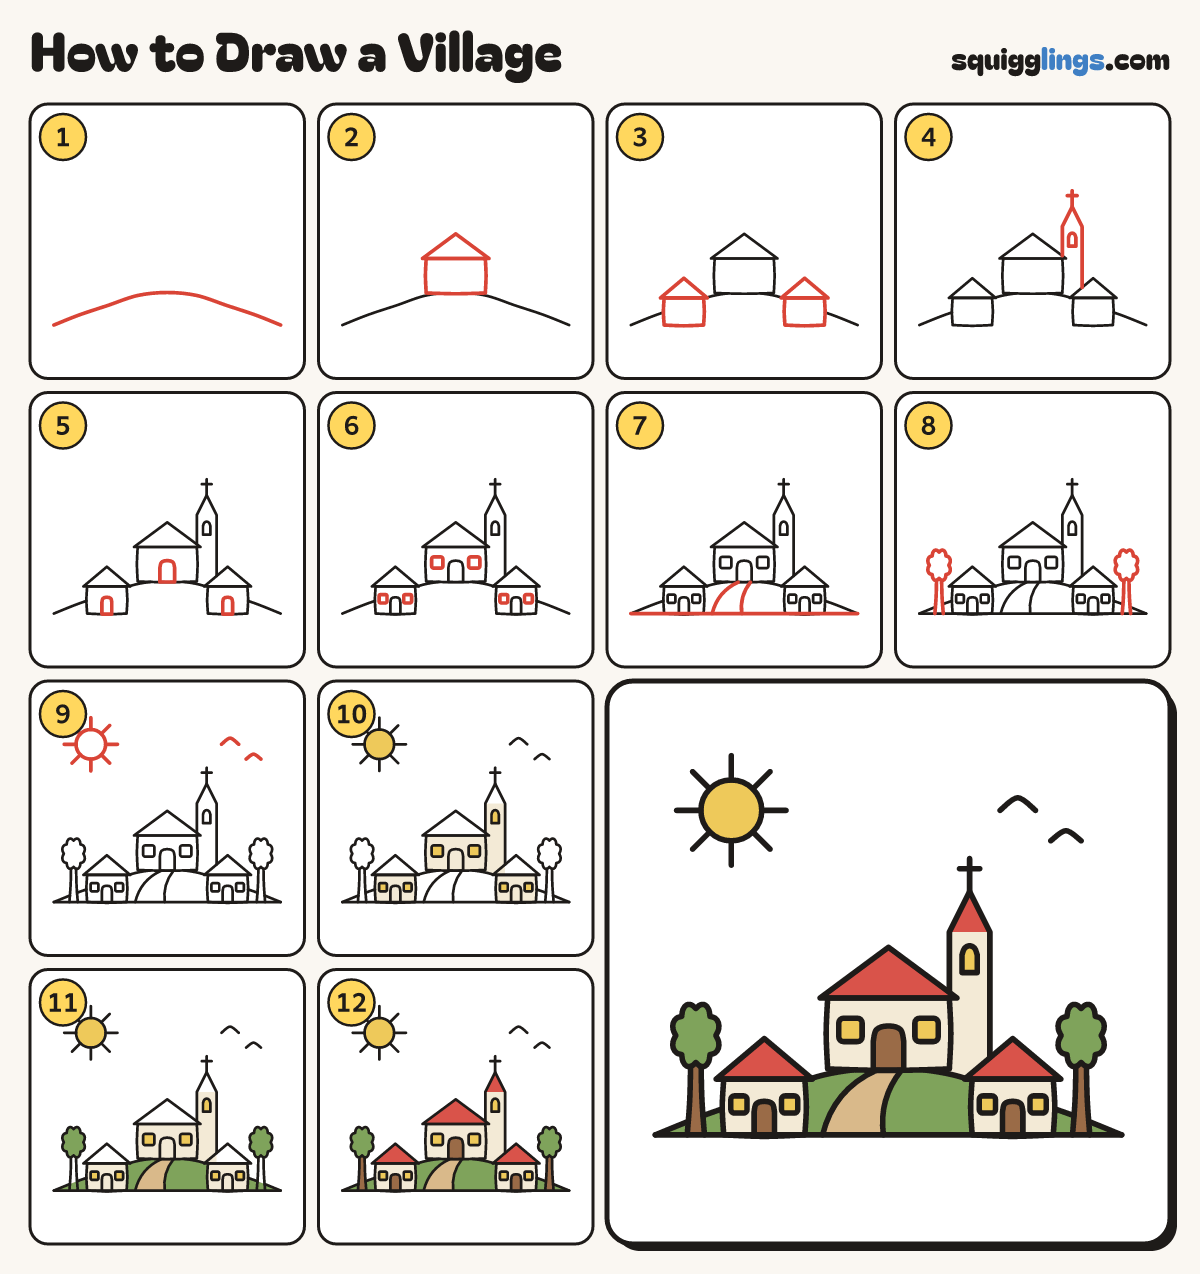
Each picture adds one red line. Draw that line, then scroll to the next picture. Rub out any dashed helper lines at the end. First up: the hill.
Step 1: The hill
Start at the left edge, below the middle. Draw one long soft hill and stop at the right edge.
Tip Keep the hill gentle, not pointy.
Step 2: Big cottage
On top of the hill, draw the biggest cottage: a pointed roof triangle with plump walls under it.
Step 3: Two more cottages
At the foot of the hill on each side, draw a smaller cottage the same way, standing on the ground.
Step 4: Church tower
Start on the big roof. Draw a tall tower with a pointed spire and stop on the small roof.
Step 5: Doors
Give each cottage an arched door in the middle, like a little rainbow standing on the bottom line.
Step 6: Windows
On each side of every door, draw a little square window, a little below the roof.
Step 7: Ground and path
Draw a ground line from edge to edge. From the big door, draw 2 path lines winding down to it.
Step 8: Two trees
Beside each small cottage, draw a tall bumpy leaf cloud. Draw 2 trunk lines from it down to the ground.
Step 9: Sun and birds
In the top left corner, draw a round sun with 8 short rays. Add 2 little birds on the right.
Step 10: Cream walls, yellow sun
Colour the walls and tower cream, around the doors and windows. Colour the windows and the sun yellow.
Step 11: Tan path, green hill
Colour the path tan. Colour the hill and tree tops green, around the cottages, trunks and path.
Step 12: Red roofs, brown doors
Colour the roofs and spire red, and the doors and tree trunks brown. Go over your lines. You're done!
Your finished drawing
Follow the steps above and this is where you end up: a village, drawn by you.
Every step in one picture