Watch it draw itself · tap to replay
How to Draw a Viking
Draw a Viking in 13 easy steps, about 10 minutes. Free, with a printable worksheet.
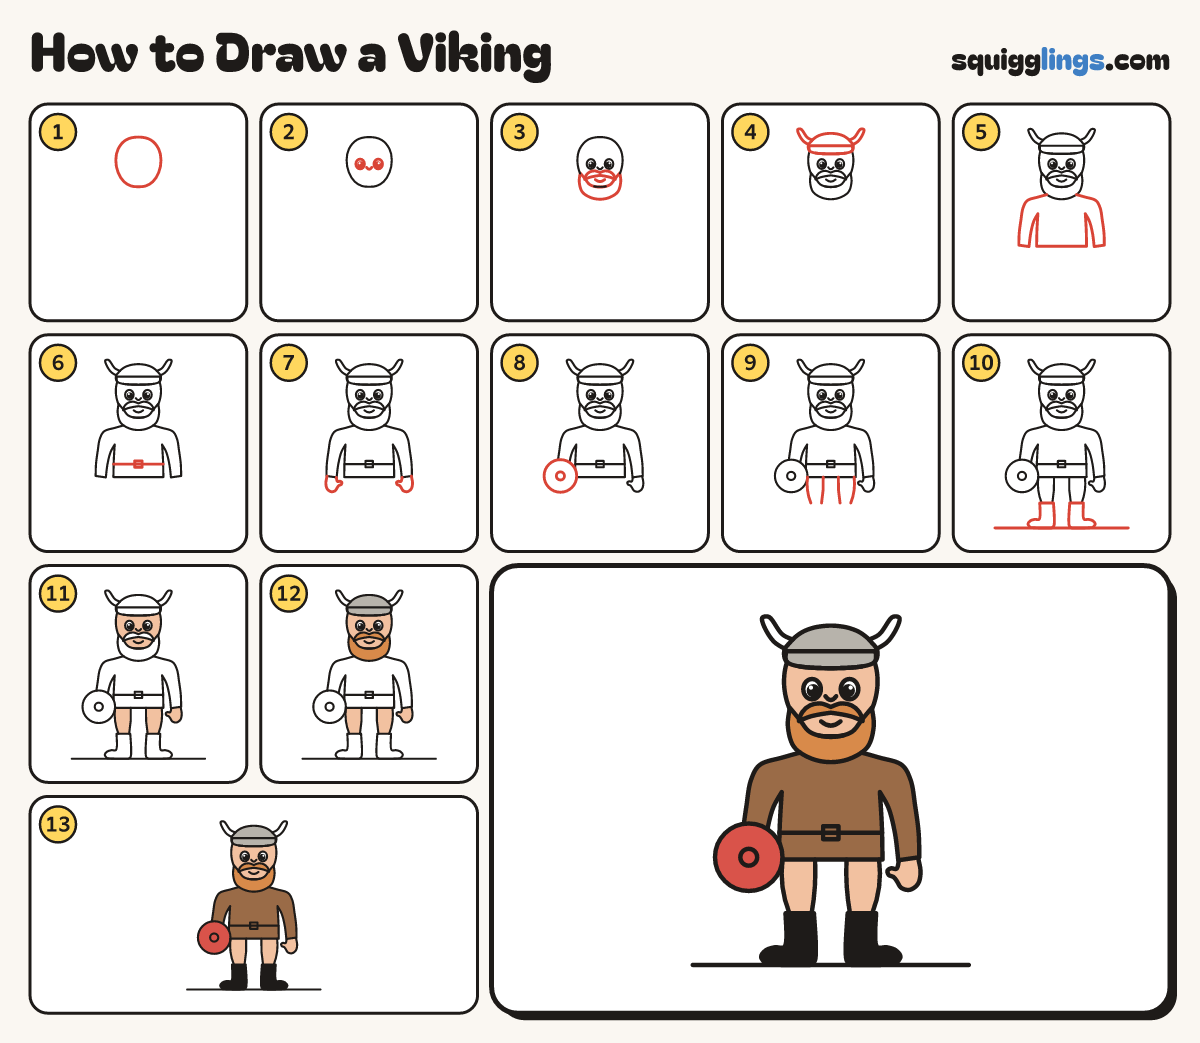
Each picture adds one red line. Draw that line, then scroll to the next picture. Rub out any dashed helper lines at the end. First up: egg head.
Step 1: Egg head
Near the top, in the middle, draw an egg head, a little narrower at the chin.
Step 2: The face
Below the middle of the head, draw 2 small oval eyes with shines. Add a tiny nose.
Step 3: Moustache, beard and smile
Under the nose, draw 2 soft moustache curls and a U beard, cheek to cheek. Add a smile between them.
Step 4: Horned helmet
Draw a helmet over the top of the head with a band across the bottom. Add a horn each side.
Step 5: Tunic and sleeves
Under the beard, draw a tunic with long sleeves to the wrists. Give it a flat bottom at the hips.
Step 6: Belt and buckle
A hand above the bottom of the tunic, draw a belt from side to side with a small square buckle.
Step 7: Mitten hands
At the end of each sleeve, draw a mitten with a little thumb pointing in toward the body.
Step 8: Round shield
Over the left arm, draw a big circle shield covering the hand, with a small circle in the middle.
Step 9: Legs
Start on the bottom of the tunic. Draw 2 lines for each leg, getting narrower. Stop where the boots begin.
Step 10: Boots and ground
Under each leg, draw a tall boot with the toe pointing out. Draw a long ground line under the boots.
Step 11: Peach skin
Colour the face, hands and legs peach. Leave the eyes white.
Step 12: Ginger beard, grey helmet
Colour the beard and moustache ginger. Colour the helmet grey, leaving the horns white.
Step 13: Brown tunic, red shield
Colour the tunic brown, the shield red and the boots black.
Your finished drawing
Follow the steps above and this is where you end up: a Viking, drawn by you.
Every step in one picture