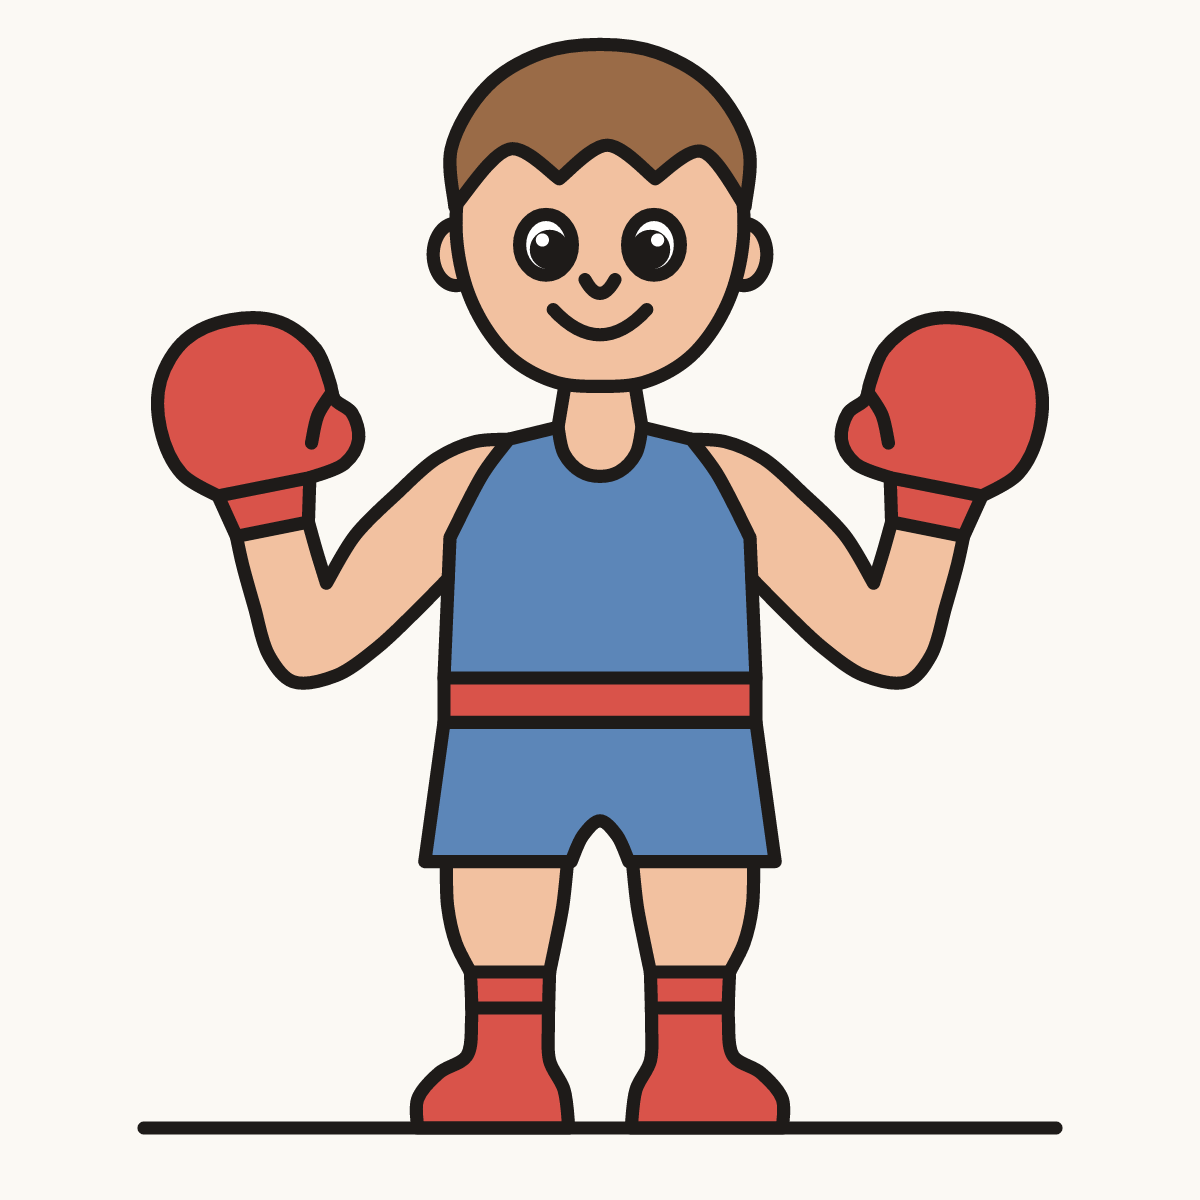
Watch it draw itself · tap to replay
How to Draw a Boxer Fighter
Draw a boxer fighter in 13 easy steps, about 10 minutes. Free, with a printable worksheet.
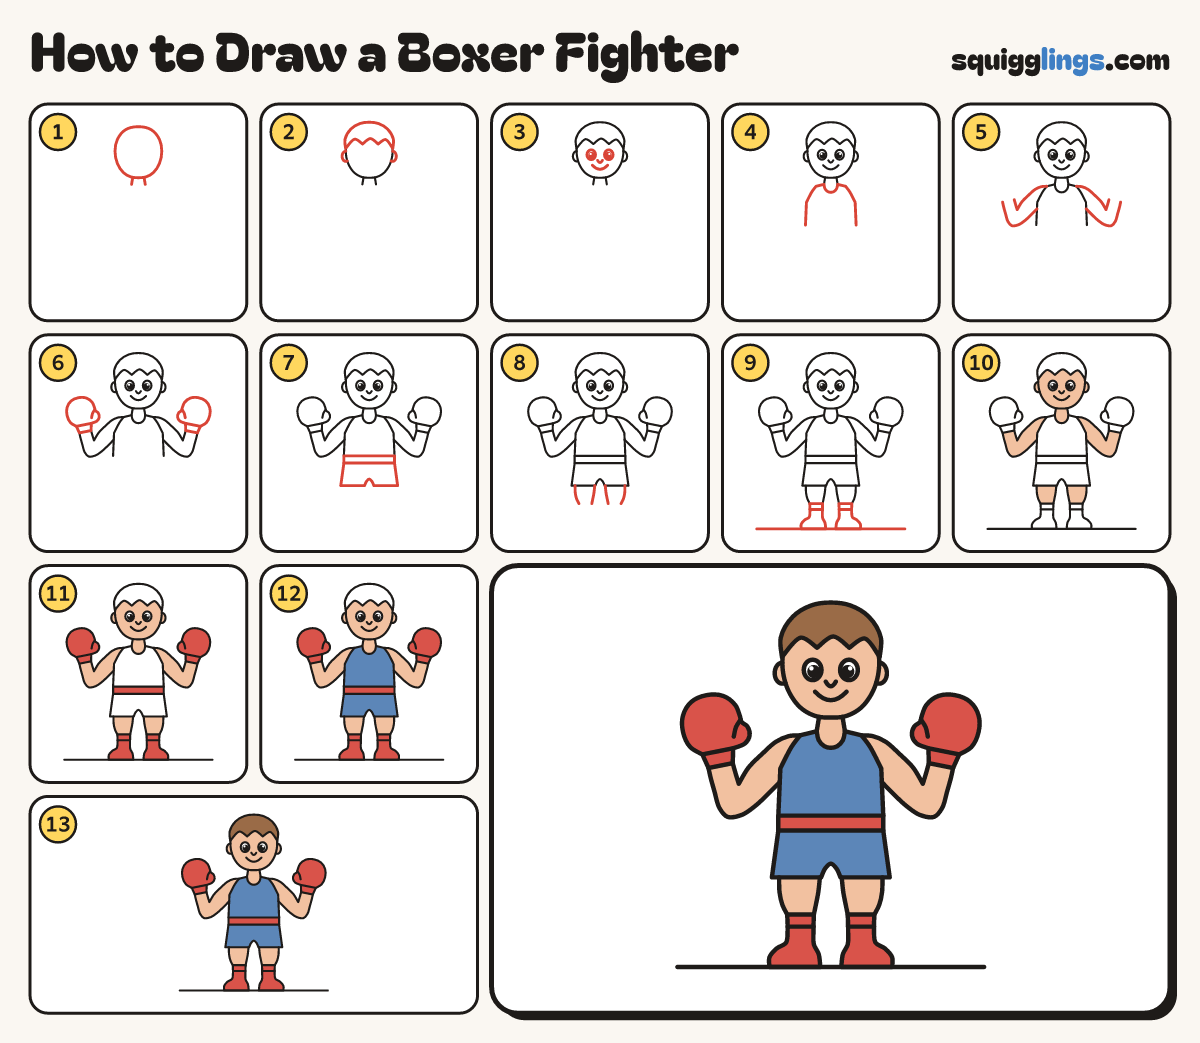
Each picture adds one red line. Draw that line, then scroll to the next picture. Rub out any dashed helper lines at the end. First up: head and neck.
Step 1: Head and neck
Near the top draw an egg head. From the chin draw 2 short neck lines down to the shoulders.
Tip Leave room at each side for the gloves and most of the page below.
Step 2: Hair and ears
Draw hair over the top of the head with a 3-point fringe. Add a small ear on each side.
Step 3: Friendly face
Draw 2 round eyes with a black dot in each, a tiny U nose and a big smile.
Step 4: The vest
Start at the left hip. Draw the vest up over 2 straps and a U neck. Stop at the right hip.
Step 5: Bent arms
Start at each shoulder. Draw an arm out and down to a bent elbow, then up. Stop at the wrist.
Tip Make the top part of the arm fatter than the part near the wrist.
Step 6: Boxing gloves
On each wrist draw a big round glove with a thumb bump on the inside. Add a cuff line.
Step 7: Baggy shorts
Under the vest draw a wide waistband. Start at its ends, draw baggy shorts and stop at a middle notch.
Step 8: Two legs
Start at the shorts and draw 2 lines down for each leg, closer at the ankle. Stop above the bottom.
Step 9: Boots and ground
Under each leg draw a tall boot with a round toe and a band on top. Add a ground line.
Step 10: Peach skin
Colour the face, ears, neck, arms and legs peach. Leave the eyes and the hair white.
Step 11: Red gloves and boots
Colour the 2 gloves, the waistband and the 2 boots red.
Step 12: Blue vest and shorts
Colour the vest and the shorts blue. Leave the red waistband between them.
Step 13: Brown hair
Colour the hair brown. Go over your lines and your boxer is ready!
Your finished drawing
Follow the steps above and this is where you end up: a boxer fighter, drawn by you.
Every step in one picture