Watch it draw itself · tap to replay
How to Draw a Hand Holding a Phone
Draw a hand holding a phone in 12 easy steps, about 9 minutes. Free, with a printable worksheet.
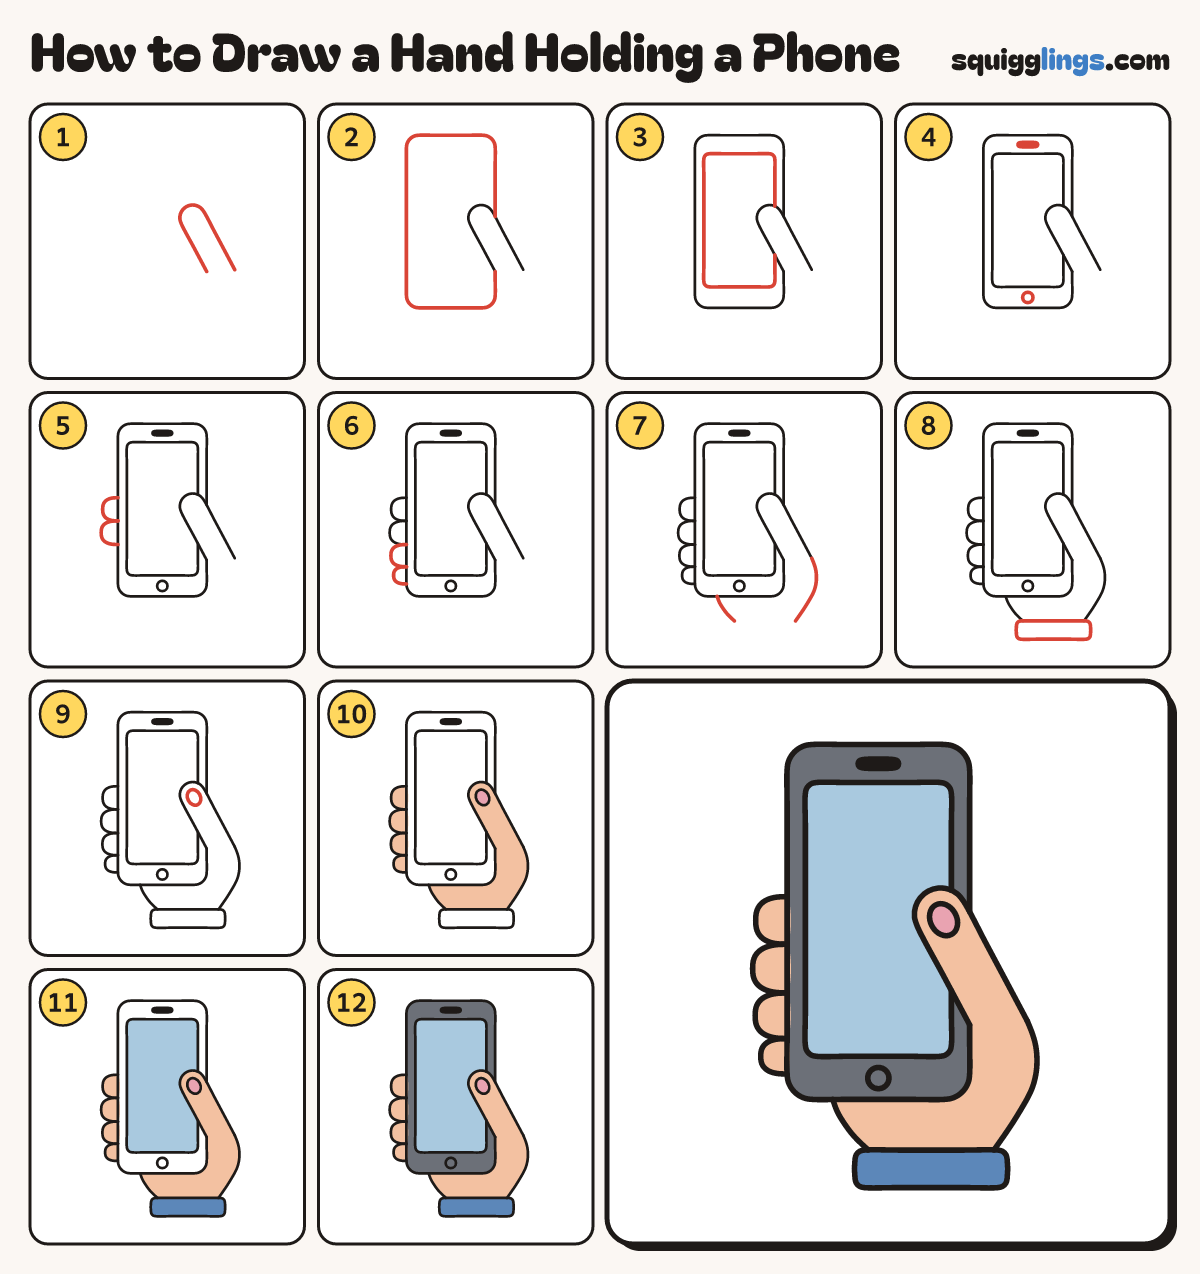
Each picture adds one red line. Draw that line, then scroll to the next picture. Rub out any dashed helper lines at the end. First up: the thumb.
Step 1: The thumb
Start right of the middle. Draw a fat thumb leaning up left, round the tip, and stop lower down.
Tip The outside line comes down a little further than the inside line.
Step 2: The phone
Behind the thumb draw a tall box with round corners. Start and stop on the thumb's left side.
Tip Make it twice as tall as it is wide.
Step 3: The screen
Inside the phone draw a smaller box for the screen. Stop at the thumb and carry on below it.
Step 4: Speaker and button
Above the screen draw a short black speaker bar. Below the screen draw a small round button.
Step 5: Two fingers
On the phone's left edge draw 2 fat finger bumps. Each one starts and stops on the edge.
Tip The fingers wrap round the back, so only their sides show.
Step 6: Two more fingers
Start under the 2 bumps. Draw 2 more finger bumps, the little finger smallest, and stop above the bottom corner.
Step 7: Palm of the hand
Start at the thumb's end and curve down to the wrist. Draw another curve down from the phone's bottom.
Step 8: Soft cuff
Across the 2 wrist ends draw a soft cuff with round corners, a little wider than the wrist.
Step 9: Thumb nail
Near the tip of the thumb draw a small rounded nail.
Step 10: Peach hand
Colour the thumb, the 4 fingers and the palm peach. Colour the thumb nail pink.
Step 11: Blue screen and cuff
Colour the screen light sky blue, around the thumb. Colour the cuff a darker blue.
Step 12: Grey phone
Colour the rest of the phone grey, around the screen. Go over your lines and it is done!
Your finished drawing
Follow the steps above and this is where you end up: a hand holding a phone, drawn by you.
Every step in one picture