Watch it draw itself · tap to replay
How to Draw a Viking Face
Draw a Viking face in 11 easy steps, about 8 minutes. Free, with a printable worksheet.
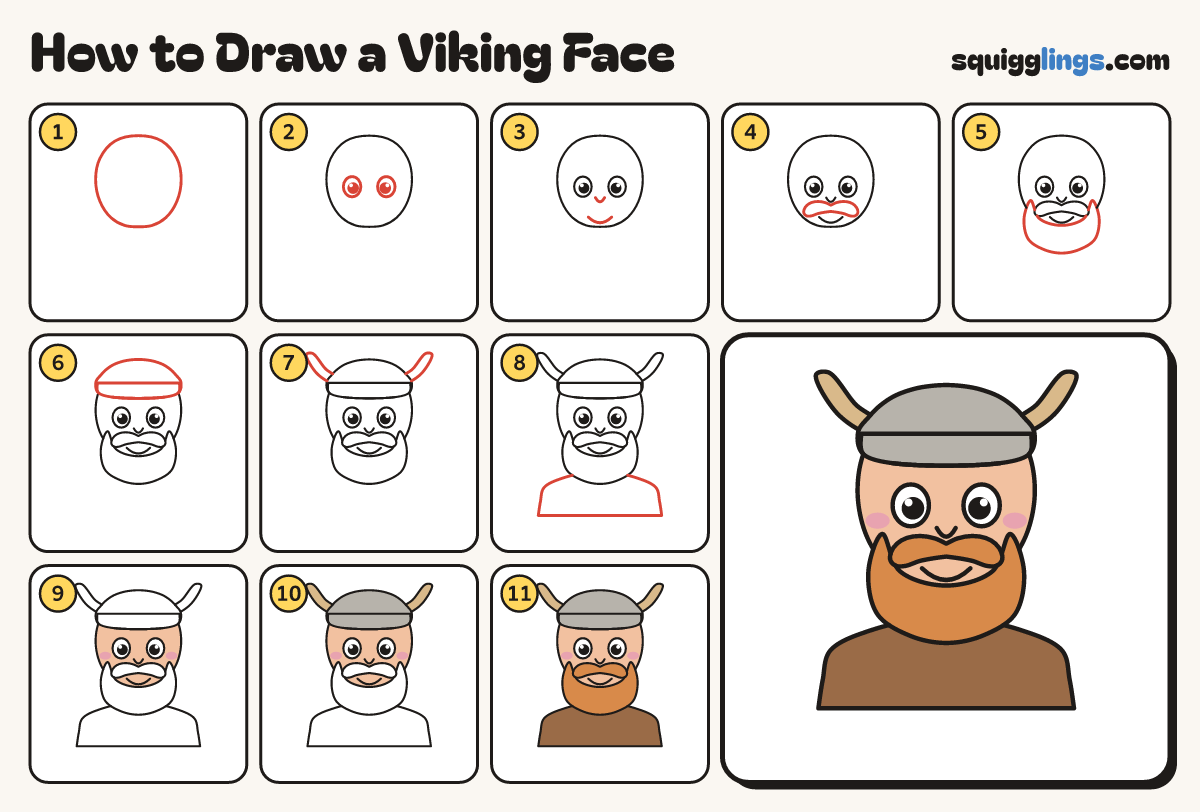
Each picture adds one red line. Draw that line, then scroll to the next picture. Rub out any dashed helper lines at the end. First up: the head.
Step 1: The head
Draw a big egg for the head in the upper middle of your paper, narrower at the chin.
Tip Leave room above for the horns and below for the big beard.
Step 2: Big eyes
Below the middle of the head draw 2 big oval eyes, a gap apart, with black dots and tiny shines.
Step 3: Nose and smile
Draw a tiny U nose between the eyes. Start a smile under the left eye and stop under the right.
Step 4: Bushy moustache
Under the nose draw a bushy moustache: 2 round lobes side by side, dipping in the middle like a bow.
Step 5: Big beard
From the left cheek, draw a big U beard to the right cheek, with a small U under the smile.
Step 6: Helmet
Start on the left of the head. Draw a helmet over the top, down to the right, with a band.
Step 7: Horns
Start on each side of the helmet. Curve a horn up and out to a rounded tip, and back down.
Step 8: Tunic
From the left of the beard, draw a sloping shoulder, a flat bottom, and a shoulder back to the beard.
Step 9: Pink cheeks, peach skin
Colour the cheeks pink. Colour the face peach, around the cheeks. Leave the eyes white.
Step 10: Tan horns, grey helmet
Colour the horns tan and the helmet grey.
Step 11: Ginger beard, brown tunic
Colour the beard and moustache ginger and the tunic brown. Your viking is done!
Your finished drawing
Follow the steps above and this is where you end up: a Viking face, drawn by you.
Every step in one picture