Watch it draw itself · tap to replay
How to Draw a USB Stick
Draw a USB stick in 11 easy steps, about 8 minutes. Free, with a printable worksheet.
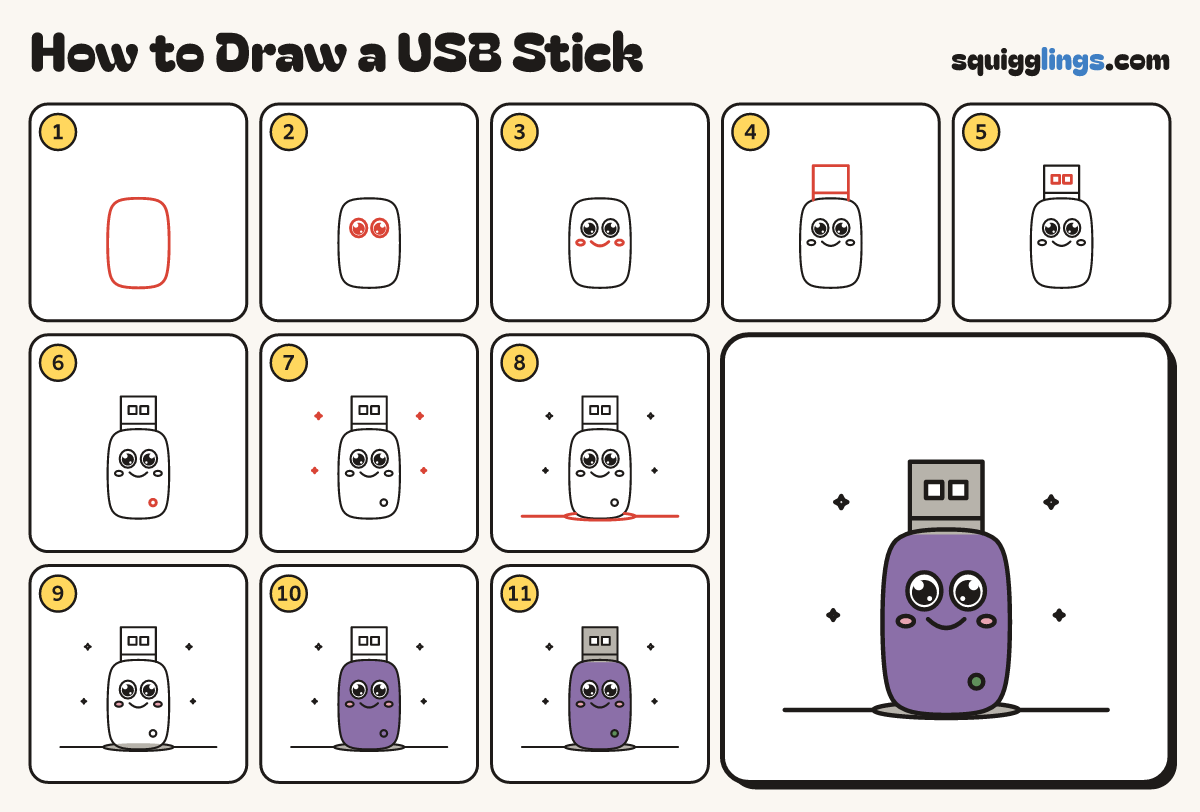
Each picture adds one red line. Draw that line, then scroll to the next picture. Rub out any dashed helper lines at the end. First up: the stick.
Step 1: The stick
Low on your paper draw a tall box standing up with rounded corners, twice as tall as it is wide.
Tip Leave room on top for the metal plug.
Step 2: Two big eyes
On the box draw 2 big egg eyes side by side. Colour a black dot in each, with a shine.
Step 3: Smile and cheeks
Under the eyes draw a U smile, with a small flat cheek beside each end.
Step 4: The metal plug
On top of the box draw a shorter, narrower box with square corners, with a line across near the bottom.
Step 5: Two little holes
Inside the plug draw 2 tiny squares side by side.
Step 6: The little light
Low on the stick, near the right side, draw a tiny circle for the light.
Step 7: Sparkles
Draw 4 little sparkles in the air around the stick.
Step 8: Table and shadow
Draw a table line under the stick from left to right, and a thin flat oval shadow on the line.
Step 9: Pink cheeks, grey shadow
Go over your lines, then colour the cheeks pink and the shadow grey.
Step 10: Purple stick
Colour the stick purple, going around the face and the light. Leave the eyes white.
Step 11: Grey plug, green light
Colour the plug grey, leaving the 2 holes white, and the light green. Your USB stick is ready!
Your finished drawing
Follow the steps above and this is where you end up: a USB stick, drawn by you.
Every step in one picture