Watch it draw itself · tap to replay
How to Draw a Tuxedo
Draw a tuxedo in 13 easy steps, about 10 minutes. Free, with a printable worksheet.
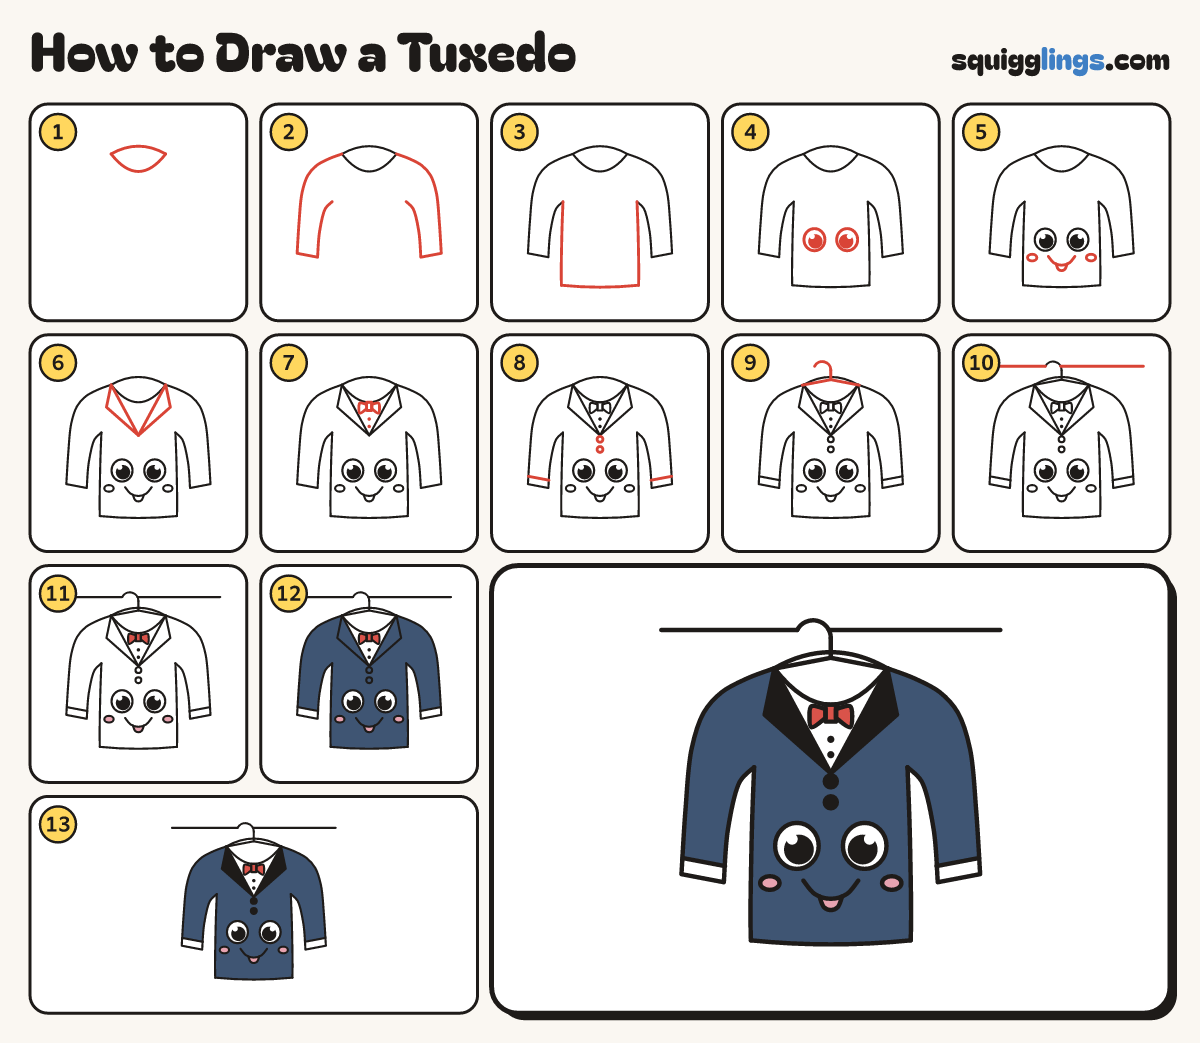
Each picture adds one red line. Draw that line, then scroll to the next picture. Rub out any dashed helper lines at the end. First up: neck hole.
Step 1: Neck hole
Near the top draw a small rainbow. Start at its left end, draw a U, stop at its right end.
Step 2: Long sleeves
Start at the left end of the rainbow. Draw a long sleeve down and back up to the armpit.
Step 3: Long body
Start at each armpit. Draw a line down past the sleeve. Join the corners with a hem.
Step 4: Two big eyes
Below the armpits draw 2 big circles. Fill most of each with a black dot, leaving a white shine.
Step 5: Smile and cheeks
Start under the left eye. Draw a big U smile and stop under the right eye. Add tongue and cheeks.
Step 6: Lapels and shirt front
Start at each rainbow end, draw a long pointy lapel to the middle, then straight back to the start.
Step 7: Bow tie
Right under the neck U draw a small box with a wing on each side. Add 2 dots below.
Step 8: Cuffs and buttons
Start at each sleeve's outside edge, draw a slanted cuff line, stop inside. Add 2 buttons under the lapels.
Step 9: The hanger
Start at the left end of the rainbow. Draw a low tent to the right end. Add a curled hook.
Step 10: The rail
Start near the left edge, level with the hook. Draw a straight line across to the right edge.
Step 11: Pink cheeks, red tie
Colour the cheeks and tongue pink and the bow tie red.
Step 12: Navy jacket
Colour the jacket navy around the lapels, buttons, pink and red. Leave the shirt, cuffs and eyes white.
Step 13: Black lapels
Colour the lapels and buttons black. Go over your lines.
Your finished drawing
Follow the steps above and this is where you end up: a tuxedo, drawn by you.
Every step in one picture