Watch it draw itself · tap to replay
How to Draw a Tunnel
Draw a tunnel in 12 easy steps, about 9 minutes. Free, with a printable worksheet.
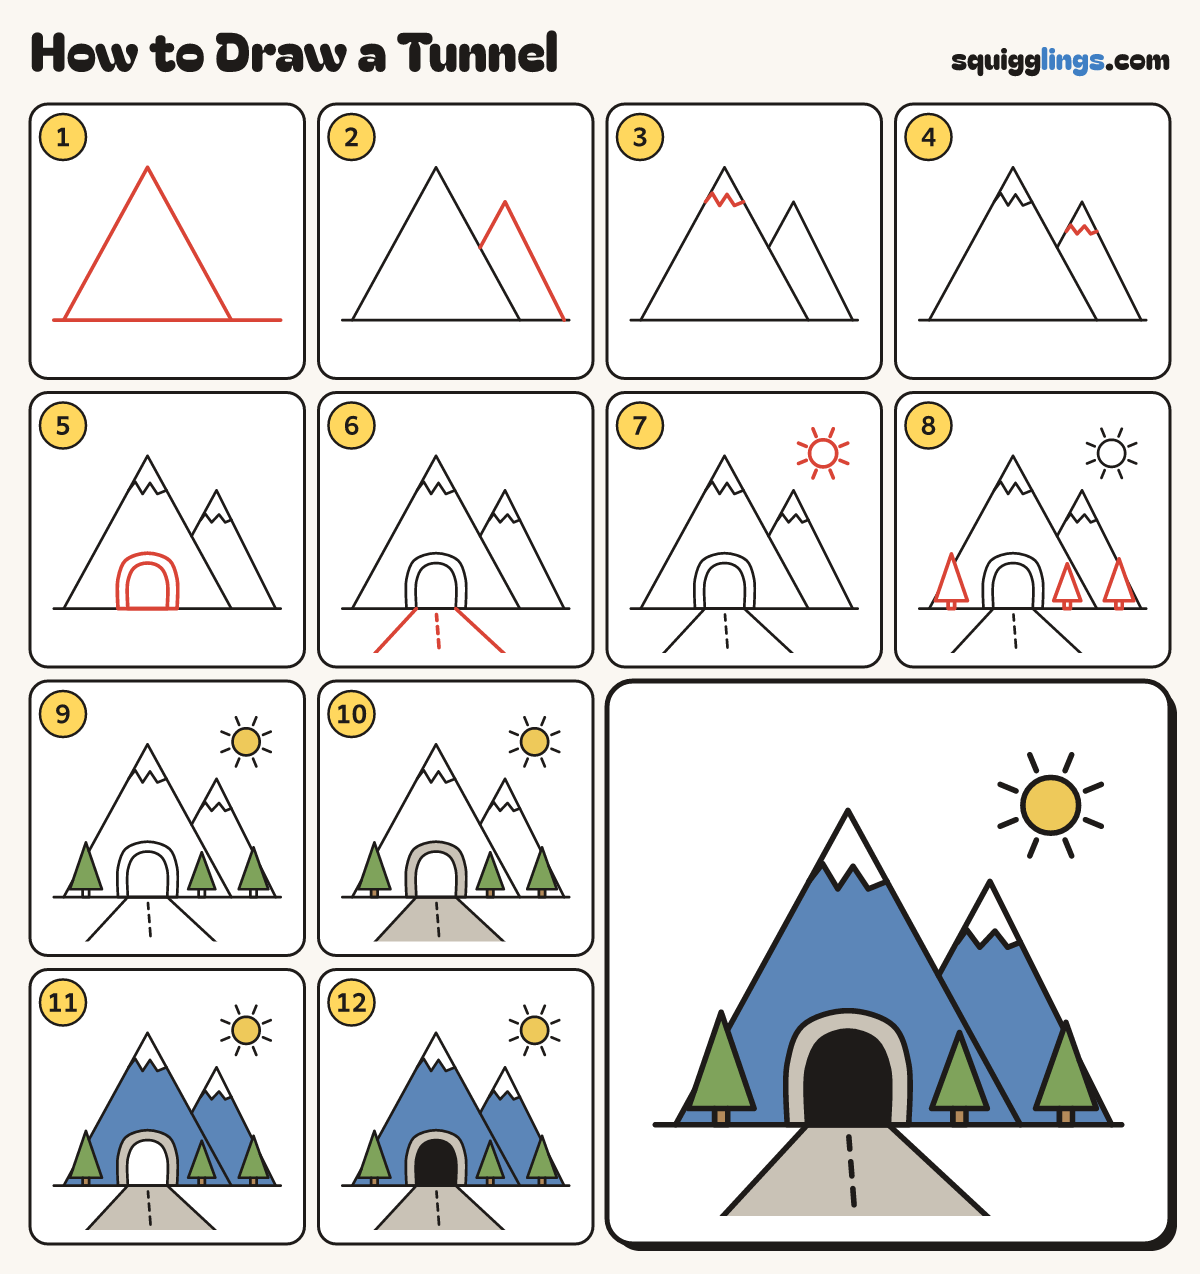
Each picture adds one red line. Draw that line, then scroll to the next picture. Rub out any dashed helper lines at the end. First up: ground and big peak.
Step 1: Ground and big peak
Draw a low ground line. Start on it, slant up to a tall point, then back down to the ground.
Step 2: A second peak
Start on the big mountain's right slope. Slant up to a lower point, then back down to the ground.
Step 3: Big peak snow
A little way down from the big point draw a zig-zag across from the left slope to the right slope.
Step 4: Small peak snow
Do the same on the small peak: a zig-zag across from its left slope to its right slope.
Step 5: The tunnel
At the foot of the big mountain draw a rainbow arch, ground to ground. Add a smaller arch inside.
Tip The tunnel goes right through the mountain!
Step 6: The road
From each bottom corner of the hole, slant a line down to the paper's edge. Add 3 dashes.
Step 7: Sun and rays
Near the top right corner, away from the edges, draw a small round sun with 8 short rays.
Step 8: Pine trees
Draw 3 pointy triangle trees by the mountains. Start under each and draw a trunk down to the ground.
Step 9: Yellow sun, green trees
Colour the sun yellow and the 3 little trees leaf green.
Step 10: Brown trunks, grey arch
Colour the tree trunks wood brown, then the stone arch and the road grey.
Step 11: Blue mountains, white snow
Colour both mountains blue around the tunnel and trees, below the zig-zags. Leave the snow caps white.
Step 12: Black tunnel hole
Colour the hole inside the arch black, deep and dark. Your tunnel is done!
Your finished drawing
Follow the steps above and this is where you end up: a tunnel, drawn by you.
Every step in one picture