Watch it draw itself · tap to replay
How to Draw a Classroom
Draw a classroom in 13 easy steps, about 10 minutes. Free, with a printable worksheet.
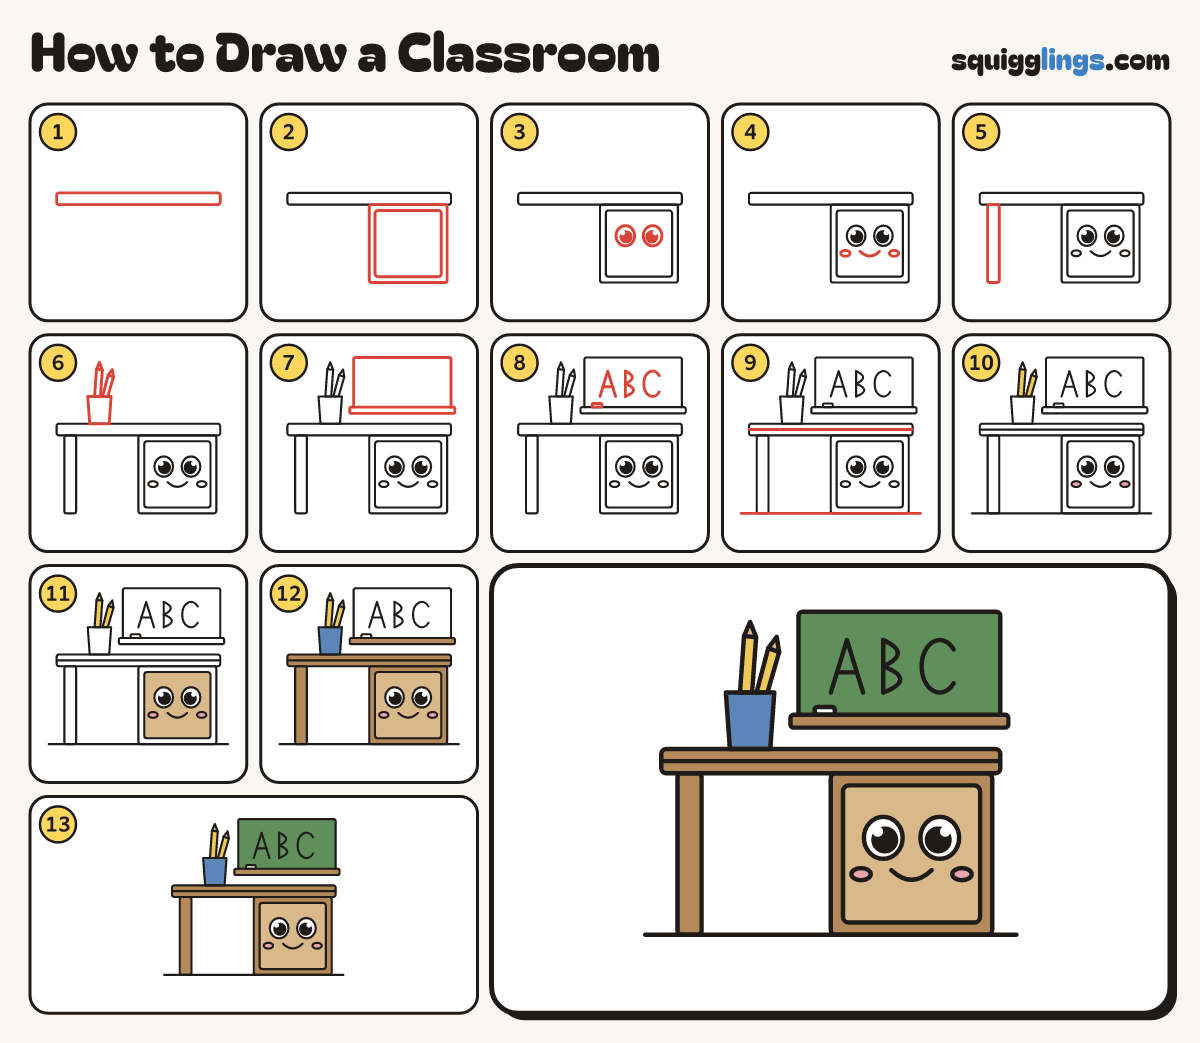
Each picture adds one red line. Draw that line, then scroll to the next picture. Rub out any dashed helper lines at the end. First up: the desk top.
Step 1: The desk top
Above the middle of your paper draw a long flat plank with soft corners, nearly edge to edge.
Step 2: The drawer
Under the right half of the plank draw a drawer box. Draw a soft drawer front just inside it.
Step 3: Two big eyes
On the drawer front, a little above the middle, draw 2 big round eyes with a dot and a shine.
Step 4: Smile and cheeks
Under the eyes draw a small U smile with a cheek at each end.
Step 5: The leg
Under the plank's left end draw a thin leg down to the floor.
Step 6: Pencil cup
On the left of the desk draw a tall cup. Start inside it and draw 2 pencils up to points.
Step 7: The chalkboard
On the wall behind the right half of the desk draw a big soft-cornered box. Add a skinny ledge below.
Step 8: ABC and chalk
On the board write 3 big letters: A, B and C. Lay a tiny stick of chalk on the ledge.
Tip Big wobbly letters are fine: it is chalk!
Step 9: Edge and floor
Draw a line along the plank, half way down, for the edge. Add a floor line under the desk.
Step 10: Cheeks and pencils
Colour the cheeks pink and the pencils yellow.
Step 11: Tan drawer and tips
Colour the drawer front tan around the cheeks, leaving the eyes white. Colour the pencil tips tan too.
Step 12: Blue cup, wood desk
Colour the pencil cup blue. Colour the plank, leg, ledge and the box around the drawer front wood brown.
Step 13: Green board
Colour the chalkboard dark green, going round the letters and the chalk. Your classroom is ready!
Your finished drawing
Follow the steps above and this is where you end up: a classroom, drawn by you.
Every step in one picture