Watch it draw itself · tap to replay
How to Draw a Tulip Bouquet
Draw a tulip bouquet in 12 easy steps, about 9 minutes. Free, with a printable worksheet.
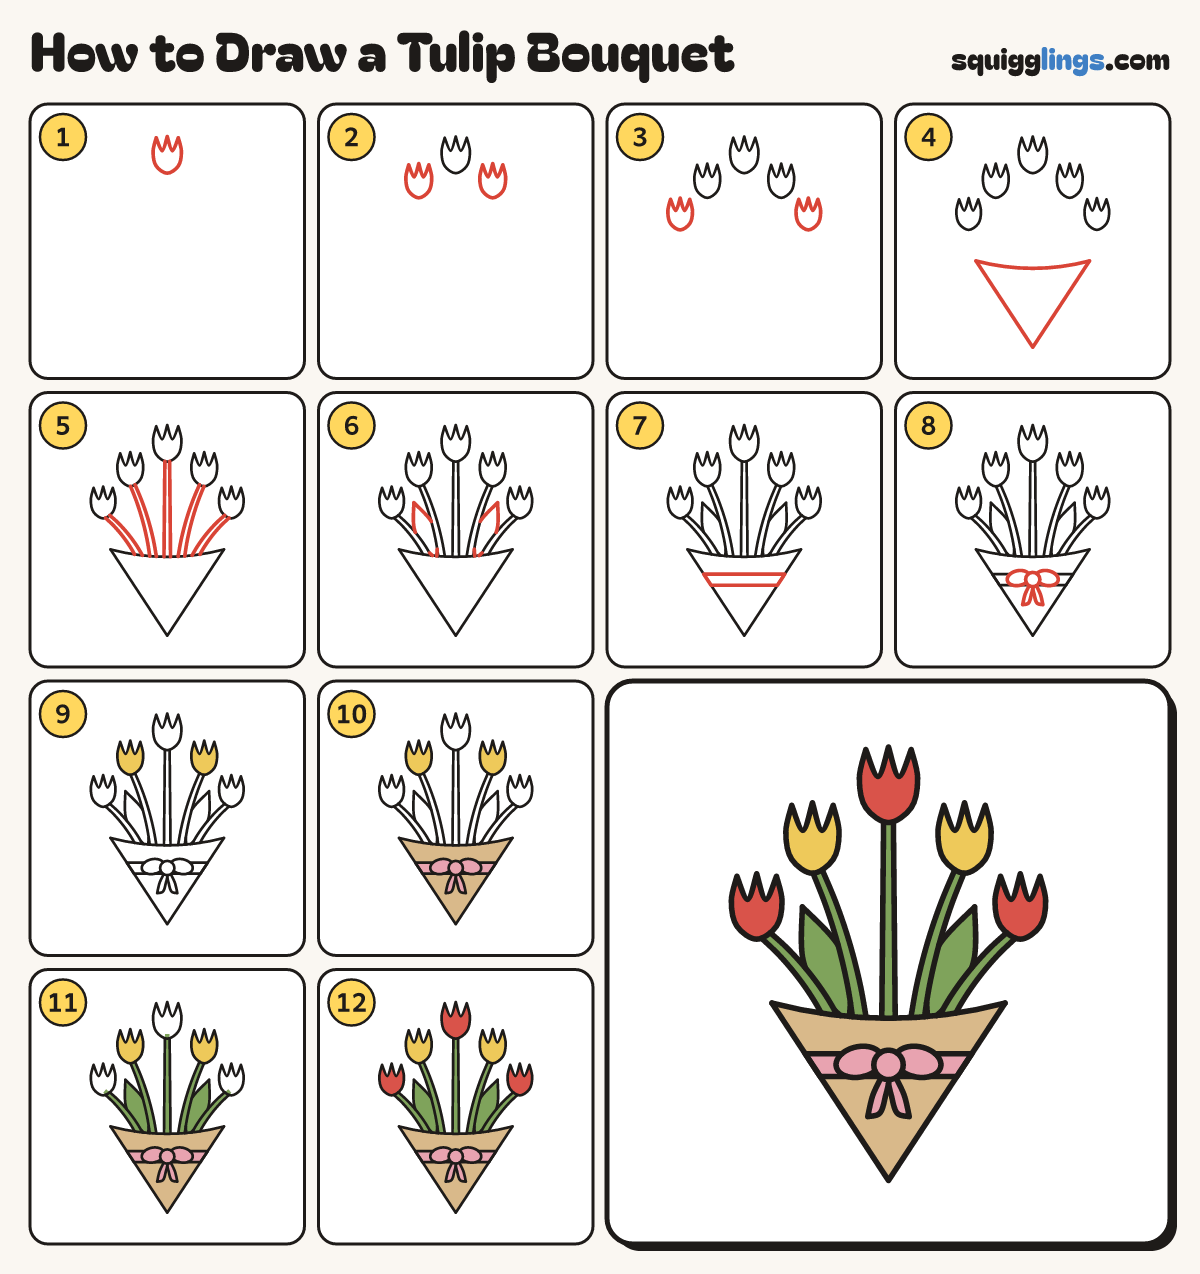
Each picture adds one red line. Draw that line, then scroll to the next picture. Rub out any dashed helper lines at the end. First up: the top tulip.
Step 1: The top tulip
High in the middle, draw a tulip: a round U cup with 3 points on top, walnut sized.
Tip Every tulip is the same shape: a round cup with 3 points.
Step 2: Two more tulips
Lower on the left, draw the same tulip cup a little smaller. Draw one lower on the right too.
Step 3: The outside tulips
Lower still, draw a tulip far out on the left and one far out on the right, making a fan.
Step 4: The paper cone
Under the tulips, draw a sagging curve. From its ends, slope 2 lines down to meet in a point.
Step 5: The stems
From under each tulip, draw a curving stem leaning in. Stop them side by side on the cone's top edge.
Step 6: Two long leaves
On each side, start on the cone's top edge. Draw a long pointed leaf out, stopping below the tulips.
Step 7: A ribbon band
High on the cone, draw 2 lines a finger apart, from one side to the other.
Step 8: A soft bow
On the band, draw a round knot with an oval loop each side. Hang 2 ribbon tails from the knot.
Step 9: Yellow tulips
Go over your lines, then colour the 2 middle tulips yellow.
Step 10: Tan paper, pink ribbon
Colour the paper cone tan around the ribbon. Colour the ribbon, bow and tails pink.
Step 11: Green stems and leaves
Colour the stems and the 2 leaves leaf green.
Step 12: Red tulips
Colour the top tulip and the 2 outside tulips red. Your tulip bouquet is done!
Your finished drawing
Follow the steps above and this is where you end up: a tulip bouquet, drawn by you.
Every step in one picture