Watch it draw itself · tap to replay
How to Draw a Cacao Tree
Draw a cacao tree in 10 easy steps, about 8 minutes. Free, with a printable worksheet.
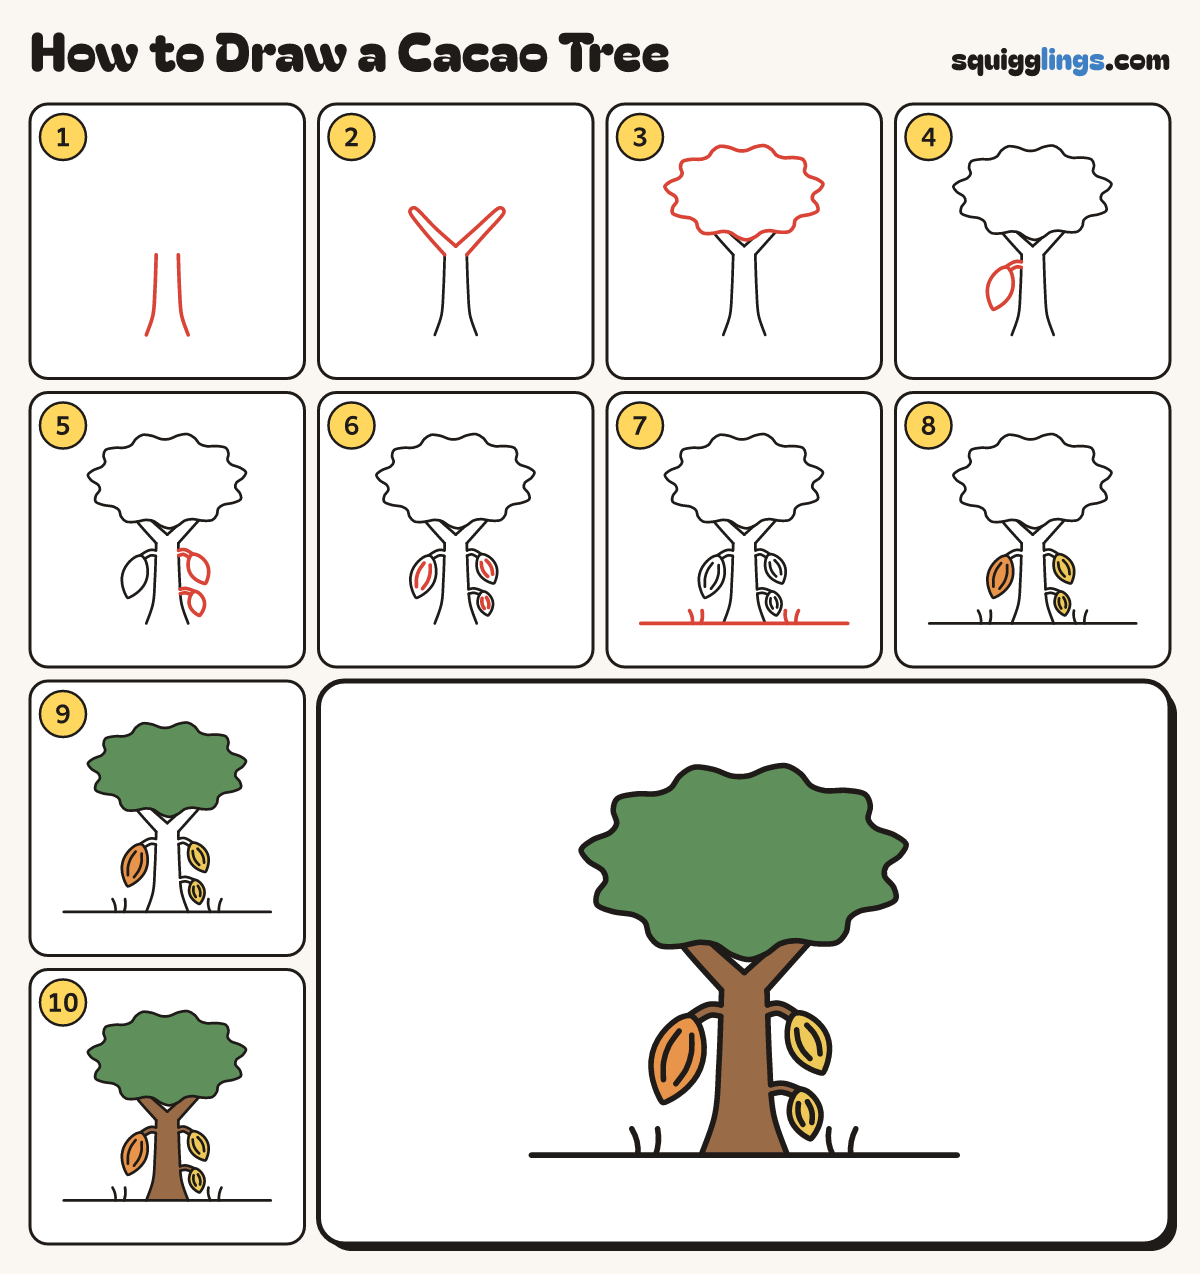
Each picture adds one red line. Draw that line, then scroll to the next picture. Rub out any dashed helper lines at the end. First up: the trunk.
Step 1: The trunk
In the middle of your paper start on the ground. Draw each side of a trunk up to the fork.
Tip Cacao pods, where chocolate comes from, grow right out of the trunk.
Step 2: Two branches
Start at the top of the trunk. Draw 2 branches forking up and out, each ending in a rounded tip.
Step 3: The leafy top
Over the branches draw a big round leafy top with soft bumps all round. Cover the branch tips.
Step 4: A big pod
Left of the trunk draw a big fat pod, pointed at the bottom. Join it on with a short stalk.
Step 5: Two more pods
On the right draw a middle-sized pod up high and a small one down low, each on a short stalk.
Step 6: Ridges
Start near the top of each pod and draw 2 curved ridge lines down its sides. Stop near the point.
Step 7: Ground and grass
Draw the ground line from well left to well right through the trunk bottom. Flick grass blades up each side.
Step 8: Yellow and orange pods
Go over your lines, then colour the 2 smaller pods yellow and the big pod orange.
Step 9: Green top
Colour the leafy top green.
Step 10: Brown trunk
Colour the trunk, branches and stalks brown, up to the green top and the pods. Your cacao tree is done!
Your finished drawing
Follow the steps above and this is where you end up: a cacao tree, drawn by you.
Every step in one picture