Watch it draw itself · tap to replay
How to Draw a Trumpet Vine
Draw a trumpet vine in 12 easy steps, about 9 minutes. Free, with a printable worksheet.
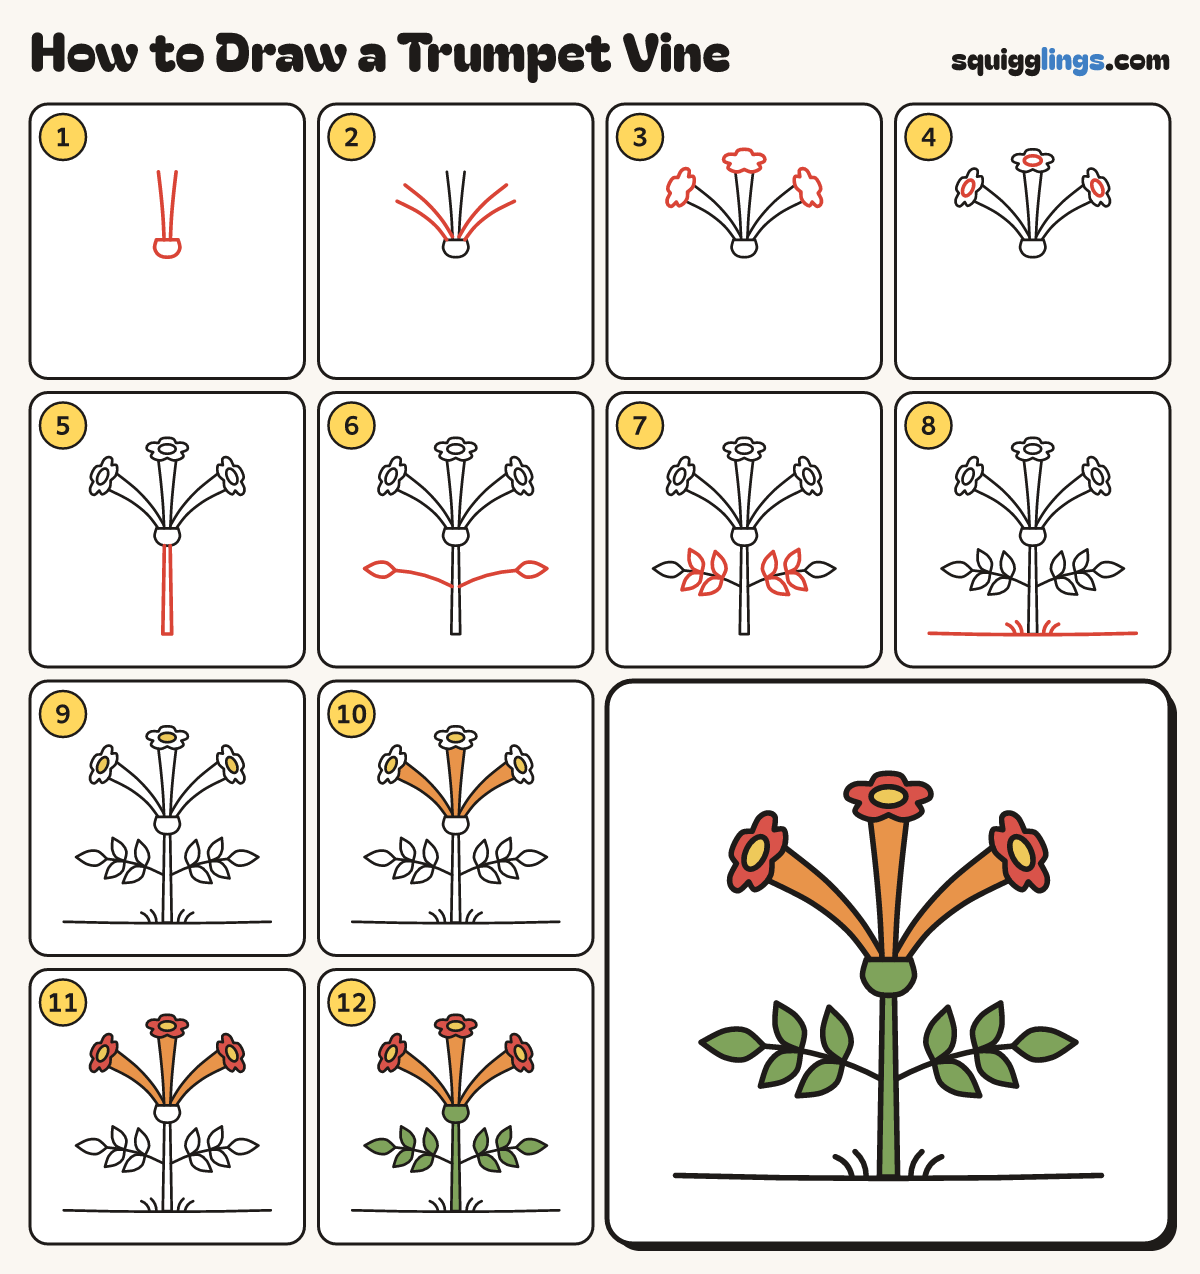
Each picture adds one red line. Draw that line, then scroll to the next picture. Rub out any dashed helper lines at the end. First up: the first trumpet.
Step 1: The first trumpet
Above the middle draw a small cup. From its top draw 2 lines up to near the top, spreading apart.
Tip Narrow at the cup, wide at the far end, like a trumpet.
Step 2: Two side trumpets
From the cup draw a trumpet curving out to each side the same way, tucked behind the first.
Step 3: Frilly mouths
Round the end of each trumpet draw a wide frilly ring with 5 round bumps.
Tip Start each ring on the 2 trumpet lines, so it closes the end.
Step 4: Inside the mouths
Inside each frilly ring draw an oval hole, where the trumpet opens.
Step 5: The stem
Start under the cup. Draw a thin stem of 2 lines down to near the bottom, a little wider there.
Tip Keep the stem thin, so the big trumpets stand out.
Step 6: Leaf stalks
From halfway down the stem draw a thin stalk out to each side, with a pointed leaf on its end.
Step 7: Pairs of leaves
Along each stalk draw 2 pairs of pointed leaves, one above and one below each time.
Tip A trumpet vine leaf is really 5 little leaves on one stalk.
Step 8: Ground and grass
Start near the left edge. Draw a ground line through the stem's foot, stopping near the right edge. Add grass.
Step 9: Yellow middles
Go over your lines, then colour the 3 oval holes yellow.
Step 10: Orange trumpets
Colour the 3 trumpets orange, up to the frilly rings.
Step 11: Red frills
Colour the 3 frilly rings red, around the yellow middles.
Tip Colour round the yellow holes, not over them.
Step 12: Green stem and leaves
Colour the cup, the stem and all 10 leaves green. Your trumpet vine is done!
Your finished drawing
Follow the steps above and this is where you end up: a trumpet vine, drawn by you.
Every step in one picture