Watch it draw itself · tap to replay
How to Draw a Trophy
Draw a trophy in 12 easy steps, about 9 minutes. Free, with a printable worksheet.
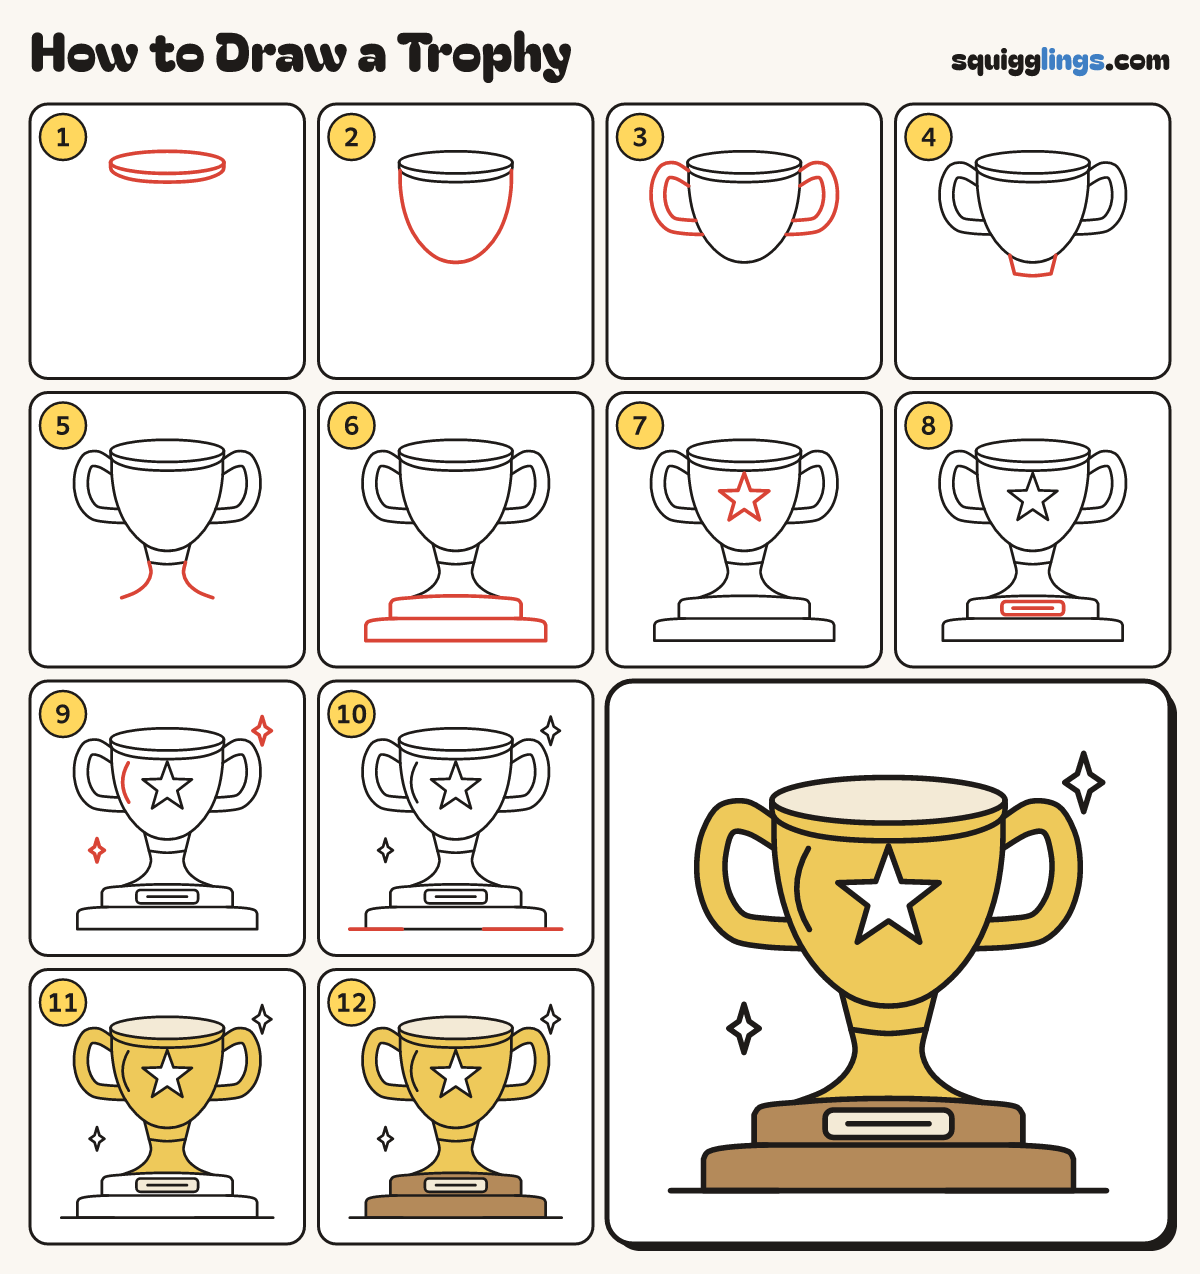
Each picture adds one red line. Draw that line, then scroll to the next picture. Rub out any dashed helper lines at the end. First up: the rim.
Step 1: The rim
Near the top, draw a long flat oval. From its left end, draw a smile under it to the right.
Tip The smile makes the rim look thick and shiny.
Step 2: Big bowl
Start at the left of the lip. Draw a big chubby tulip bowl down and round, up to the right.
Step 3: Two chubby handles
On each side, start under the lip. Draw a thick C handle out and down, stopping on the bowl.
Tip Thick like a mug handle, the same all the way round.
Step 4: The collar
Start under the bowl, left of middle. Draw a short collar down, across, and up to the bowl.
Step 5: The stem
Start at each bottom corner of the collar. Draw a gentle S down and out, stopping where it spreads wide.
Step 6: Chunky base
Under the stem, draw a wide brick with a bowed lid. Under that, draw a longer fatter brick.
Step 7: A big star
On the front of the bowl, draw a big 5-point star, nearly half as wide as the bowl.
Step 8: The name plate
On the top brick, under the stem, draw a rounded rectangle. Add one line across its middle.
Step 9: Shine and sparkles
Under the lip on the left, draw one curved shine line down the bowl. Add 2 sparkles beside the cup.
Step 10: The ground
Draw a ground line out from both sides of the base.
Step 11: Cream and yellow
Colour the top oval and plate cream. Colour the rim, bowl, handles, collar and stem yellow. Leave the star white.
Step 12: Wood brown base
Colour both bricks of the base wood brown, around the name plate.
Your finished drawing
Follow the steps above and this is where you end up: a trophy, drawn by you.
Every step in one picture