Watch it draw itself · tap to replay
How to Draw a Tree Trunk
Draw a tree trunk in 12 easy steps, about 9 minutes. Free, with a printable worksheet.
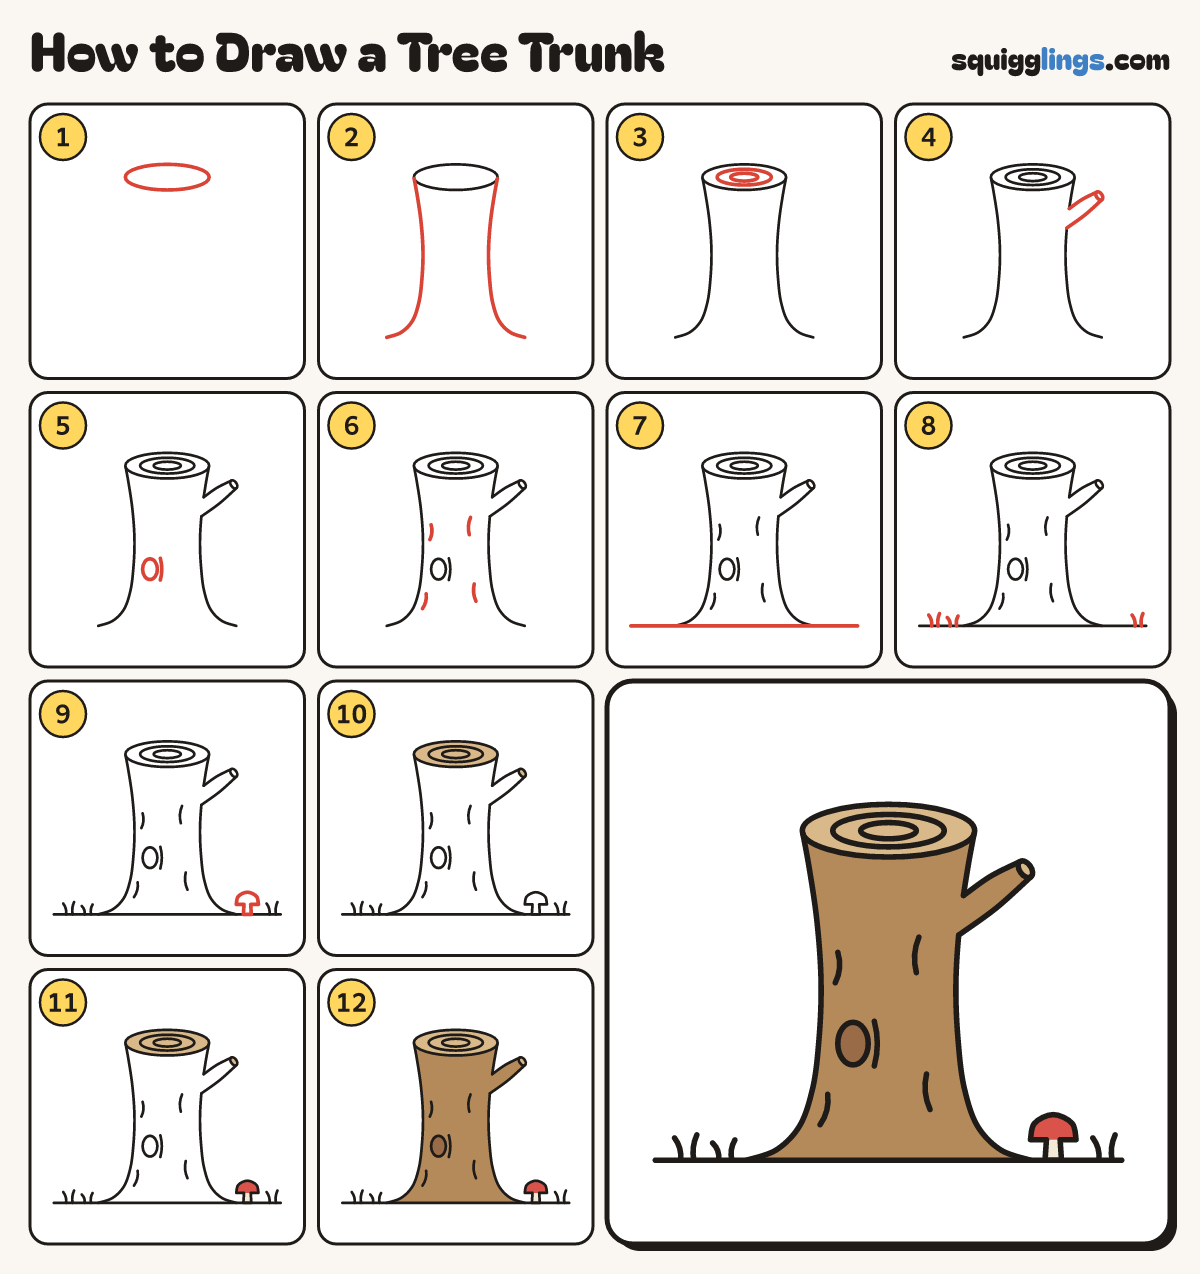
Each picture adds one red line. Draw that line, then scroll to the next picture. Rub out any dashed helper lines at the end. First up: the cut top.
Step 1: The cut top
Near the top of your paper draw a wide flat oval, wider than your hand. This is the cut top.
Tip Like a plate seen from the side.
Step 2: The trunk
Start at each end of the oval. Draw a long line down, curving out into a root foot.
Step 3: Tree rings
Inside the cut top draw 2 smaller flat ovals, one inside the other.
Step 4: A branch stub
From the trunk's right side, draw a stub up to a small oval. Rub out the trunk line inside it.
Tip Make the stub thinner at its oval end.
Step 5: Knot hole and grain
Low on the trunk draw a tall egg for a knot hole. Add a curved line hugging its right side.
Step 6: Bark lines
Draw 4 short curved bark dashes down the trunk, 2 on each side.
Step 7: The ground
Draw a long ground line from the left edge to the right edge, under both root feet.
Step 8: Grass
On the ground draw 3 tufts of grass, each 2 short blades leaning apart.
Step 9: A mushroom
By the right root, start on the ground and draw a little umbrella mushroom. Stop back on the ground.
Step 10: Tan cut tops
Go over your lines. Colour the cut top and the little stub end tan, round the rings.
Step 11: Red mushroom
Colour the mushroom cap red and the stem cream.
Step 12: Wood-brown trunk
Colour the trunk and stub wood brown, then the knot hole darker brown. Your tree trunk is done!
Your finished drawing
Follow the steps above and this is where you end up: a tree trunk, drawn by you.
Every step in one picture