Watch it draw itself · tap to replay
How to Draw a Lily of the Valley
Draw a lily of the valley in 11 easy steps, about 8 minutes. Free, with a printable worksheet.
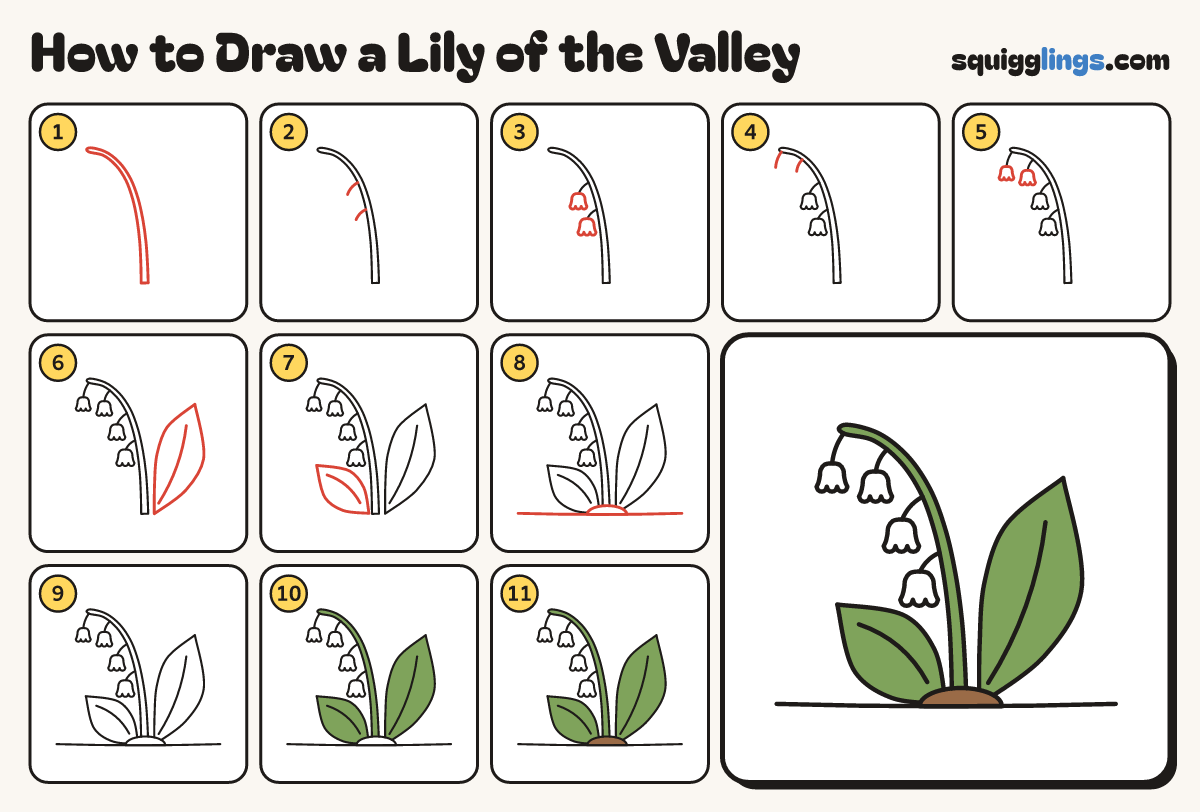
Each picture adds one red line. Draw that line, then scroll to the next picture. Rub out any dashed helper lines at the end. First up: the stalk.
Step 1: The stalk
Start at the bottom middle. Draw a stalk up, arching over to the left, getting thinner to a round tip.
Tip The bells hang under an arching stalk, like a shepherd's crook.
Step 2: Two little hangers
From the underside of the arch draw 2 thin hangers curving out and down, where the bells will hang.
Step 3: Two bells
On the end of each hanger draw a little bell hanging down, with a wavy bottom of 3 round bumps.
Step 4: Two more hangers
Further along the arch, toward its tip, draw 2 more drooping hangers, one short and one longer.
Step 5: Two more bells
On each draw a bell, a touch smaller than the last, with the same wavy 3-bump bottom.
Step 6: A big leaf
Just right of the stalk's bottom draw a big pointed leaf leaning up right. Add a vein down the middle.
Step 7: A second leaf
Left of the stalk's bottom draw a shorter pointed leaf leaning up left, with a vein down the middle.
Step 8: Soil and ground
Draw a small soil hill over the plant's bottom. Run a ground line under it, almost edge to edge.
Step 9: White bells
Go over your lines. Colour all 4 bells with a white crayon so they stand out.
Step 10: Green stalk and leaves
Colour the stalk and both leaves leaf green, right down to the soil.
Step 11: Brown soil
Colour the soil hill brown. Go over your lines and your lily of the valley is done!
Your finished drawing
Follow the steps above and this is where you end up: a lily of the valley, drawn by you.
Every step in one picture