Watch it draw itself · tap to replay
How to Draw Tree Rings
Draw tree rings in 11 easy steps, about 8 minutes. Free, with a printable worksheet.
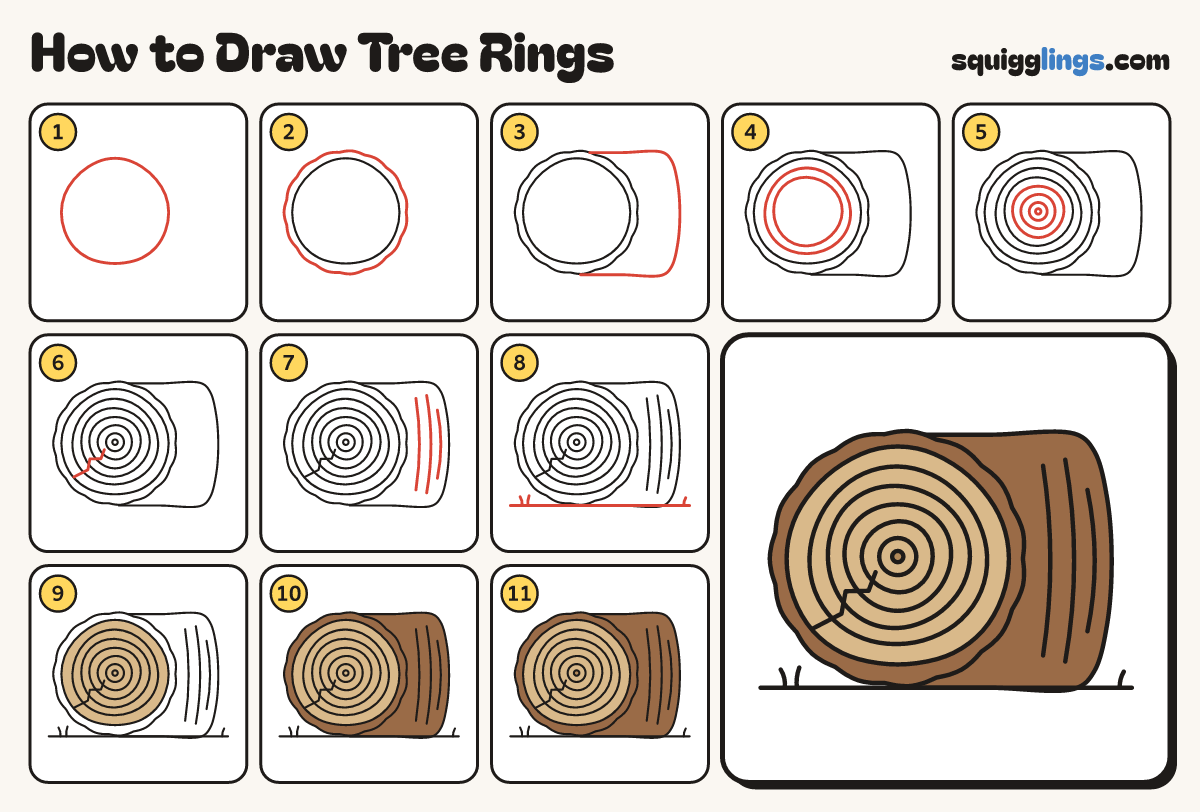
Each picture adds one red line. Draw that line, then scroll to the next picture. Rub out any dashed helper lines at the end. First up: round log end.
Step 1: Round log end
On the left draw a big wobbly circle for the end of a log, almost as tall as the paper.
Step 2: Bark edge
Around the circle draw a bumpy ring a little bigger, like a lumpy tyre, for the thick bark.
Step 3: Log body
Start on top of the bark. Draw right, round the far end, and back to the bark's bottom.
Step 4: First rings
Inside the circle draw a round ring a little smaller than the edge, and another ring inside that.
Step 5: More rings
Draw 3 more rings inside, each smaller than the last, with a dot right in the middle.
Step 6: A crack
Start low on the circle's left edge. Draw a zigzag crack in toward the middle, stopping before the dot.
Step 7: Bark lines
Along the log body draw 3 gently curved lines from top to bottom for the bark.
Step 8: Ground and grass
Draw a ground line under the log from the left edge across to the right. Flick up 3 grass blades.
Step 9: Tan face
Colour the round end of the log tan, right over the rings, leaving the middle dot.
Step 10: Brown bark
Colour the bark ring and the log body brown.
Step 11: Brown middle dot
Colour the middle dot wood brown. Go over your lines and your tree rings are done!
Your finished drawing
Follow the steps above and this is where you end up: tree rings, drawn by you.
Every step in one picture