Watch it draw itself · tap to replay
How to Draw a Tree Fern
Draw a tree fern in 11 easy steps, about 8 minutes. Free, with a printable worksheet.
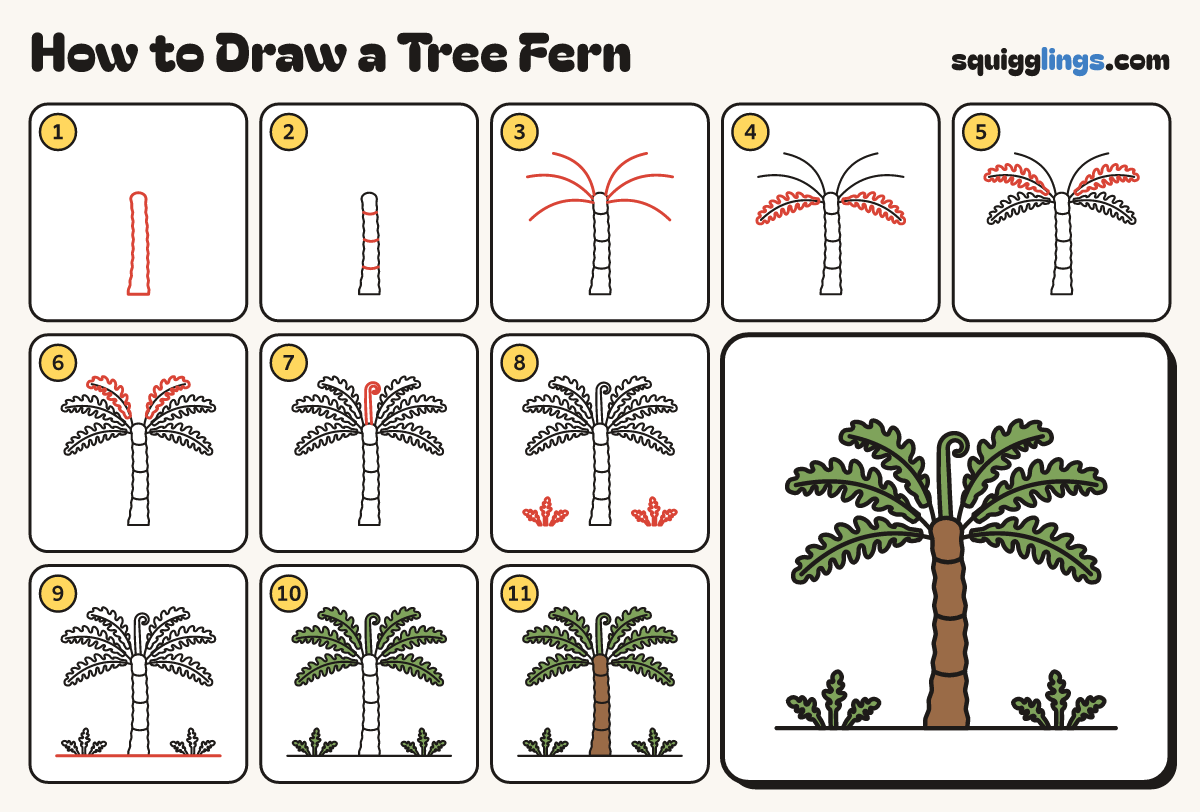
Each picture adds one red line. Draw that line, then scroll to the next picture. Rub out any dashed helper lines at the end. First up: the trunk.
Step 1: The trunk
Down the middle draw a tall trunk with soft bumpy sides, wide at the ground and round on top.
Tip Tree fern trunks are hairy, so keep the bumps soft and small, never spiky.
Step 2: Bark rings
Across the trunk draw 3 short curved lines from side to side, spaced out like rings on the bark.
Step 3: Frond lines
From the round top draw 6 long curved lines, 2 drooping, 2 out to the sides, 2 arching up.
Tip Start the lines spread out along the round top, not all from one spot.
Step 4: Two low fronds
Around the 2 drooping lines draw a comb of round leaflets, biggest in the middle and tiny at the tip.
Tip Cut deep gaps between the leaflets, so each one is its own little finger.
Step 5: Two side fronds
Do the same along the 2 side lines, leaving a small gap above the low fronds.
Step 6: Two top fronds
Add leaflets along the 2 top lines too, so 6 feathery fronds make a crown.
Step 7: A curly baby frond
From the round top draw a thick stem straight up between the top fronds, rolling into a snail curl.
Step 8: Little ferns
At the foot of the trunk draw 2 small ferns, one each side, each 3 leafy fronds fanning out.
Tip Keep the 3 fronds apart, so they only meet at the ground.
Step 9: The ground
Draw the ground line from well left to well right, through the bottom of the trunk and the little ferns.
Step 10: Green fronds
Go over your lines, then colour all the fronds, the curly baby frond and the little ferns green.
Step 11: Brown trunk
Colour the trunk brown, and your tree fern is done!
Your finished drawing
Follow the steps above and this is where you end up: a tree fern, drawn by you.
Every step in one picture