Watch it draw itself · tap to replay
How to Draw a Trash Bag
Draw a trash bag in 10 easy steps, about 8 minutes. Free, with a printable worksheet.
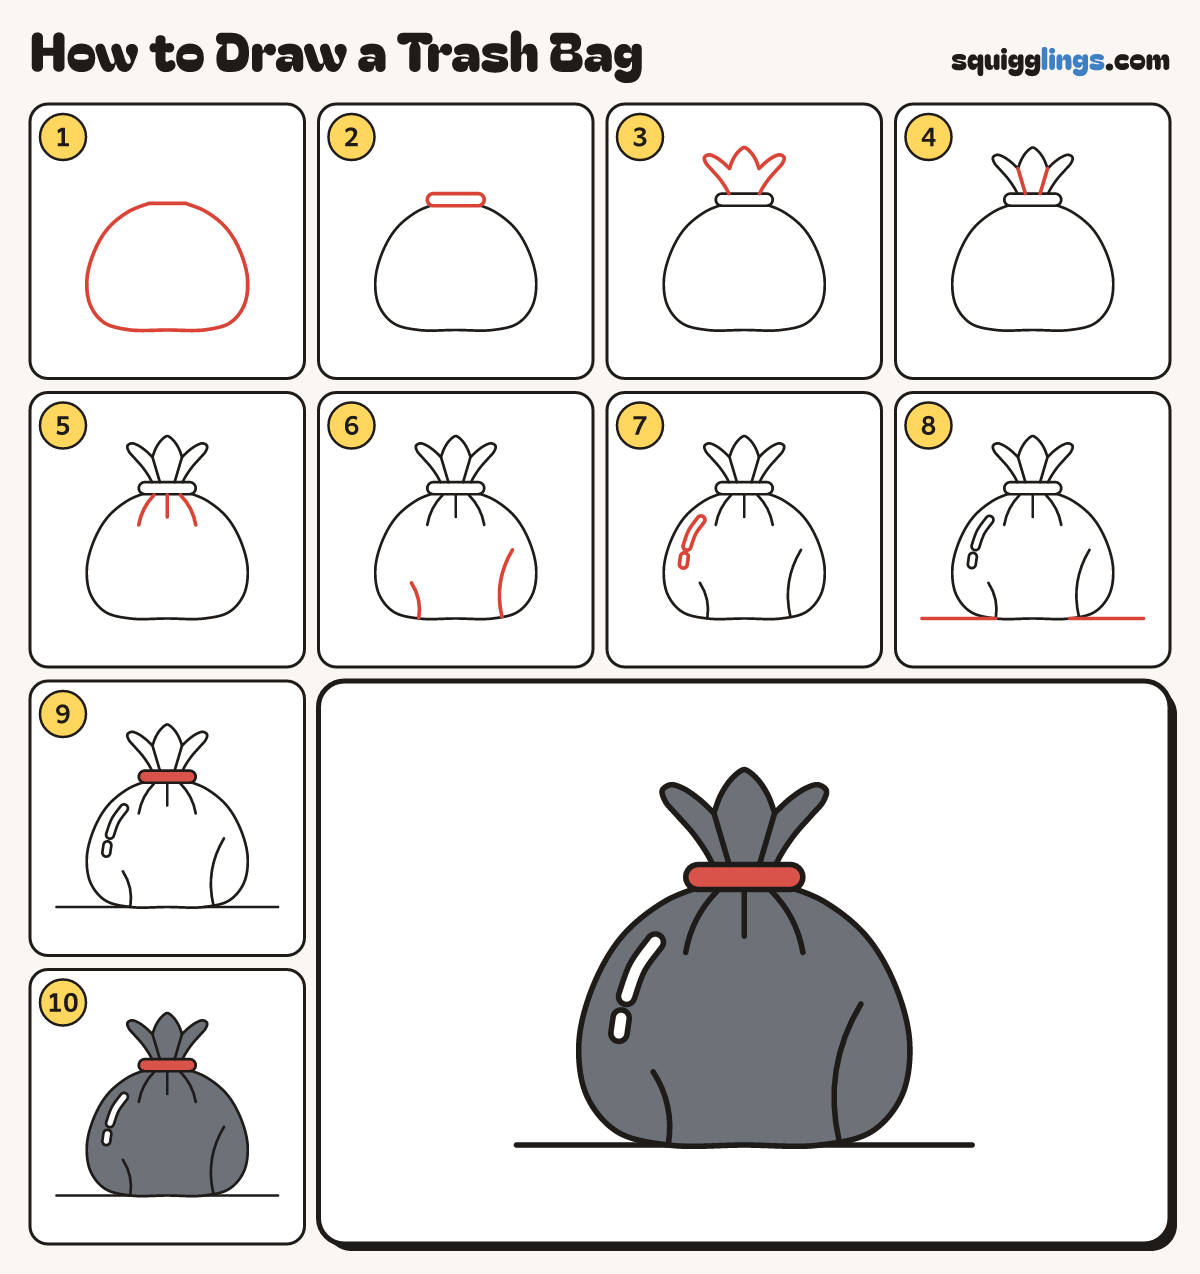
Each picture adds one red line. Draw that line, then scroll to the next picture. Rub out any dashed helper lines at the end. First up: the fat bag.
Step 1: The fat bag
In the middle of your paper draw a fat round bag with a flat bottom and a narrow flat top.
Tip Make it bulge out wide, so it looks stuffed full.
Step 2: The tie
Across the narrow top draw a short fat band with round ends for the tie.
Tip Let the band poke out a little past each side of the neck.
Step 3: The floppy top
From the tie draw 2 sides fanning up and out. Join them with 3 soft floppy points.
Tip The middle point stands up and the outer two lean out.
Step 4: Gather lines
Start at each dip between the points. Draw a line down, stopping on the tie.
Step 5: Neck creases
Start under the tie. Draw 3 short lines fanning down, stopping a finger below.
Step 6: Fold lines
Start on the bottom line. Draw a curved fold line up each side. Make the right one longer.
Tip Each fold bows out the same way as the side of the bag.
Step 7: Shiny marks
High on the left side draw a long thin sausage that follows the edge. Add a short one below it.
Tip These stay white, to make the plastic look shiny.
Step 8: The ground
Start left of the bag. Draw a straight line under it, stopping out past the right side.
Step 9: Red tie
Go over your lines. Colour the tie red.
Step 10: Dark grey bag
Colour the bag and its floppy top dark grey. Go around the 2 shiny marks and leave them white.
Your finished drawing
Follow the steps above and this is where you end up: a trash bag, drawn by you.
Every step in one picture