Watch it draw itself · tap to replay
How to Draw Fairy Wings and Wand
Draw fairy wings and wand in 12 easy steps, about 9 minutes. Free, with a printable worksheet.
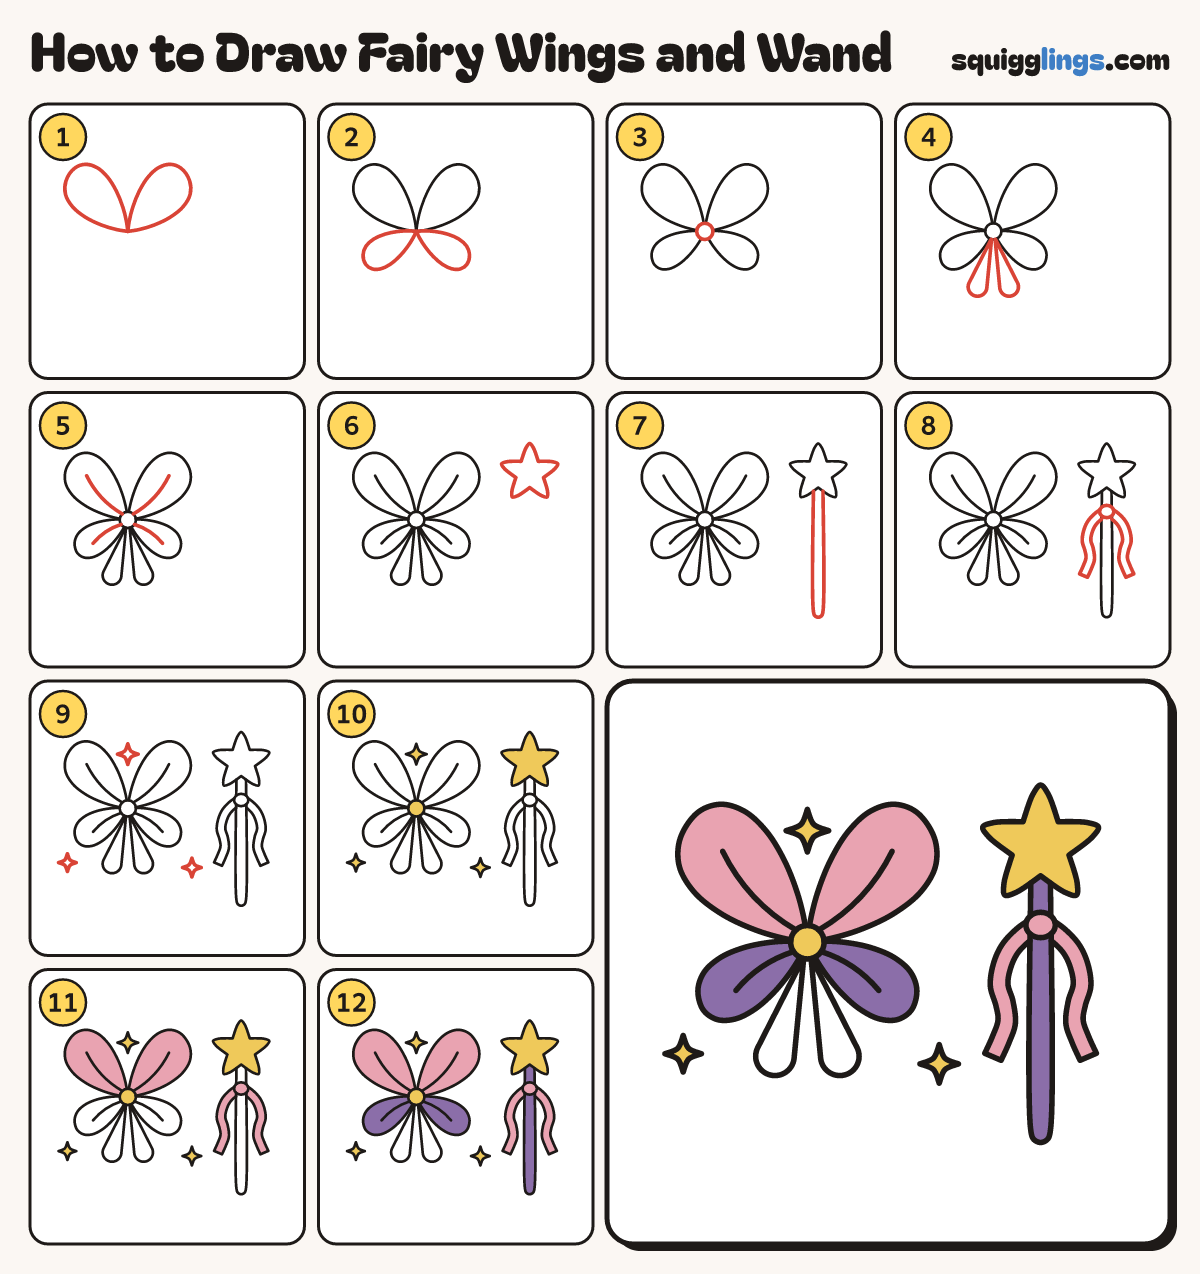
Each picture adds one red line. Draw that line, then scroll to the next picture. Rub out any dashed helper lines at the end. First up: top wings.
Step 1: Top wings
Left of the middle draw 2 big wings. They meet in a point at the bottom, like a V.
Tip Each wing is pointed at the bottom and round at the top.
Step 2: Bottom wings
From the same point draw 2 smaller wings going out to the sides and a little down.
Step 3: Middle button
Draw a small circle over the point where the 4 wings meet.
Tip Rub out the wing points inside the circle.
Step 4: Elastic loops
From the bottom of the circle hang 2 long thin loops. These are the elastic straps for your arms.
Step 5: Wing lines
Inside each wing draw one curved line, from the circle out towards the tip.
Step 6: Wand star
On the right, near the top, draw a star with 5 points. Make each point a little round.
Tip Start with the point at the top and work your way round.
Step 7: The stick
From the bottom of the star draw a long thin stick straight down. Round off the end.
Step 8: Two ribbons
Under the star draw a small round knot on the stick. From it hang 2 wavy ribbons, one each side.
Tip Rub out the stick lines inside the knot.
Step 9: Sparkles
Draw 3 sparkles with 4 points each: one above the button and 2 lower down.
Step 10: Yellow star
Go over your lines. Colour the star, the button and the 3 sparkles yellow.
Step 11: Pink wings
Colour the 2 top wings pink. Colour the knot and the 2 ribbons pink too.
Step 12: Purple wings
Colour the 2 bottom wings and the stick purple. Leave the elastic loops white.
Your finished drawing
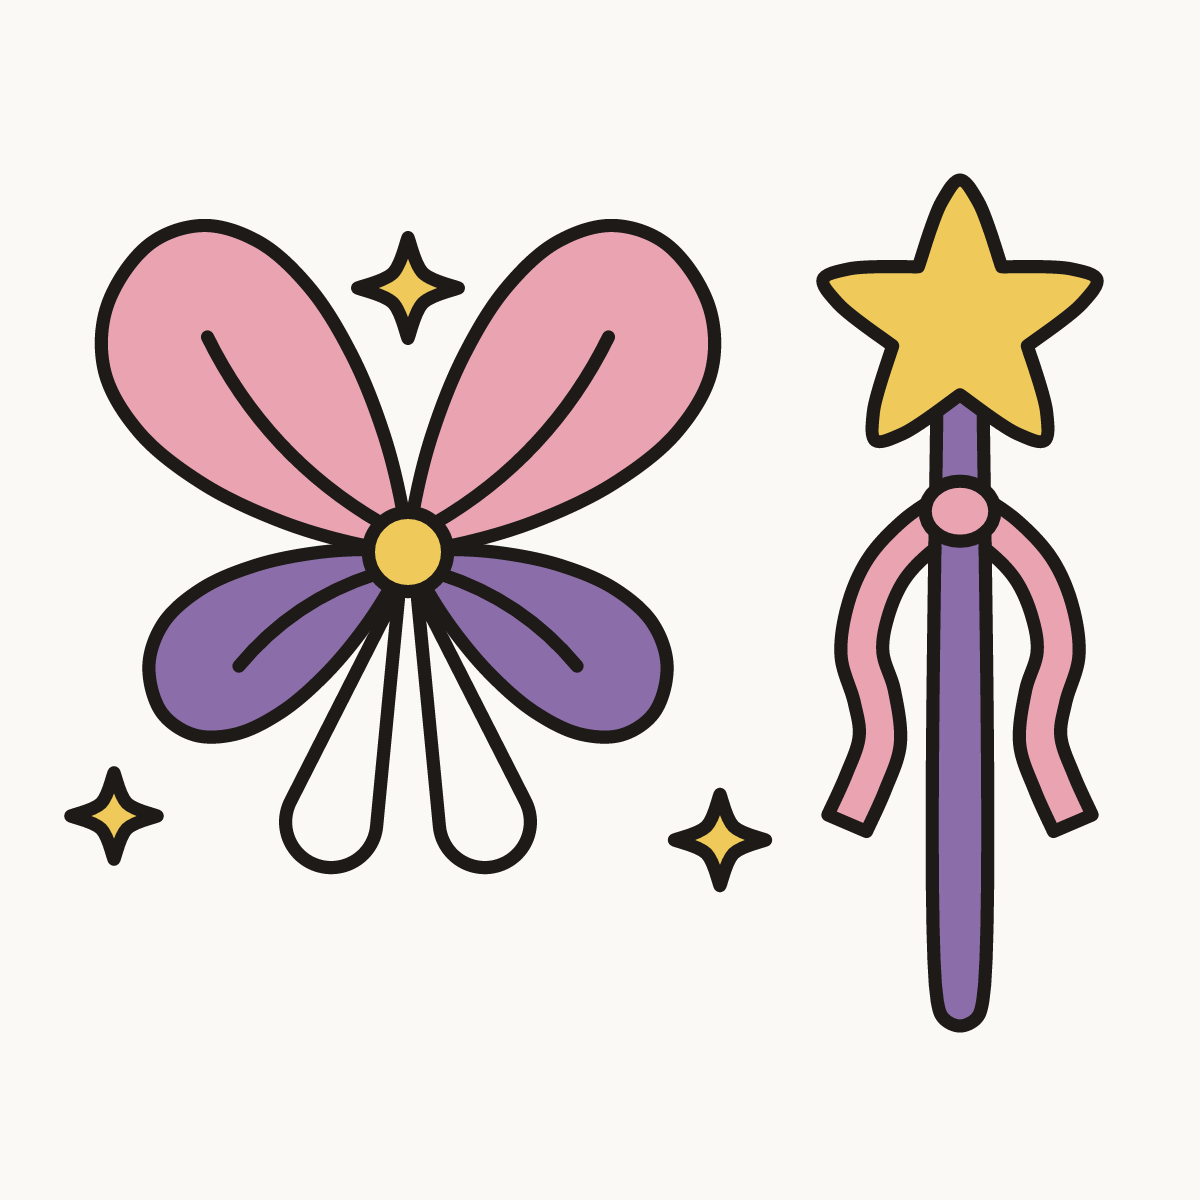
Follow the steps above and this is where you end up: fairy wings and wand, drawn by you.
Every step in one picture