Watch it draw itself · tap to replay
How to Draw a Triangle Instrument
Draw a triangle instrument in 11 easy steps, about 8 minutes. Free, with a printable worksheet.
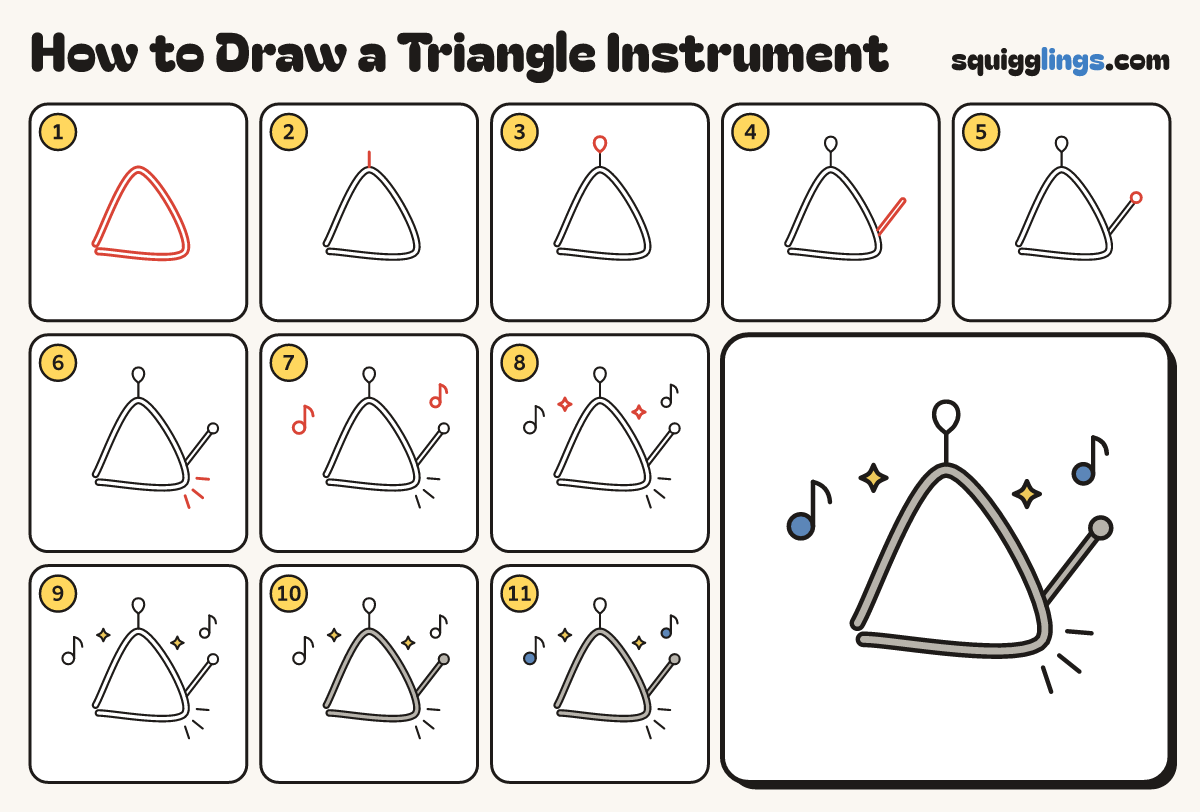
Each picture adds one red line. Draw that line, then scroll to the next picture. Rub out any dashed helper lines at the end. First up: the triangle.
Step 1: The triangle
Draw a big triangle as one thick band. Start near the bottom left corner and stop just short of it.
Tip The little gap at the corner is what makes it a triangle instrument.
Step 2: The hanging cord
From the top point, draw a short cord straight up, stopping a thumb above the triangle.
Step 3: The loop
On top of the cord, draw a little loop of string like a teardrop, its point on the cord.
Step 4: The beater
Start at the triangle's right side and draw a thin stick leaning up and out, like a slash.
Tip The beater touches the triangle, ready to ting it.
Step 5: The handle
On the top end of the beater, draw a small round knob for the handle.
Step 6: Ting lines
Around the bottom right corner, draw 3 short dashes fanning out like little rays, for the ting sound.
Step 7: Music notes
Draw a note on the left and a small one high on the right: a dot, a stem, a flag.
Step 8: Sparkles
Draw 2 sparkle stars near the top of the triangle, one on each side.
Step 9: Yellow sparkles
Go over your lines, then colour the sparkles yellow.
Step 10: Silver triangle
Colour the triangle band, the beater and the handle grey, like shiny metal.
Step 11: Blue notes
Colour the music notes blue. Ting!
Your finished drawing
Follow the steps above and this is where you end up: a triangle instrument, drawn by you.
Every step in one picture