Watch it draw itself · tap to replay
How to Draw a Train Track
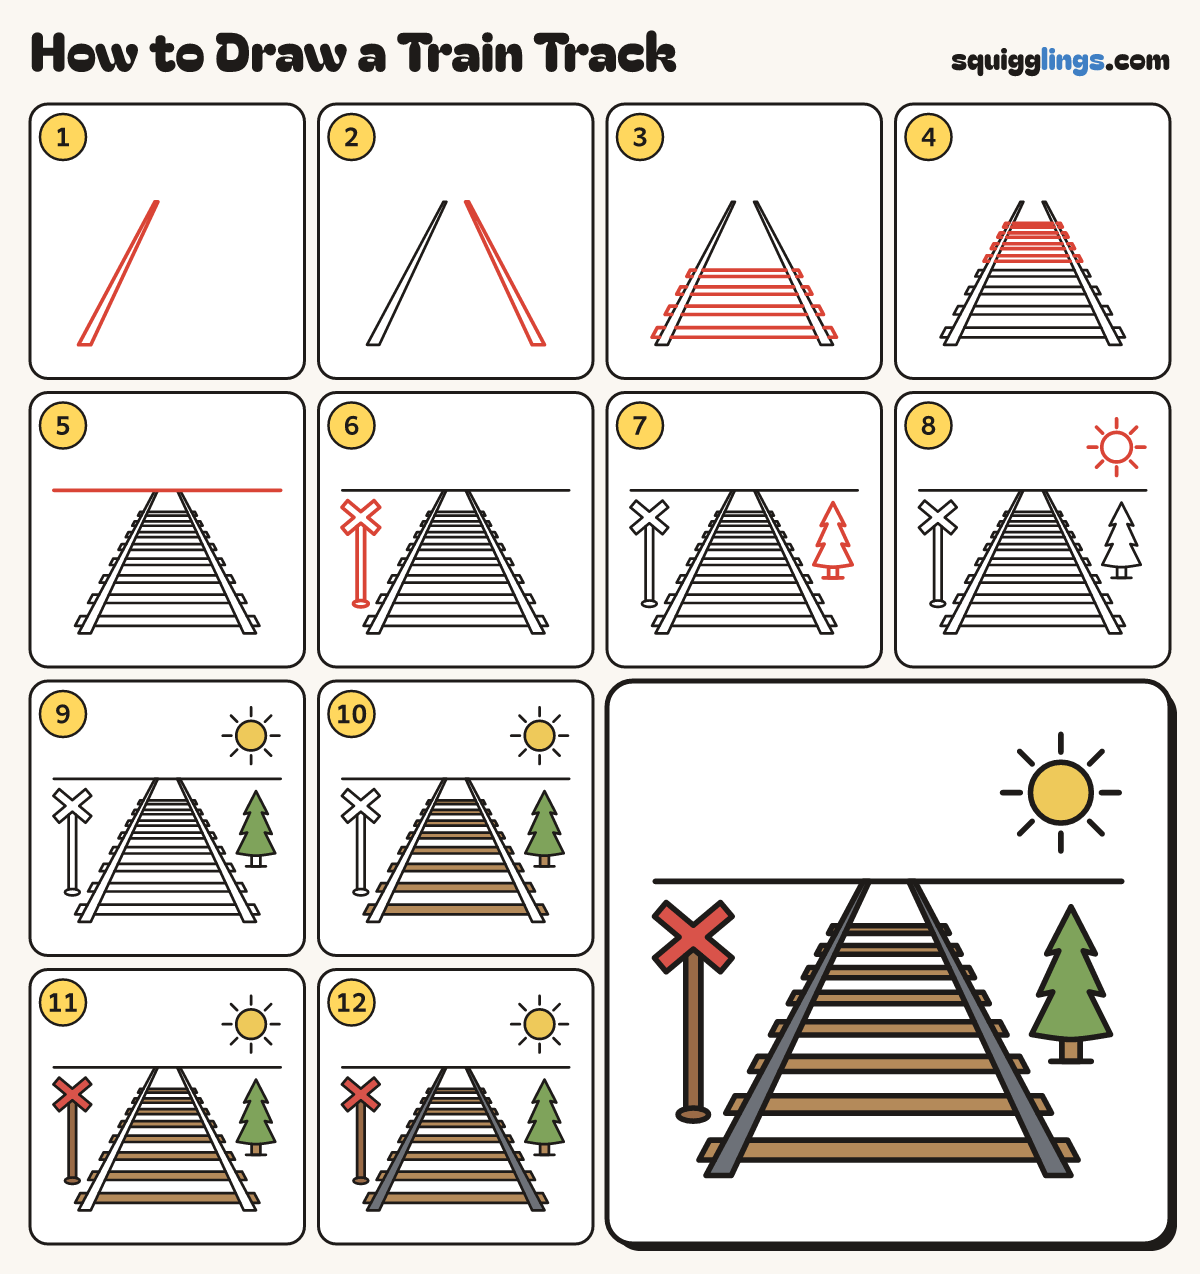
Draw a train track in 12 easy steps, about 9 minutes. Free, with a printable worksheet.
Each picture adds one red line. Draw that line, then scroll to the next picture. Rub out any dashed helper lines at the end. First up: the left rail.
Step 1: The left rail
Start near the bottom left. Draw a long thin bar leaning right, up to a point near the middle.
Tip The rail gets thinner as it goes up, because it is far away.
Step 2: The right rail
Draw a second bar leaning left, from the bottom right up to the first rail's top. A long V!
Step 3: Bottom ties
Near the bottom draw a fat flat bar across under the rails. Draw 3 more above, each thinner and closer.
Step 4: Far ties
Draw 4 more ties between the rails, getting smaller and closer together up to the top.
Tip Far away things look small and squashed together.
Step 5: The horizon
Start near the left edge, level with the rail tops. Draw a straight line across to near the right edge.
Step 6: Crossing sign
Left of the track draw a tall thin post on a flat oval. Put a big X sign on top.
Step 7: A pine tree
Right of the track draw a pine tree: 3 stacked pointy layers and a short trunk on a ground line.
Step 8: The sun
In the top right draw a round sun with 8 short rays.
Step 9: Yellow sun, green tree
Go over your lines, then colour the sun yellow and the pine tree leaf green.
Step 10: Wooden ties
Colour all the ties and the tree trunk wood brown.
Step 11: Red sign, brown post
Colour the X sign red, and the post and its flat base brown.
Step 12: Slate rails
Colour both rails slate grey. Your train track is ready for a train!
Your finished drawing
Follow the steps above and this is where you end up: a train track, drawn by you.
Every step in one picture