Watch it draw itself · tap to replay
How to Draw a Train Crossing
Draw a train crossing in 11 easy steps, about 8 minutes. Free, with a printable worksheet.
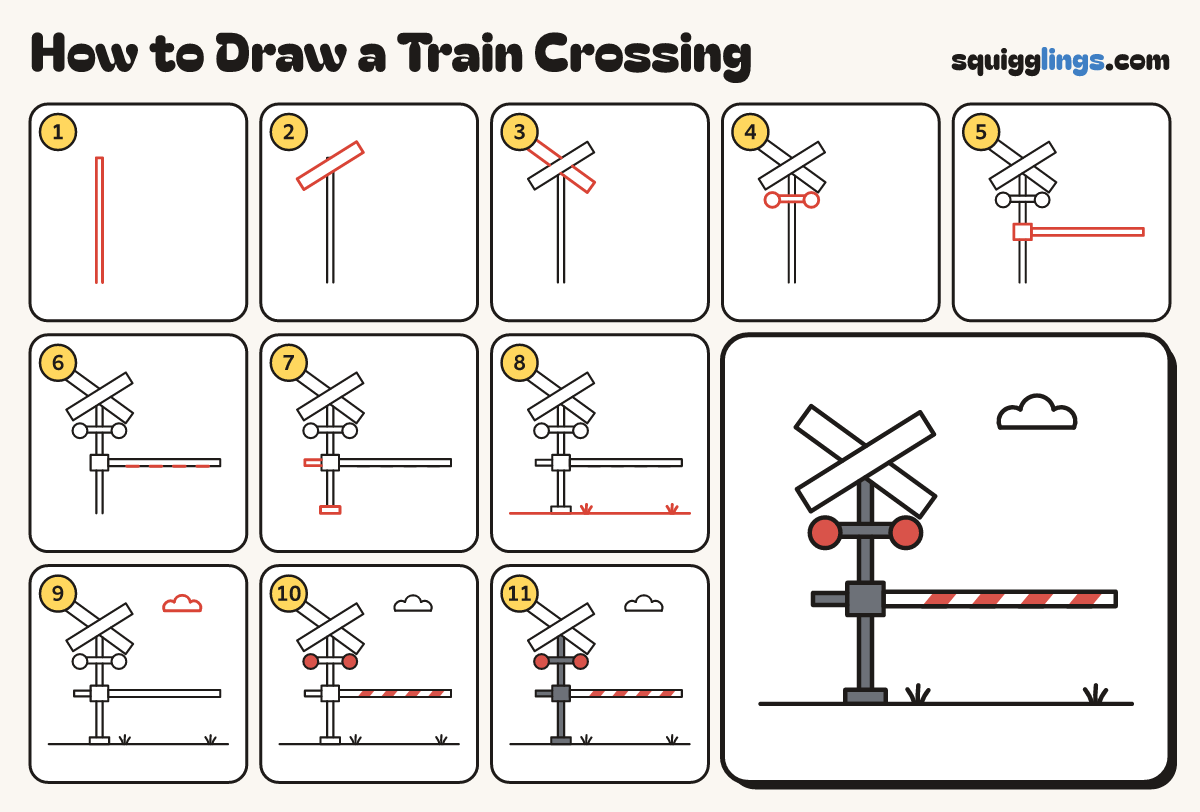
Each picture adds one red line. Draw that line, then scroll to the next picture. Rub out any dashed helper lines at the end. First up: the tall pole.
Step 1: The tall pole
Left of the middle draw a tall thin pole, from low on your paper up to near the top.
Tip Leave the right side empty: the long gate arm swings out that way.
Step 2: First plate
At the top of the pole draw a long flat plate slanting up right, its middle on the pole top.
Step 3: Second plate
Draw a second plate the same size slanting the other way, crossing the first in the middle. A big X!
Tip The X is the sign that says a railway crosses here.
Step 4: Two lights
Under the X draw a short flat bar across the pole. Hang a round light on each end.
Step 5: Box and gate arm
Halfway down the pole draw a small square box. From its right side draw a long thin arm out right.
Tip The arm is down, blocking the road, because a train is coming.
Step 6: Stripes on the arm
Along the arm draw 4 slanted stripes, evenly spaced, each 2 short lines from the top edge to the bottom.
Step 7: Counterweight and base
From the box's left side draw a stubby arm. At the pole's foot draw a small flat base.
Step 8: Ground and grass
Draw a ground line from edge to edge under the base. Add 2 grass tufts of 3 short blades.
Step 9: A cloud
Right of the X draw a small puffy cloud: 3 round bumps on top and a flat line underneath.
Step 10: Red stripes and lights
Go over your lines. Colour the 4 stripes and both lights red. Leave the X, arm and cloud white.
Step 11: Slate pole and box
Colour the pole, box, bar, stubby arm and base slate grey.
Your finished drawing
Follow the steps above and this is where you end up: a train crossing, drawn by you.
Every step in one picture