Watch it draw itself · tap to replay
How to Draw a Genie Lamp
Draw a genie lamp in 10 easy steps, about 8 minutes. Free, with a printable worksheet.
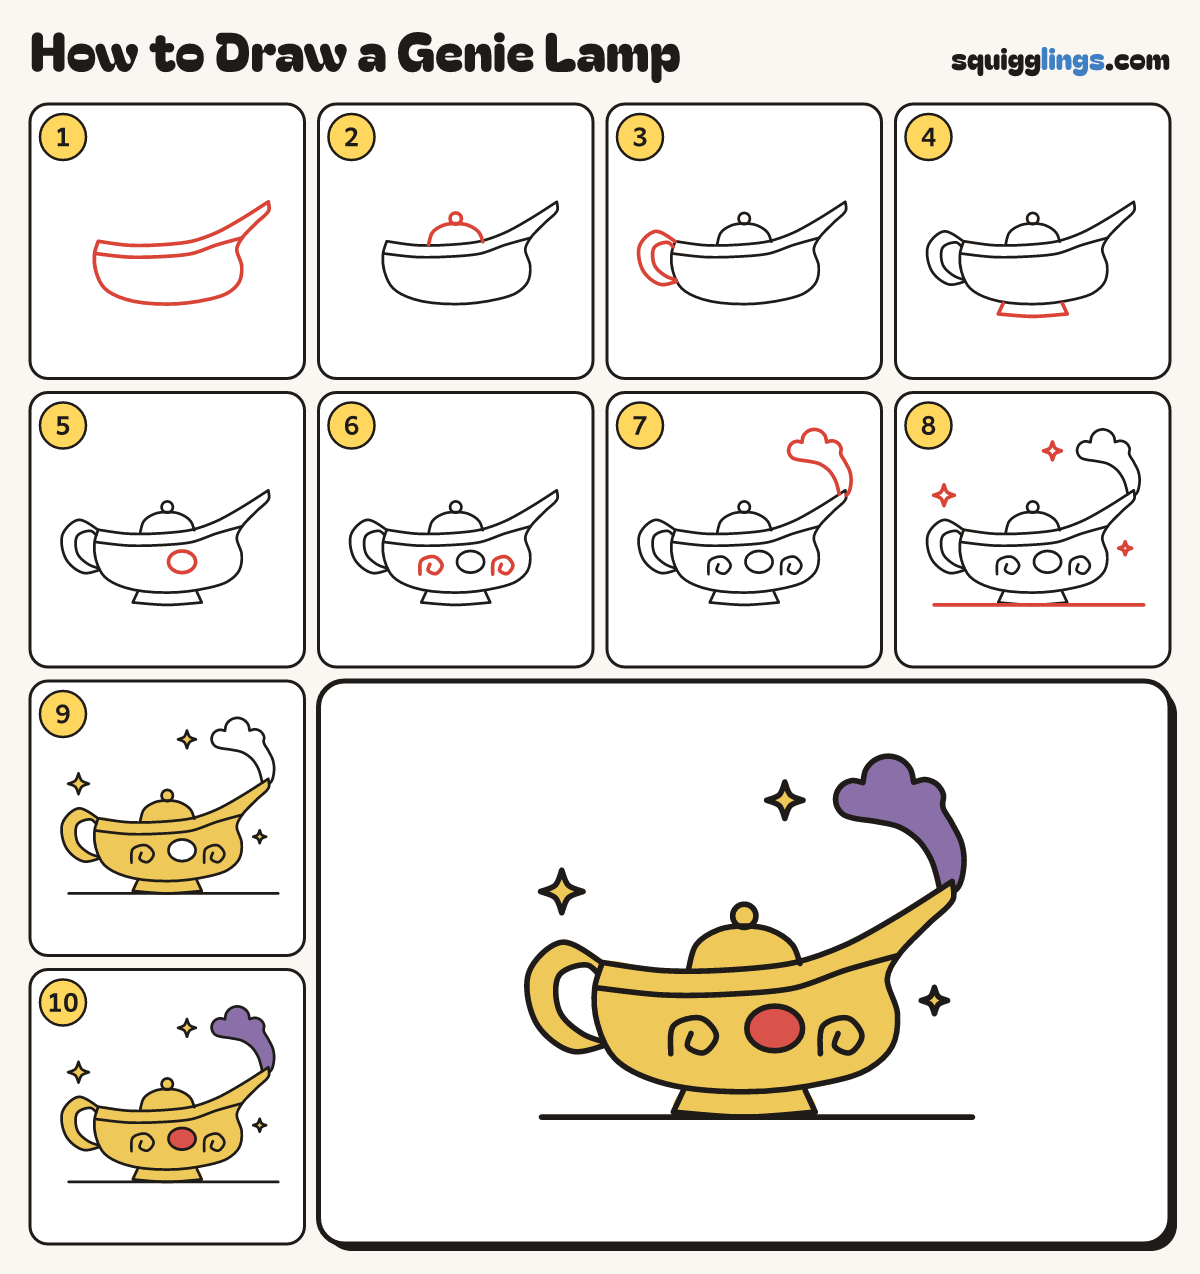
Each picture adds one red line. Draw that line, then scroll to the next picture. Rub out any dashed helper lines at the end. First up: the lamp body.
Step 1: The lamp body
Below the middle, draw a boat-shaped lamp: a sagging top, a long spout pointing up right, a round belly underneath.
Tip The long spout is the boat's bow. Add a second line under the top.
Step 2: The lid and knob
Start on the top line. Draw a small dome lid up and down to the top line. Add a knob.
Step 3: The handle
At the back, draw a big C handle looping out and down, back to the lamp. Add a C inside.
Tip The second C makes the handle thick.
Step 4: The foot
Draw a small foot under the belly: start on the lamp, go down and out, across, back up to it.
Step 5: A jewel
On the side of the lamp, below the lid, draw a big oval jewel.
Step 6: Swirly pattern
Either side of the jewel, draw a little swirl on the lamp body, like a curly comma.
Step 7: Genie smoke
From the spout tip, draw a smoke ribbon curling up and left into a puffy cloud with 3 bumps.
Tip Start thin at the spout and let the smoke get wider as it rises.
Step 8: Sparkles and ground
Draw 3 sparkle stars: above the handle, by the smoke, under the spout. Add a ground line under the foot.
Step 9: Golden lamp and sparkles
Colour the lamp body, lid, knob, handle and foot yellow like gold, going round the jewel. Colour the sparkles yellow.
Step 10: Red jewel, purple smoke
Colour the jewel red and the smoke purple. Go over your lines and your genie lamp is done!
Your finished drawing
Follow the steps above and this is where you end up: a genie lamp, drawn by you.
Every step in one picture