Watch it draw itself · tap to replay
How to Draw a Tornado
Draw a tornado in 9 easy steps, about 7 minutes. Free, with a printable worksheet.
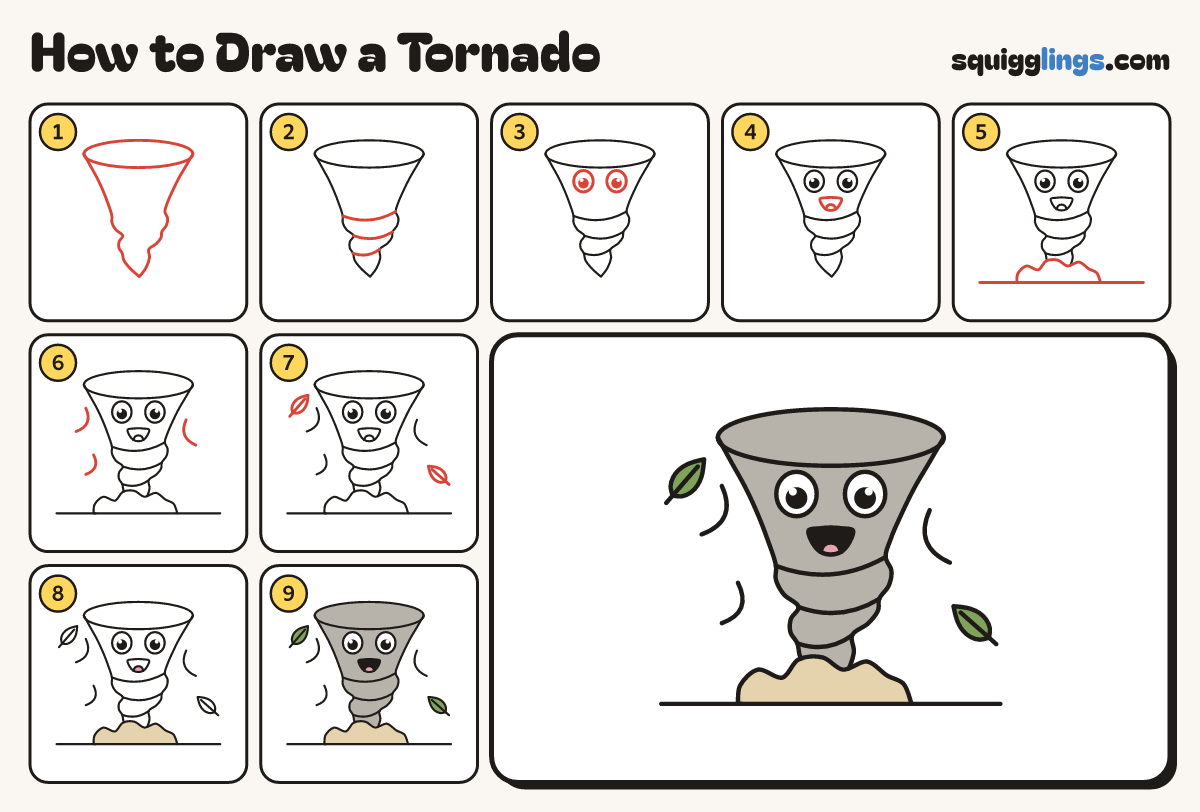
Each picture adds one red line. Draw that line, then scroll to the next picture. Rub out any dashed helper lines at the end. First up: the funnel.
Step 1: The funnel
Draw a flat oval up top. Wiggle from its left end down to a point, back to its right end.
Tip Wide under the oval, then narrower and narrower, like a stack of puffs.
Step 2: Swirl stripes
Below the middle, draw 3 upside-down rainbows, each joining a dip on the left to a dip on the right.
Tip Each one is shorter than the one above. Leave the top for the face.
Step 3: Two big eyes
Just under the oval, draw 2 big round eyes with a black dot and a shine. Leave them white.
Step 4: Open mouth
Under the eyes, draw an open mouth: a flat line with a U under it. Add a tongue hill inside.
Step 5: Dust cloud and ground
Start left of the point. Draw 5 cloud bumps over the point and down to the right, then rule back.
Tip Rub out the point inside the cloud. Add a short ground line each side.
Step 6: Wind swooshes
Draw 3 wind swooshes, 2 left and 1 right. Each starts a finger off the funnel and stops lower.
Step 7: Flying leaves
Draw 2 flying leaves, top left and bottom right, each with a pointed tip, a stem and a vein.
Step 8: Pink tongue, sandy dust
Colour the tongue pink and the dust cloud sandy.
Step 9: Funnel, leaves and mouth
Colour the funnel and oval grey around the face, the leaves green, and the mouth black around the tongue.
Your finished drawing
Follow the steps above and this is where you end up: a tornado, drawn by you.
Every step in one picture