Watch it draw itself · tap to replay
How to Draw a Haunted Tree
Draw a haunted tree in 11 easy steps, about 8 minutes. Free, with a printable worksheet.
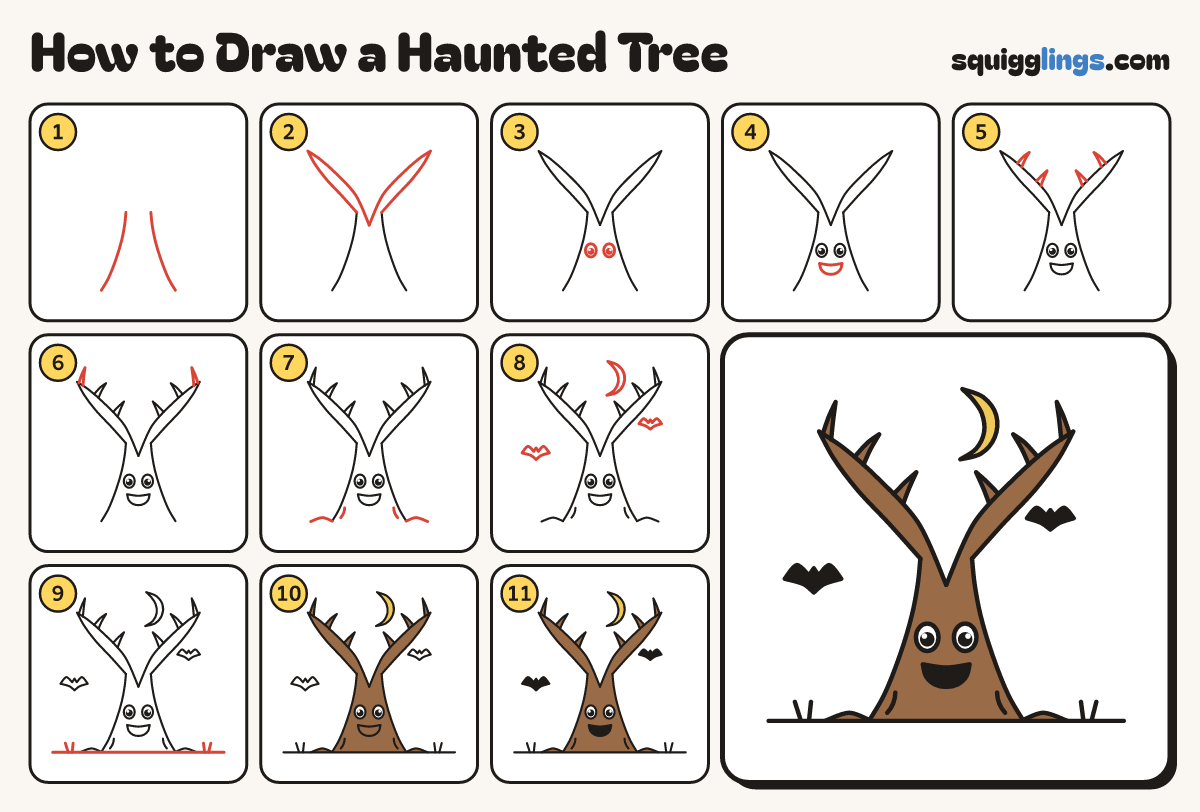
Each picture adds one red line. Draw that line, then scroll to the next picture. Rub out any dashed helper lines at the end. First up: trunk.
Step 1: Trunk
Start low on the left. Draw a line leaning in, and stop halfway up. Do the right side too.
Step 2: Two branches
Start at the left trunk top. Draw a branch up, and back down to the fork. Same on the right.
Step 3: Round eyes
Below the fork draw 2 big round eyes. Add a black dot in each with a little white shine.
Step 4: Open smile
Under the eyes draw a big smile, flat on top and round underneath, like a sideways D.
Step 5: Twigs
On each branch draw 2 thorn twigs: start on the branch, go up to a sharp tip, and back down.
Step 6: Tip twigs
Start on each branch just below its tip. Draw one more little twig, and back down to the branch.
Step 7: Roots and bark
From each trunk bottom draw a little root curving out to the side. Add 2 bark dashes near the ground.
Step 8: Moon and bats
Above the tree draw a crescent moon. Draw 2 little bats in the sky, one each side, like flat Ms.
Step 9: Ground and grass
Draw a ground line under the roots from left to right, and flick 2 blades of grass at the ends.
Step 10: Yellow moon, brown tree
Colour the moon yellow and the tree brown, going around the eyes and mouth. Leave the eyes white.
Step 11: Black mouth and bats
Go over your lines, then colour the mouth and the bats black. Spooky!
Your finished drawing
Follow the steps above and this is where you end up: a haunted tree, drawn by you.
Every step in one picture