Watch it draw itself · tap to replay
How to Draw a Christmas Tree
Draw a Christmas tree in 12 easy steps, about 9 minutes. Free, with a printable worksheet.
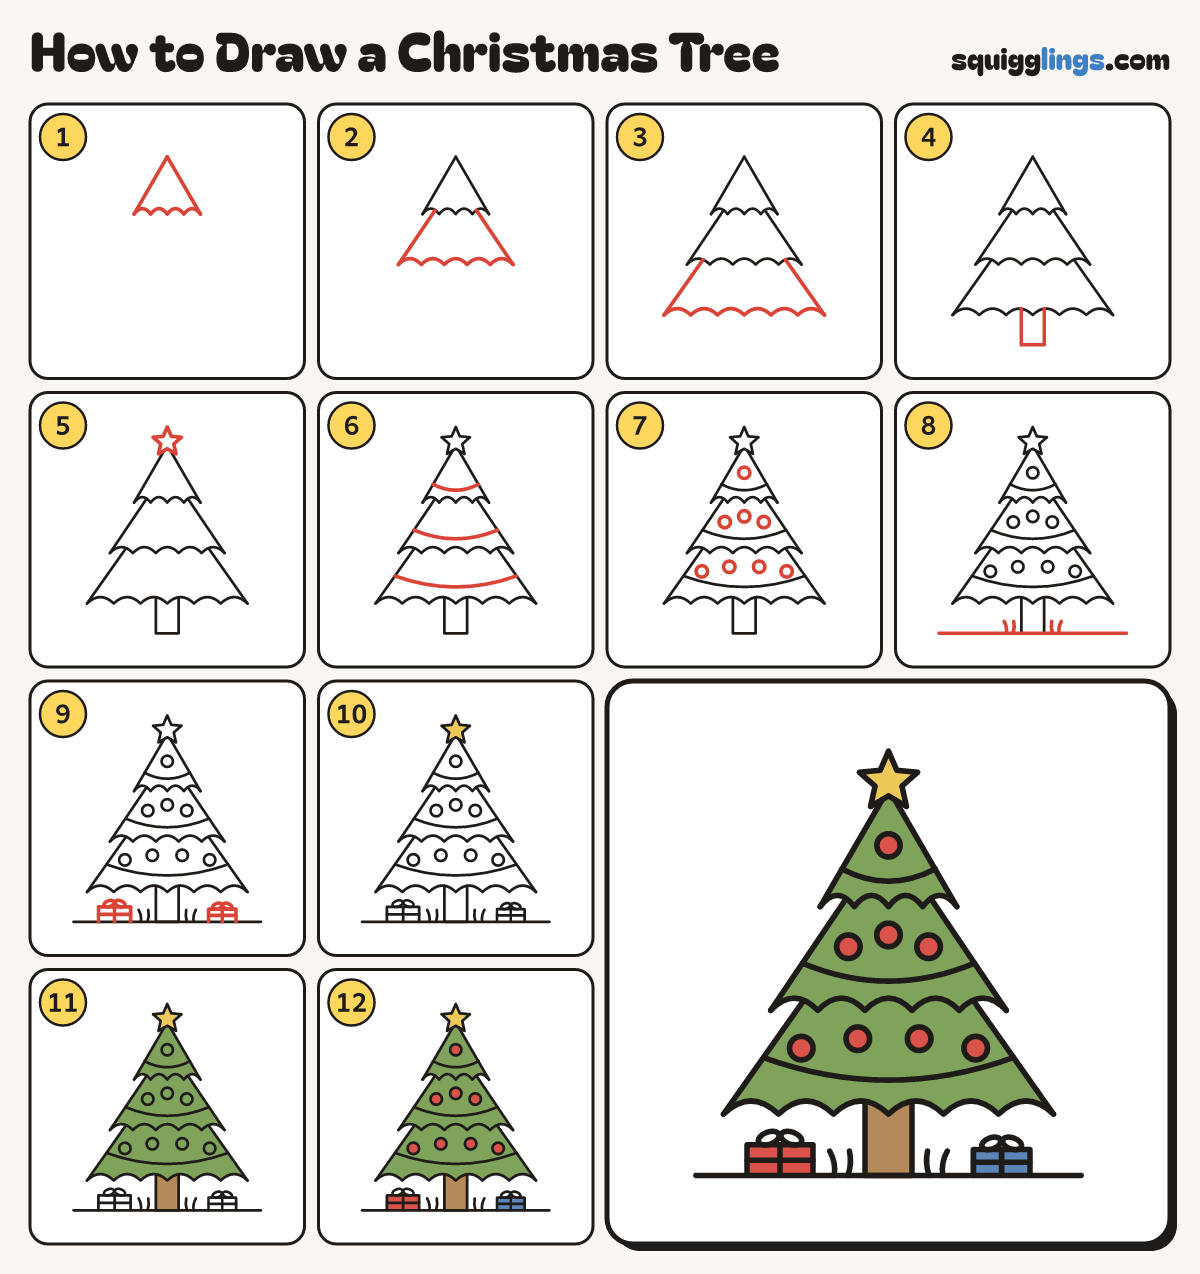
Each picture adds one red line. Draw that line, then scroll to the next picture. Rub out any dashed helper lines at the end. First up: the top tier.
Step 1: The top tier
Start at a point near the top. Slant down left, draw 4 bumps across, and slant up to the point.
Step 2: The middle tier
Start under the top tier, near the left. Slant down and out, draw 5 bumps across, slant up to it.
Step 3: The bottom tier
Start under the middle tier, near the left. Slant down and out, draw 6 bumps across, slant up to it.
Step 4: The trunk
Under the middle, start on the bumps and draw a stubby trunk: down, across, back up to the bumps.
Step 5: A star on top
On the very top point draw a 5-point star, sitting on the point.
Step 6: Garlands
On each tier, start on the left edge and draw one swooping curve that sags across to the right edge.
Step 7: Ornaments
Hang round ornaments above each garland: 1 in the top tier, 3 in the middle, 4 in the bottom.
Step 8: Ground and grass
Along the trunk's bottom draw a ground line, wider than the tree. Add 4 grass blades by the trunk.
Step 9: Two presents
Beside the trunk draw 2 box presents, starting and ending on the ground. Add a ribbon and bow on each.
Step 10: Yellow star
Start with the lightest colour and colour the star yellow.
Step 11: Green tree
Colour all 3 tiers leaf green around the ornaments, right to the bumpy edges. Colour the trunk wood brown.
Step 12: Red and blue
Colour the ornaments and the left present red, and the right present blue. Leave the bows white.
Your finished drawing
Follow the steps above and this is where you end up: a Christmas tree, drawn by you.
Every step in one picture