Watch it draw itself · tap to replay
How to Draw a Windy Day
Draw a windy day in 11 easy steps, about 8 minutes. Free, with a printable worksheet.
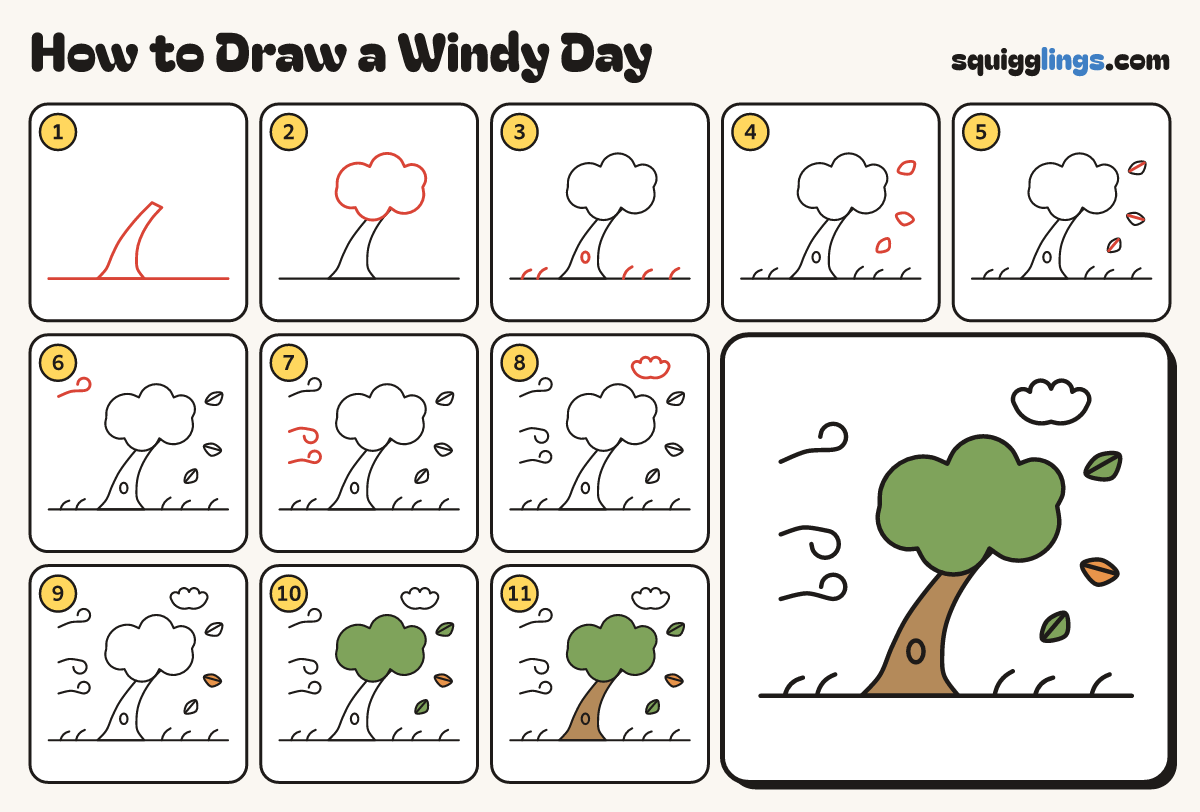
Each picture adds one red line. Draw that line, then scroll to the next picture. Rub out any dashed helper lines at the end. First up: ground and bending trunk.
Step 1: Ground and bending trunk
Draw a long ground line low down. From the ground, left of middle, draw a trunk leaning to the right.
Tip The whole trunk bows right like it is being pushed by the wind.
Step 2: The leafy top
Over the trunk draw a big soft cloud of leaves swept to the right: 6 big round bumps going round.
Tip Lean it to the right the same way the trunk leans.
Step 3: Knot and bent grass
Draw a small egg knot hole low on the trunk. Along the ground flick short grass blades that bend right.
Step 4: Tumbling leaves
To the right of the tree draw 3 little pointed leaves tumbling away, each tilted a different way.
Step 5: Leaf veins
Draw one line down the middle of each tumbling leaf from end to end.
Step 6: First gust
A finger in from the left edge, level with the treetop, draw a long gust line ending in a curl.
Tip Wind lines are long and smooth and finish with a small loop.
Step 7: 2 more gusts
Under it draw 2 more gust lines, each starting a finger in from the edge and ending in a curl.
Step 8: A cloud
In the top right draw a small puffy cloud: 4 bumps over the top and 2 along the bottom.
Step 9: White cloud, orange leaf
Colour the cloud white and the middle tumbling leaf orange.
Step 10: Green leaves
Colour the leafy top green, right up to the bumpy edge, and the other 2 tumbling leaves green too.
Step 11: Brown trunk
Colour the trunk wood brown, stopping at the leaves. Go over your lines and your windy day is done!
Your finished drawing
Follow the steps above and this is where you end up: a windy day, drawn by you.
Every step in one picture