Watch it draw itself · tap to replay
How to Draw a Spooky Forest
Draw a spooky forest in 12 easy steps, about 9 minutes. Free, with a printable worksheet.
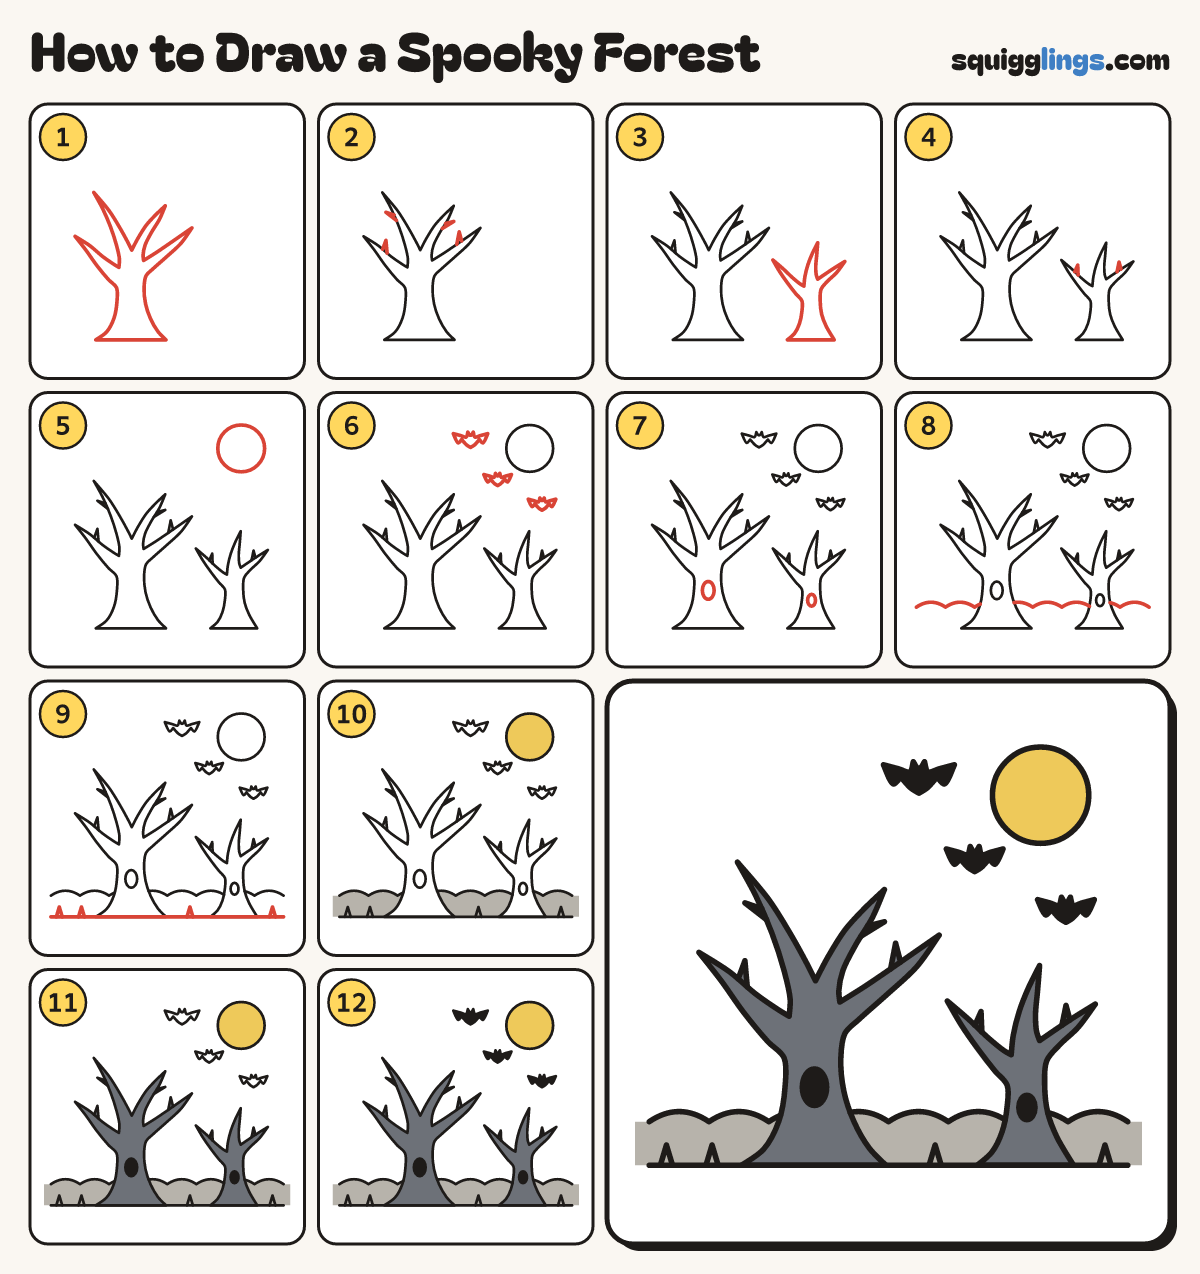
Each picture adds one red line. Draw that line, then scroll to the next picture. Rub out any dashed helper lines at the end. First up: the big tree.
Step 1: The big tree
On the left, draw a bare tree: a crooked trunk and 4 branches of different lengths with sharp tips.
Step 2: Sharp twigs
On each branch, draw a little twig from the branch up to a sharp tip and back down.
Step 3: A smaller tree
On the right, draw a smaller bare tree with a crooked trunk and 3 sharp branches.
Step 4: Its twigs
Give the small tree one twig on each side branch, from the branch up to a tip and back.
Step 5: The moon
High on the right, above the small tree, draw a big round full moon, not touching any branch.
Step 6: Bats
In the sky, draw 3 little bats, each like a wide letter M with pointy wings and tiny ears.
Step 7: Knot holes
On each trunk, a little above the middle, draw a small egg for a dark knot hole.
Step 8: Fog
Start at the left edge above the ground. Draw soft bumps behind the trunks across to the right edge.
Step 9: The ground
Draw a ground line along the bottom from edge to edge. Add a few sharp little V grass spikes.
Step 10: Moon and fog
Go over your lines. Colour the moon yellow and the fog light grey, around the trunks.
Step 11: Grey trees
Colour both trees and their twigs slate grey, and the knot holes black.
Step 12: Black bats
Colour the bats black, and your spooky forest is done!
Your finished drawing
Follow the steps above and this is where you end up: a spooky forest, drawn by you.
Every step in one picture