Watch it draw itself · tap to replay
How to Draw a Torah
Draw a torah in 13 easy steps, about 10 minutes. Free, with a printable worksheet.
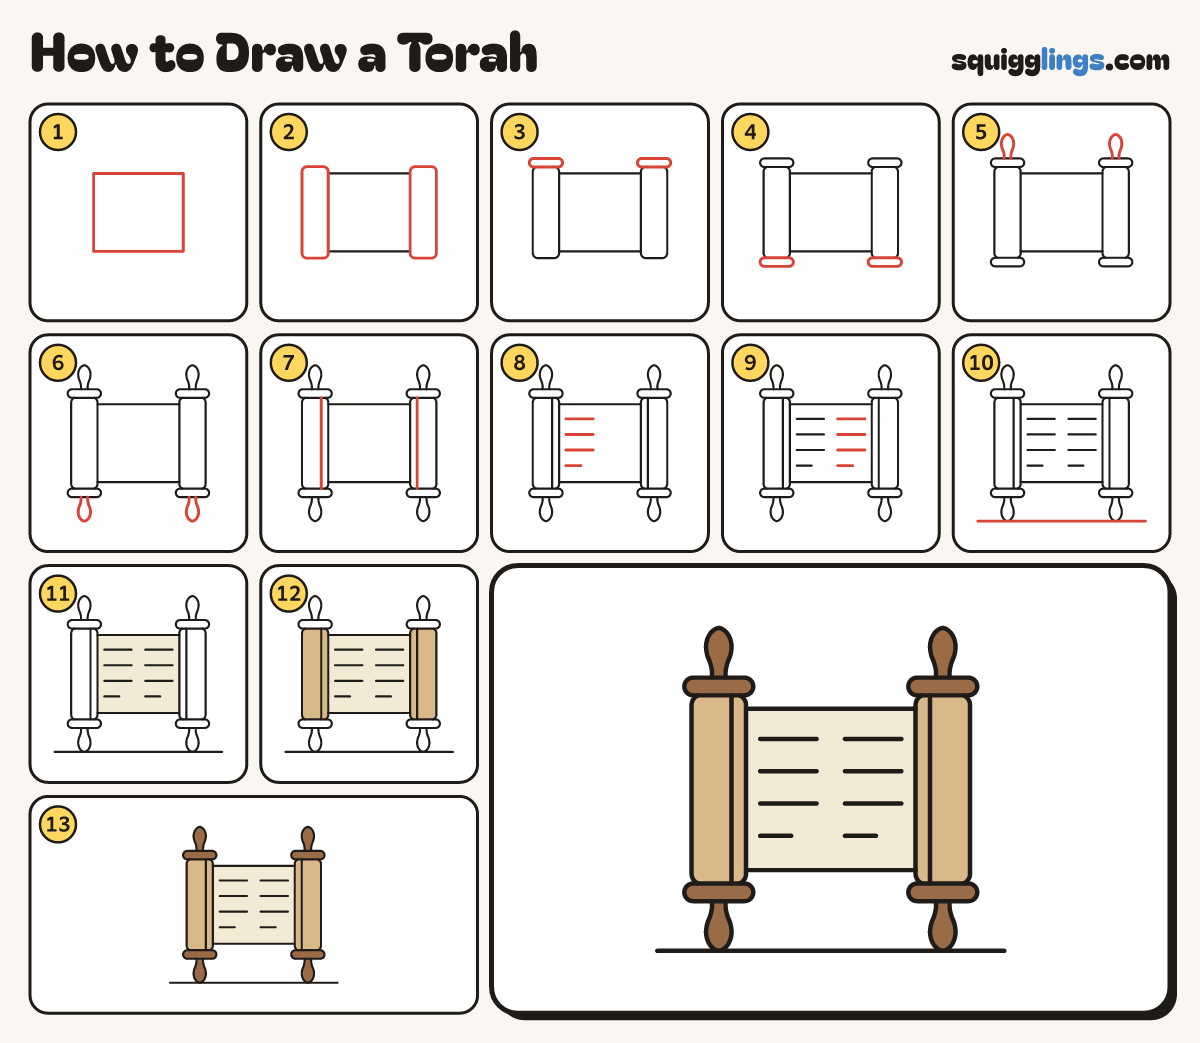
Each picture adds one red line. Draw that line, then scroll to the next picture. Rub out any dashed helper lines at the end. First up: the open page.
Step 1: The open page
In the middle of your paper draw a box for the open page, a little wider than tall.
Tip Leave room on both sides for the rolls.
Step 2: Two tall rolls
Over each side of the page draw a tall roll with round corners, a bit taller than the page.
Tip The rest of the scroll is rolled up inside these.
Step 3: Top plates
Across the top of each roll draw a flat plate with round ends, a little wider than the roll.
Step 4: Bottom plates
Draw the same flat plate across the bottom of each roll.
Tip Now each roll has a plate at both ends.
Step 5: Top handles
On each top plate draw a handle: thin at the plate, fatter in the middle, round on top.
Tip It looks like a little skittle.
Step 6: Bottom handles
Under each bottom plate draw the same handle pointing down. Make all 4 handles match.
Step 7: Roll edges
Start under each top plate. Draw a line down the roll, stopping on the bottom plate.
Tip Keep it close to the page. It is the edge of the rolled sheet.
Step 8: Left column
On the left half of the page draw 4 lines of writing. Make the last one short.
Tip Keep the lines level and the same distance apart.
Step 9: Right column
On the right half draw 4 matching lines, leaving a gap down the middle of the page.
Step 10: Ground line
Start left of the scroll. Draw a straight line under the bottom handles, stopping out past the right side.
Step 11: Cream page
Go over your lines. Colour the open page cream, between the lines of writing.
Step 12: Tan rolls
Colour the 2 tall rolls tan.
Step 13: Brown wood
Colour the 4 plates and the 4 handles brown, and your Torah scroll is done!
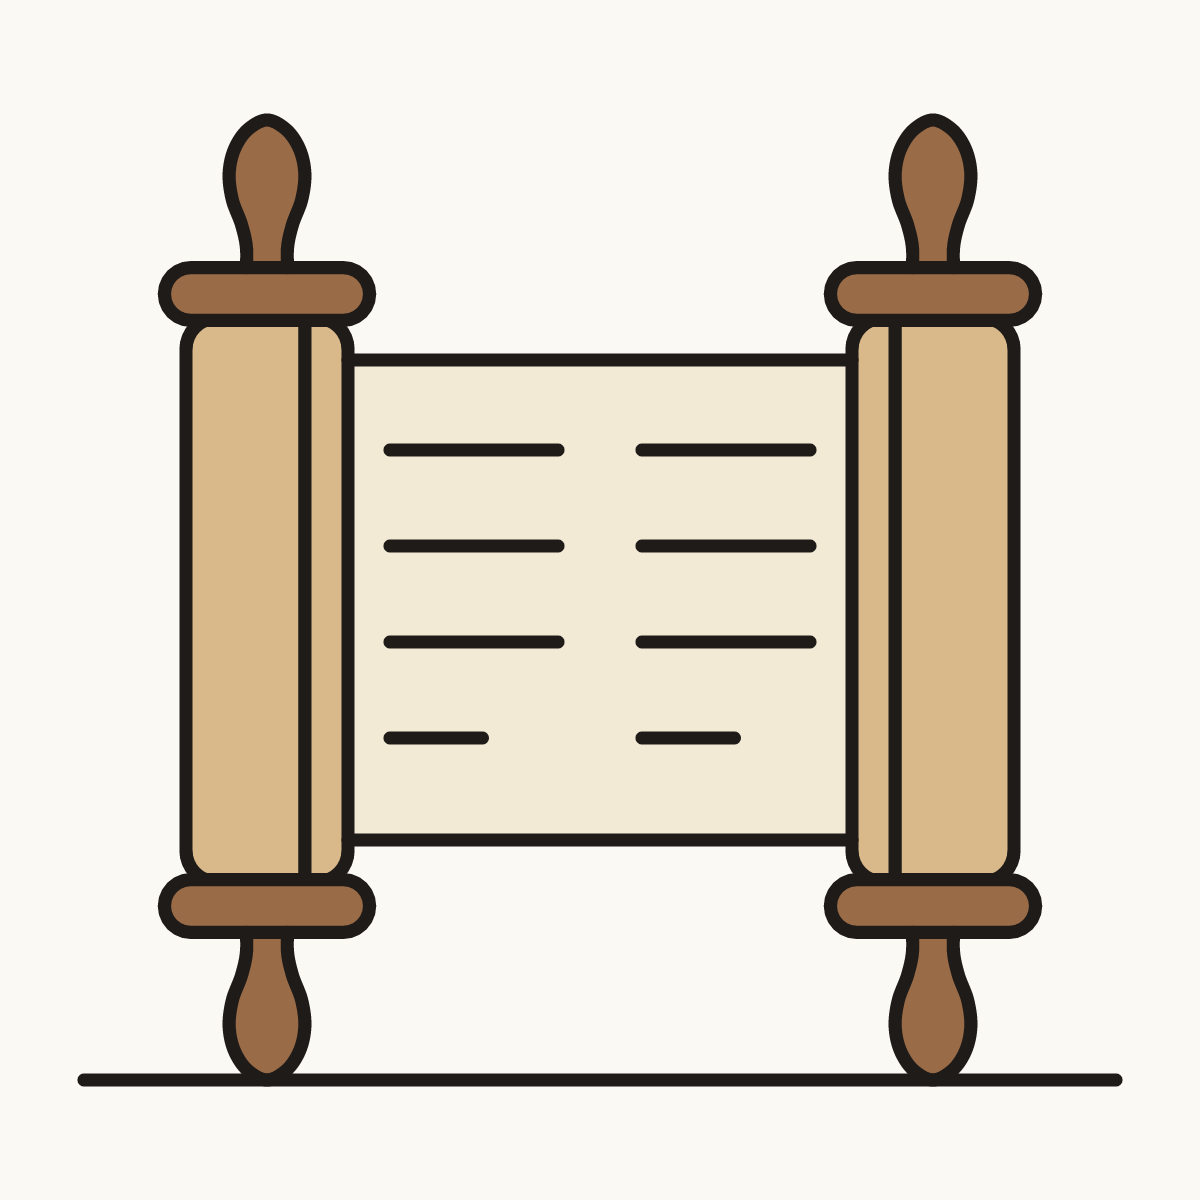
Your finished drawing
Follow the steps above and this is where you end up: a torah, drawn by you.
Every step in one picture