Watch it draw itself · tap to replay
How to Draw Tokyo Tower
Draw Tokyo Tower in 12 easy steps, about 9 minutes. Free, with a printable worksheet.
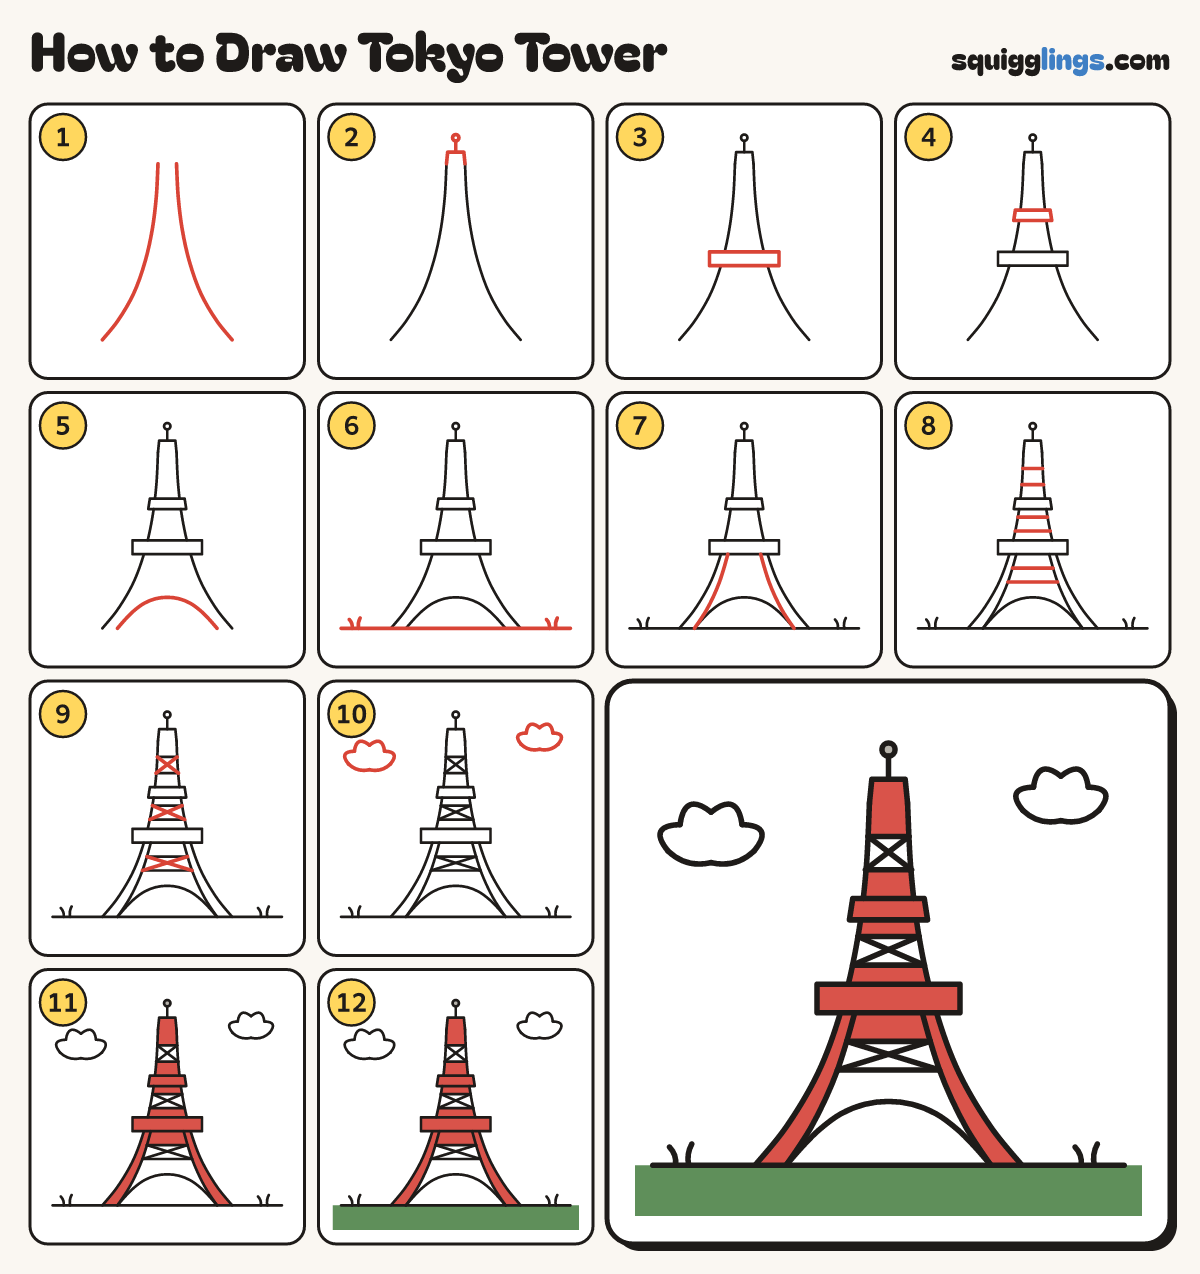
Each picture adds one red line. Draw that line, then scroll to the next picture. Rub out any dashed helper lines at the end. First up: two legs.
Step 1: Two legs
Start near the top, a finger apart. Draw 2 long lines curving down and out to the bottom corners.
Tip Tokyo Tower is a steep A: taller than a witch's hat.
Step 2: Top and antenna
Join the legs at the top with a short box. From it, draw a long antenna up to a ball.
Step 3: Big deck
A little below the middle, draw a wide flat box across both legs, poking out past them.
Step 4: Small top deck
Higher up, between the top box and the big deck, draw a smaller box across the legs.
Step 5: Big arch
Start low down, a little inside the left leg. Draw a big rainbow arch and stop inside the right leg.
Step 6: The ground
Draw a ground line under the feet from edge to edge. Add a few grass blades.
Step 7: Inner legs
Start under the big deck, a little inside each leg. Draw a line down to the foot of the arch.
Step 8: Stripe lines
Rule short lines across between the legs: 2 near the top, 2 under each deck.
Step 9: Criss-crosses
Between each pair of stripe lines, draw a big X from corner to corner.
Step 10: Clouds
Draw a puffy cloud on each side of the tower: little bumps on top and a flat line underneath.
Step 11: Red iron
Colour the antenna ball grey. Colour the boxes, decks, legs and every other stripe red, leaving the X stripes white.
Tip Red, white, red, white, all the way up.
Step 12: Green ground
Colour the ground green, out to the paper's edges. Leave the clouds white. Your Tokyo Tower is done!
Your finished drawing
Follow the steps above and this is where you end up: Tokyo Tower, drawn by you.
Every step in one picture