Watch it draw itself · tap to replay
How to Draw a Tin Can Toss
Draw a tin can toss in 13 easy steps, about 10 minutes. Free, with a printable worksheet.
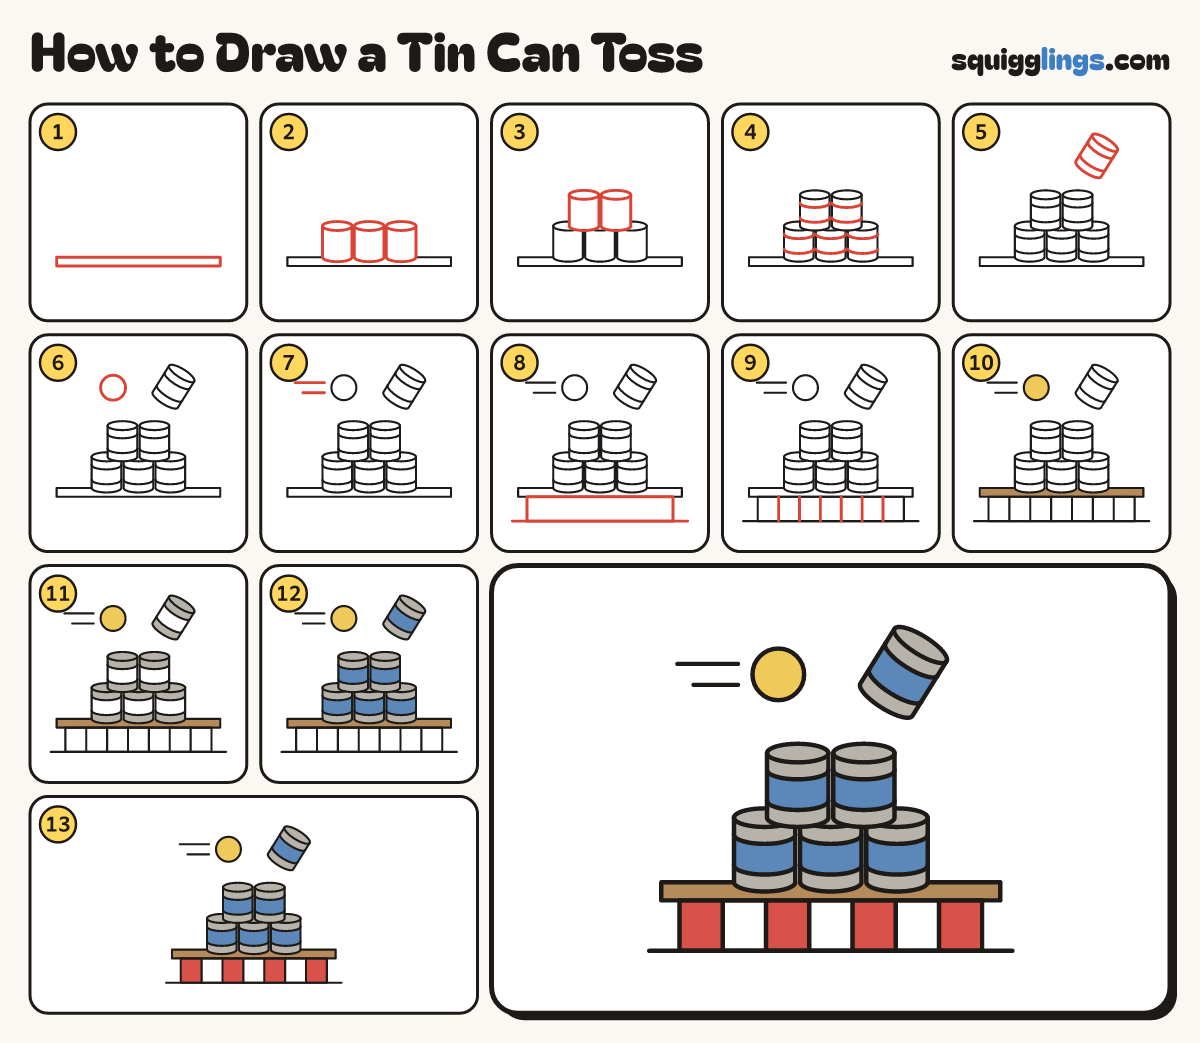
Each picture adds one red line. Draw that line, then scroll to the next picture. Rub out any dashed helper lines at the end. First up: the shelf.
Step 1: The shelf
Low down on your paper draw a long thin box from side to side. This is the shelf.
Tip Leave lots of room above it for the cans.
Step 2: Bottom row
Draw 3 cans on the shelf. Start each with an oval lid, then 2 sides down to a curved bottom.
Tip Make all 3 the same size, with a tiny gap between them. Rub out the shelf line inside each can.
Step 3: Second row
Draw 2 more cans on top. Start each lid above a gap and stop its sides on the lids below.
Tip Rub out the bits of the lids hidden behind them.
Step 4: Bands
On each can draw 2 curved lines from the left side across to the right side, for a wide band.
Tip Each line curves like the bottom of the can.
Step 5: The top can
Up on the right draw 1 more can tipping over, from its lid down to its 2 band lines.
Tip It has just been knocked off the top of the stack.
Step 6: The ball
Left of the falling can draw a round ball flying in.
Step 7: Speed lines
Draw 2 short lines behind the ball. Start near the left of the page and stop just before the ball.
Step 8: The stall
Under the shelf draw a big wide box for the front of the stall. Draw a ground line under it.
Step 9: Stripes
On the stall front draw 6 lines from the shelf down to the ground, to make 7 even stripes.
Step 10: Yellow and brown
Colour the ball yellow and the shelf brown.
Step 11: Grey tins
Colour the top and the bottom strip of every can grey. Leave the bands white for now.
Step 12: Blue bands
Colour the wide band on all 6 cans blue.
Step 13: Red stripes
Colour the 2 end stripes red, then every other stripe between them. Go over your lines!
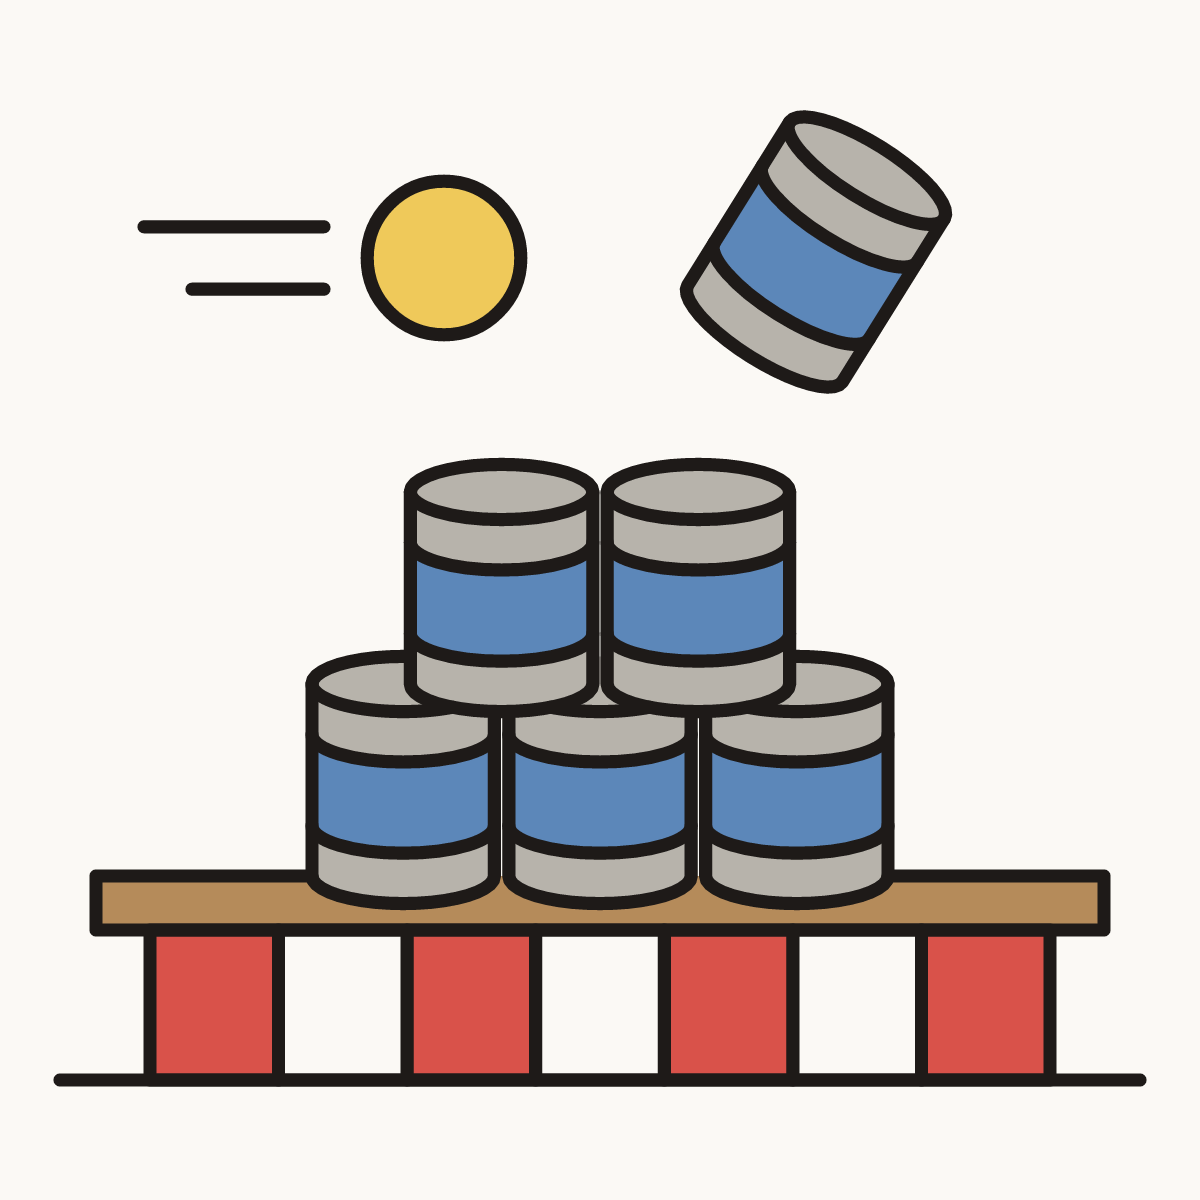
Your finished drawing
Follow the steps above and this is where you end up: a tin can toss, drawn by you.
Every step in one picture