Watch it draw itself · tap to replay
How to Draw a Battery
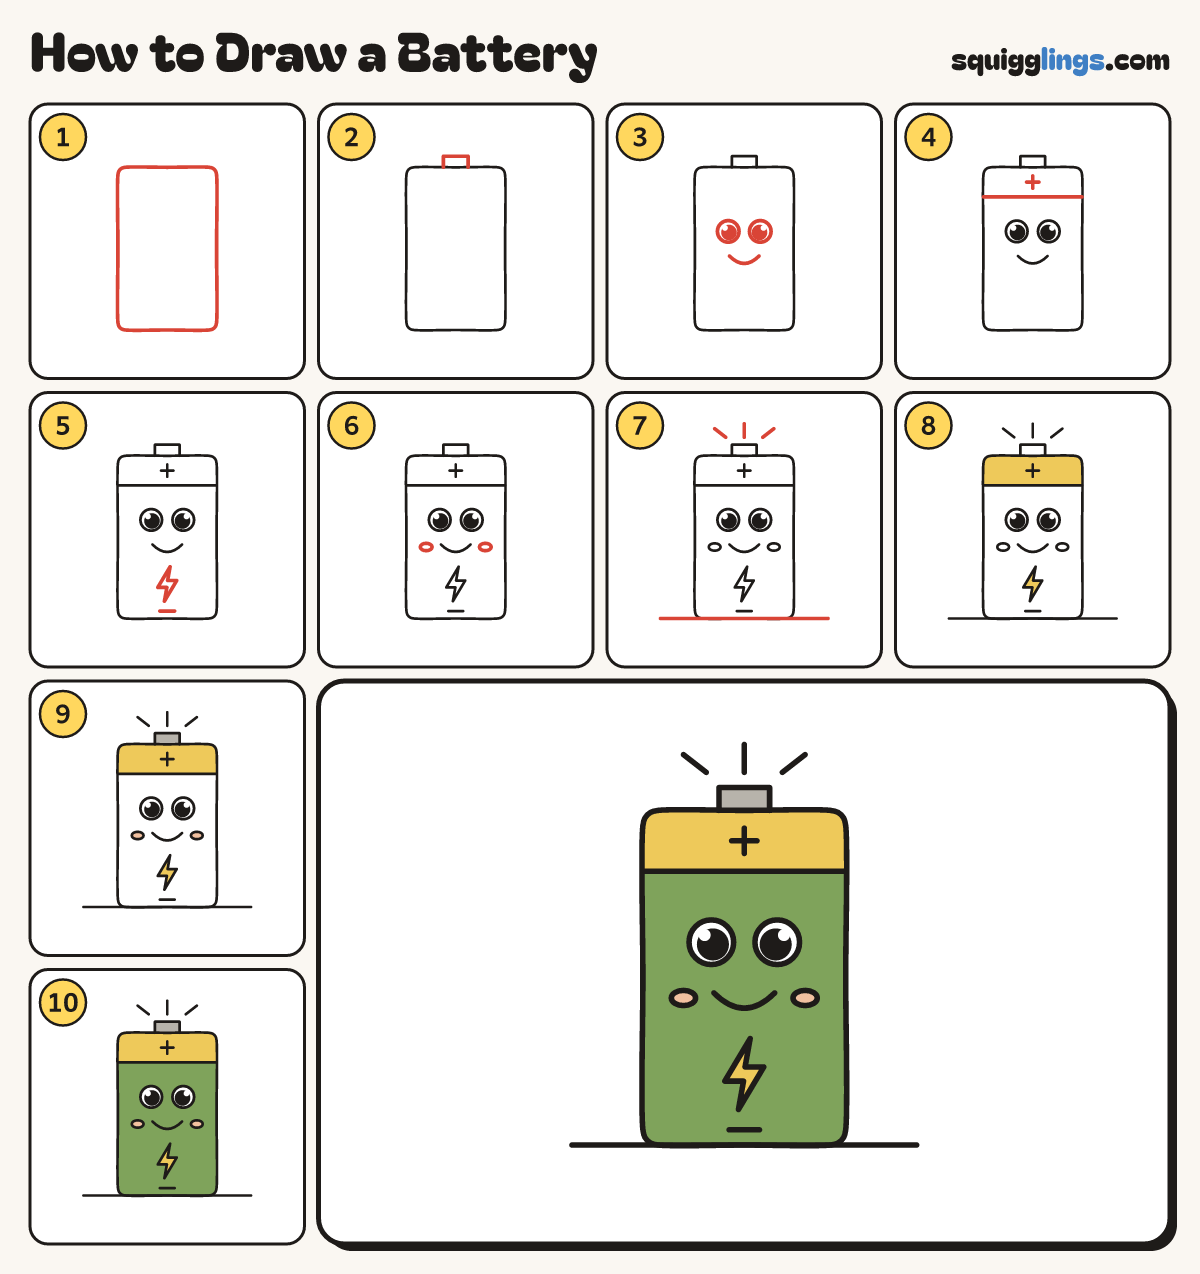
Draw a battery in 10 easy steps, about 8 minutes. Free, with a printable worksheet.
Each picture adds one red line. Draw that line, then scroll to the next picture. Rub out any dashed helper lines at the end. First up: the can.
Step 1: The can
In the middle of your paper draw a tall box with soft corners, twice as tall as it is wide.
Step 2: The bump on top
Start on the top edge, left of the middle. Draw a little flat bump and stop back on the edge.
Step 3: A happy face
Above the middle draw 2 big round eyes, each with a black dot and shine. Add a U smile below.
Step 4: Band and plus
Start on the left edge near the top. Draw a line across to the right edge. Add a plus sign.
Step 5: Bolt and minus
Under the smile draw a zigzag bolt down to a point and back up. Add a minus near the bottom.
Step 6: Rosy cheeks
Draw a small oval cheek beside each end of the smile.
Step 7: Sparks and ground
Above the bump draw 3 little sparks fanning up. Draw a long ground line under the can, left to right.
Step 8: Yellow band and bolt
Colour the top band and the lightning bolt yellow.
Step 9: Grey bump, peach cheeks
Colour the bump grey and the cheeks peach.
Step 10: Green can
Go over your lines. Colour the can green below the band, around the bolt and cheeks. Leave the eyes white.
Your finished drawing
Follow the steps above and this is where you end up: a battery, drawn by you.
Every step in one picture