Watch it draw itself · tap to replay
How to Draw a Tiltrotor
Draw a tiltrotor in 13 easy steps, about 10 minutes. Free, with a printable worksheet.
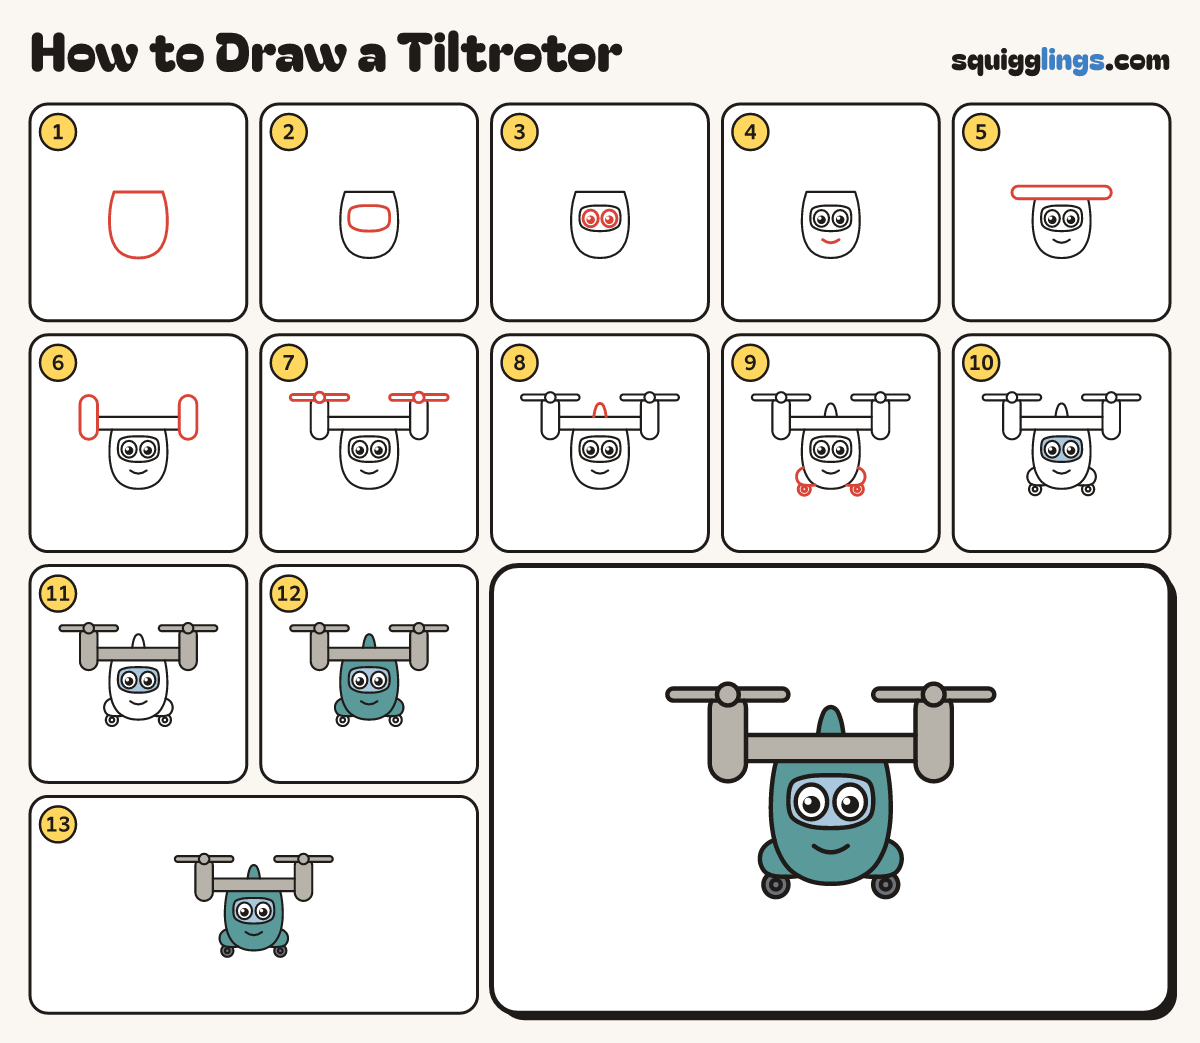
Each picture adds one red line. Draw that line, then scroll to the next picture. Rub out any dashed helper lines at the end. First up: chubby body.
Step 1: Chubby body
In the middle draw a chubby body with a flat top, almost straight sides and a round bottom.
Tip Leave room above it for the wing and pods.
Step 2: Windscreen
Near the top of the body draw a big rounded windscreen, wider than tall. Leave a gap all round.
Step 3: Two big eyes
Inside the windscreen draw 2 big round eyes side by side. Add a black dot and shine in each.
Step 4: Smile
Under the windscreen, start below one eye and draw a wide smile. Stop below the other eye.
Step 5: Long wing
Across the top of the body draw one long flat wing, like a ruler, reaching far out both sides.
Tip Rub out the top of the body inside the wing.
Step 6: Two tall pods
At each end of the wing draw a tall pill standing straight up.
Tip The pods point up, so the plane can take off like a helicopter.
Step 7: Big rotors
On top of each pod draw a round hub with 2 long blades in a line, one out each side.
Step 8: Tail fin
From the middle of the wing, draw a fin up to a round top and back down to the wing.
Step 9: Bumps and wheels
On each lower side of the body draw a small round bump, with a wheel peeking out under it.
Step 10: Sky glass
Colour the windscreen sky blue, around the eyes. Leave the eyes white.
Step 11: Grey wing and pods
Colour the wing, both pods, the hubs and all 4 blades grey.
Step 12: Teal body and fin
Colour the body, both bumps and the tail fin teal, around the windscreen.
Step 13: Dark grey wheels
Colour the wheels dark grey. Your tiltrotor is ready to fly!
Your finished drawing
Follow the steps above and this is where you end up: a tiltrotor, drawn by you.
Every step in one picture