Watch it draw itself · tap to replay
How to Draw a Paraglider
Draw a paraglider in 12 easy steps, about 9 minutes. Free, with a printable worksheet.
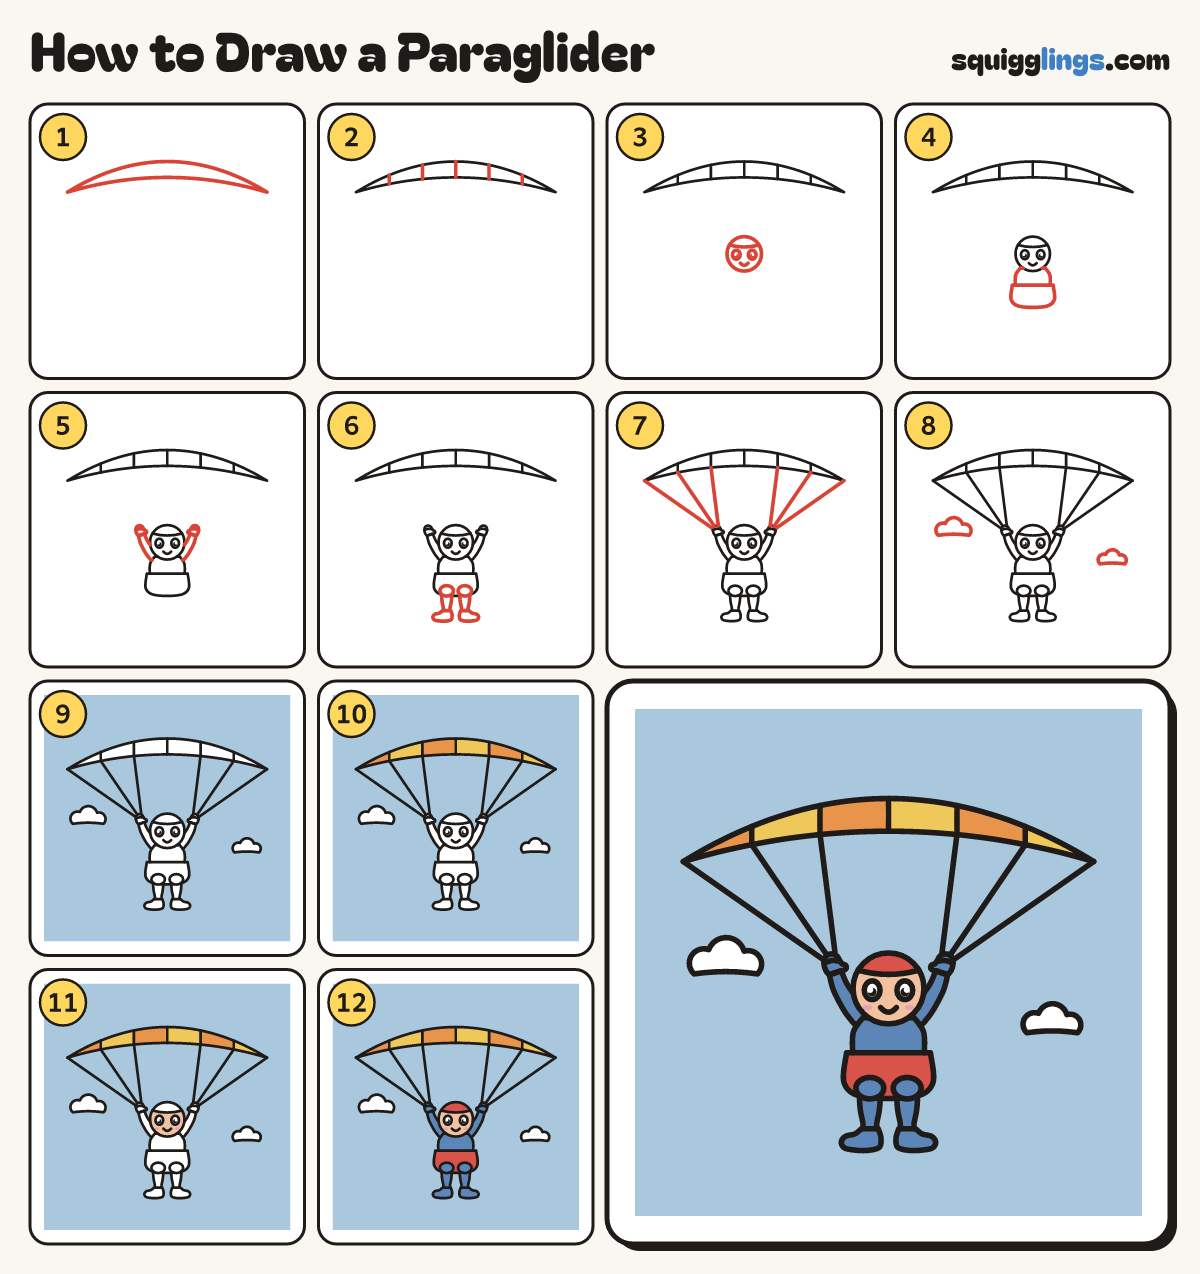
Each picture adds one red line. Draw that line, then scroll to the next picture. Rub out any dashed helper lines at the end. First up: the wing.
Step 1: The wing
Near the top, draw a long thin rainbow wing from low left, over the top, to low right, and back.
Tip Almost as wide as the paper, fattest in the middle, pointed at the tips.
Step 2: Wing cells
Draw 5 short lines across the wing, from its top edge down to its bottom edge, evenly spaced.
Step 3: Helmet and face
Below the wing, draw a round head with a helmet brim across the top. Add 2 eyes and a smile.
Step 4: Body and harness seat
Under the head, draw a soft rounded body. Around its bottom, draw a bucket seat.
Step 5: Arms up
From each shoulder, draw an arm reaching up and out, narrower at the wrist. Add a small round fist.
Step 6: Knees, legs and boots
At the seat bottom, draw 2 small knees. Hang a leg from each, narrow at the ankle, and a boot.
Tip Knees forward, boots hanging: that is how a pilot sits.
Step 7: Six lines
From the bottom of the wing, draw 6 long straight lines down to the hands: 3 to each hand.
Step 8: Two clouds
Draw a puffy cloud with 3 round bumps under the left wing tip, and a smaller one on the right.
Step 9: Sky and clouds
Colour the sky light blue all around the wing, lines and pilot. Leave the 2 clouds white.
Step 10: Orange and yellow cells
Colour the wing cells orange and yellow, taking turns.
Step 11: Peach face
Colour the face peach and add 2 pink cheeks. Leave the eyes white.
Step 12: Blue suit, red seat
Colour the suit and boots blue, and the helmet and seat red. Go over your lines. Done!
Your finished drawing
Follow the steps above and this is where you end up: a paraglider, drawn by you.
Every step in one picture